
Boo hoo hoo.
I recently made a sales counter for a friend's new store, and it turned out great. Unfortunately it was too long. The first time, I created a ship-lap joint to join the two long counter slabs. This was the source of my error in measurement.
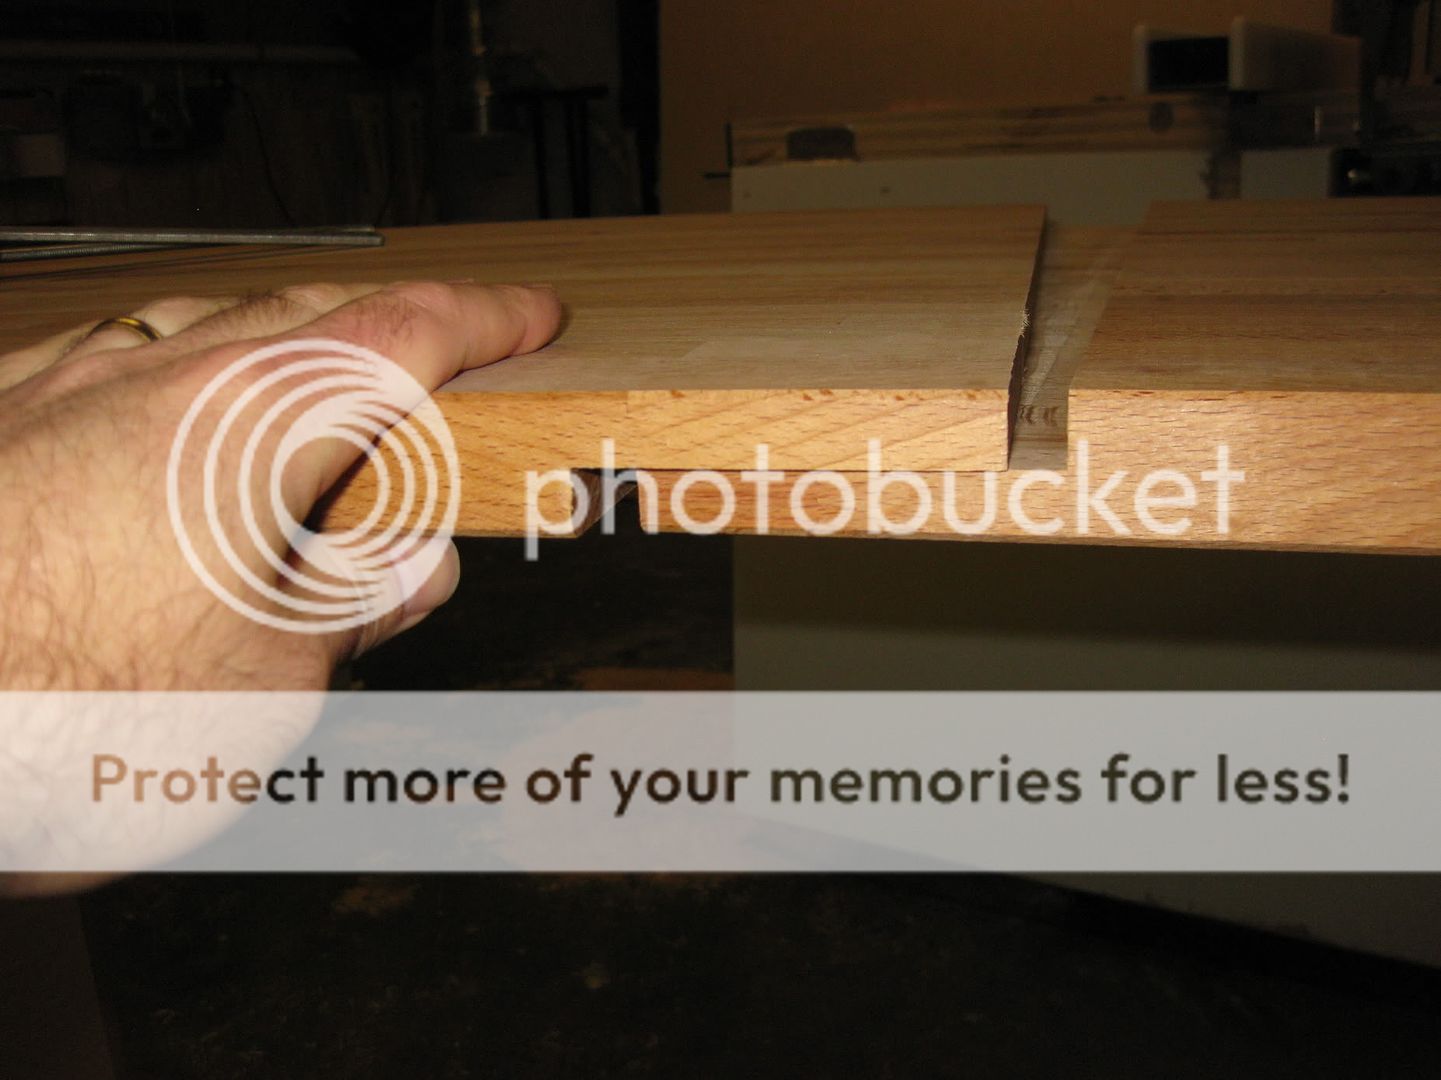 |
| Version 1 of the joint was a strong ship-lap. This joint was also the source of my error in length. |
 |
| Version 1 of the joint had a visible gap. |
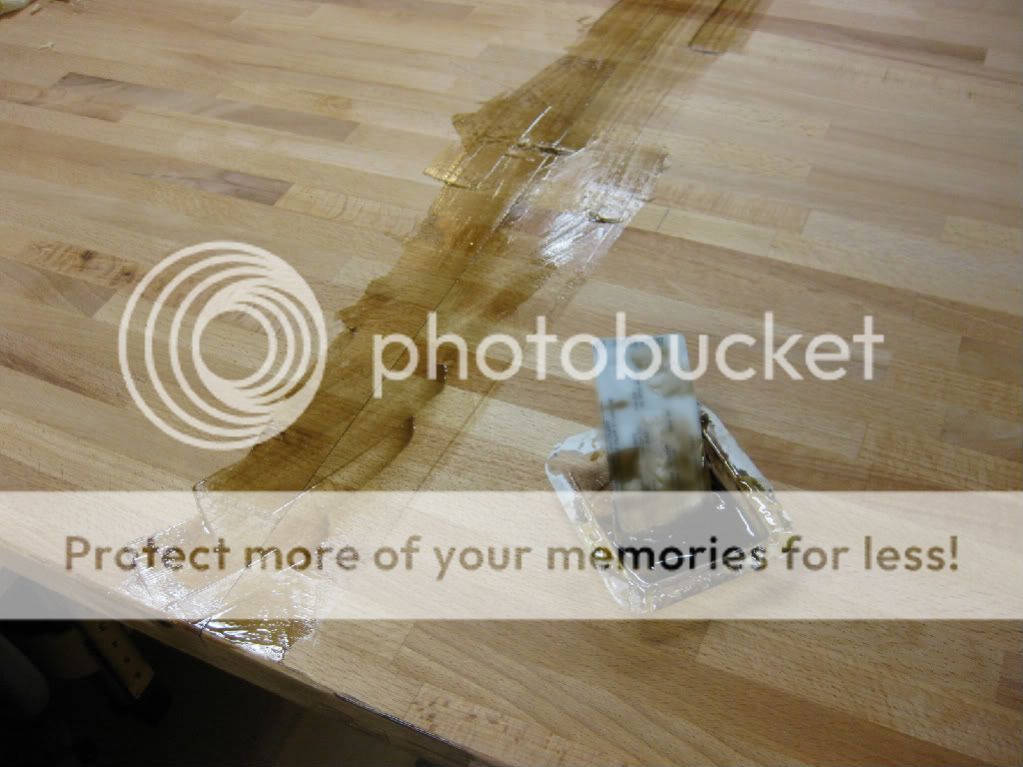 |
| I used tinted epoxy to fill the gap in the original piece. |
The epoxy fix turned out pretty well, but it was one of those things that drives us woodworkers crazy while nobody else really notices. The error in length of the counter top gave me the opportunity to rethink the joint and improve the seam.
Due to the design, the only option was to cut the counter top apart and take the extra material out of the middle. This went pretty quickly with a circular saw and straightedge. It was very satisfying to deposit the extra chunk of material in the garbage bin, after a few choice words were exchanged.
For Version 2 of the joint, I kept things a little simpler. First I cut the two halves to exact length to get the joint centered correctly. Then I focused on getting the joint as tight as possible. I ended up "shooting" the ends of both halves with my smoothing plane to get them as nice and straight as possible.
 |
| A small spacer under the slab raises it up so I can shoot the end with my planes. |
I decided not to so another ship-lap joint at this point. With a tight fitting seam and no extra length remaining, I was afraid anything else I did would mess it up somehow. Instead, I used my pocket screw jig to put in a slot every couple inches along the bottom of the slabs. I figured I could use pocket screws to pull the two halves together during installation.
I brought the tops back over to the store, and it was much easier to transport two seven foot slabs than one 14 footer in my truck. Installation went smoothly the second time, and the pocket screws worked great to hold the two slabs tightly together along the seam. Luckily the cabinet design allowed me to access most of the underside easily. I just worked slowly from one side to the other, making sure the two slabs were tight and flush before screwing them together. The seam is much less visible than the first time, and so flush that you can barely feel it. Even better, I didn't have to strip any finish or sand to get the joint smoothed out.
I'll have pictures of the final sales counter soon - the grand opening of the store is this weekend. Until then, I am running laps around my tiny shop. It feels twice as big now that the counter tops are gone!
Do you ever find yourself fixing mistakes? I sure do! Comments are open, operators standing by!
5 comments:
Head scratching in my shop is something I am afraid I do way too much. Dad always said measure twice and cut once. But then he always kept a triple X Case barlow knife he modified for use in making minute cuts for that tight fit. Good work
Can't wait to see your fixed joint in the pictures.
Pocket hole screws tighten things up nicely.
I recently make a big oak picture frame using them and the miters are as tight as a tic.
Hope the Grand Opening goes well.
Thanks
Eric
I always enjoy seeing how other woodworkers fix their mistakes, but I hate making them myself! Oh well, live and learn.
Our friend's store will open tomorrow, so final pics will be posted soon.
I once was soooo upset with an error on one of my projects, my wife threatened to take my daughter and leave the house until I cooled off (I had let a few choice words fly too).
Looks like you did good and I'm looking forward to the final pics.
Well done, Aaron. Looks like you managed to improve the joinery (or at least the visual appearance of the joinery) as you fixed the mistake.
I look forward to seeing it. I hope the store opening goes well.
Post a Comment