Showing posts with label Arrrrgh. Show all posts

Thursday, March 10, 2011

Sales Counter - Top Version 2

How do you make a woodworker cry?  Tell him he has to cut up a recently finished project with a circular saw.

Boo hoo hoo.

I recently made a sales counter for a friend's new store, and it turned out great.  Unfortunately it was too long.  The first time, I created a ship-lap joint to join the two long counter slabs.  This was the source of my error in measurement.
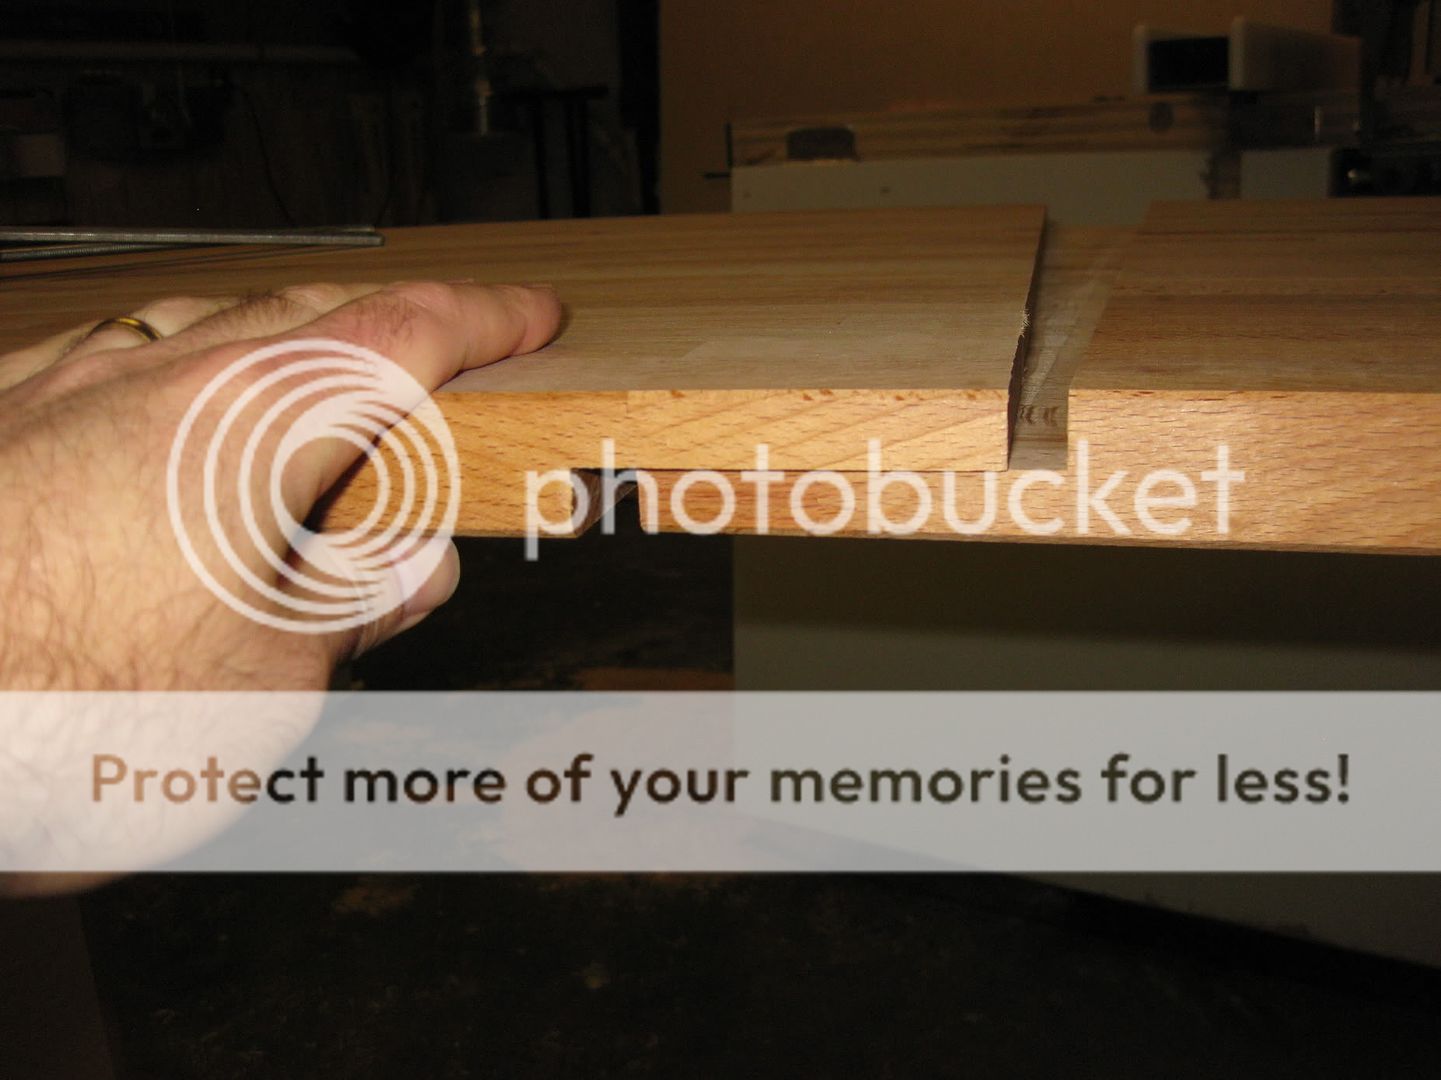
Version 1 of the joint was a strong ship-lap.  This joint was also the source of my error in length.
This was very strong, but I wasn't able to get the joint as tight as I would like so I had to fill the small gap with tinted epoxy.

Version 1 of the joint had a visible gap.

I used tinted epoxy to fill the gap in the original piece.

The epoxy fix turned out pretty well, but it was one of those things that drives us woodworkers crazy while nobody else really notices.  The error in length of the counter top gave me the opportunity to rethink the joint and improve the seam.

Due to the design, the only option was to cut the counter top apart and take the extra material out of the middle.  This went pretty quickly with a circular saw and straightedge.  It was very satisfying to deposit the extra chunk of material in the garbage bin, after a few choice words were exchanged.

For Version 2 of the joint, I kept things a little simpler.  First I cut the two halves to exact length to get the joint centered correctly.  Then I focused on getting the joint as tight as possible.  I ended up "shooting" the ends of both halves with my smoothing plane to get them as nice and straight as possible.

A small spacer under the slab raises it up so I can shoot the end with my planes.
This approach worked very well and I was able to get the joint super tight.  In fact, I got so excited I stopped taking pictures.  Whoops!

I decided not to so another ship-lap joint at this point.  With a tight fitting seam and no extra length remaining, I was afraid anything else I did would mess it up somehow.  Instead, I used my pocket screw jig to put in a slot every couple inches along the bottom of the slabs.  I figured I could use pocket screws to pull the two halves together during installation.

I brought the tops back over to the store, and it was much easier to transport two seven foot slabs than one 14 footer in my truck.  Installation went smoothly the second time, and the pocket screws worked great to hold the two slabs tightly together along the seam.  Luckily the cabinet design allowed me to access most of the underside easily.  I just worked slowly from one side to the other, making sure the two slabs were tight and flush before screwing them together.  The seam is much less visible than the first time, and so flush that you can barely feel it.  Even better, I didn't have to strip any finish or sand to get the joint smoothed out.

I'll have pictures of the final sales counter soon - the grand opening of the store is this weekend.  Until then, I am running laps around my tiny shop.  It feels twice as big now that the counter tops are gone!

Do you ever find yourself fixing mistakes?  I sure do!  Comments are open, operators standing by!

Monday, February 28, 2011

Arrrrrrgh! Sales Counter Top Update

No, I'm not a pirate.  That's "Arrrrrrgh" as in "I am really upset and frustrated!"  Ever have one of those days?  Me too.

As a reminder, I recently built a sales counter for a friend that is roughly 14 feet long.  It has been installed, and the last thing left to do was join two store-bought butcher block counter tops together into a single long slab for the top.

Easy, right?  Well, kind of.  I'm going to get a lot of practice.  I made it too long the first time, so I get to try again.

Here's how I did it the first time.  With a series of too-complicated router setups, I created a half-lap joint between the two top slabs.  This turned out to be ultra-strong, but was the source of my error.  Somehow I messed up and the length of the overlap was added to the total counter.  The half-lap is about 3 inches wide.

Half lap joint is very strong, but I didn't measure correctly for overall length.
If I had caught the problem at this point, fixing it would have been easy.  I could have just trimmed the ends of the counter to the correct overall length.  Instead I just plowed ahead with all the remaining steps. I sanded, stained, varnished, and delivered the top.  I plopped it down on top of the sales counter and finally discovered the length was wrong.

"Arrrrrgh!"

This sales counter has a jewelry case at each end, so part of the design called for a glass insert in each end of the top.  You can see one of the cutouts in the picture below, and there is one on the other end too.

After adding cutouts for glass inserts, the only option is to cut it back apart to fix the length.
The problem now is that the cutouts for the glass inserts prevent me from simply trimming the ends off.  I will be forced to cut the two slabs apart again and redo the center joint.

"Arrrrrgh!"

The other challenge is that the top has been stained and I have several coats of durable poly applied as a finish.  I really don't want to repeat the half lap process, because I don't want to have to sand or plane the joint to get it flush.  I haven't had good luck touching up a stain/poly finish and I don't want to strip the entire top.

I'll keep you posted.  Back to the shop.

Ever have one of those days?  Got any ideas?  How would you recover from this blunder?  I'd love to hear it!