Showing posts with label Pop Woodworking. Show all posts

Monday, September 12, 2011

Moxon Vise with Metal Screws

Workbenches and vises have been very popular topics for magazines, bloggers, and manufacturers for the past few years. Thanks to Chris Schwarz and others, we have all been able to dive deeply into workholding theory for the shop. Building a capable workbench is becoming a rite of passage for modern woodworkers.

It doesn't look like this resurgence will slow any time soon. In fact, there are a couple great workbench builds going on right now across the web. For instance, check out Kari Hultman's blog, The Village Carpenter as she begins construction of a Roubo style bench. In addition, Marc Spagnuolo has announced that the winter build for The Wood Whisperer Guild will be a Benchcrafted Split-Top Roubo Workbench.

One design that has gotten a lot of recent attention is the Moxon Vise, which is a handy clamping accessory for working on the ends of boards. It excels at holding boards for dovetailing or tenoning with a hand saw. Based on a 17th century manuscript by Moxon, the common design spreading through the woodworking world comes from a recent article in Popular Woodworking Magazine by Schwarz. That guy is everywhere! The Moxon is a twin-screw vise that clamps on top of your workbench, so it raises the work up to a better height for sawing.

Schwarz's version of the Moxon vise
One downside to the Schwarz design is that it uses shop-made wooden screws, so you will need a threading and tapping kit.  This is about a $50 pain in the butt, and I've heard that the tapping kits are very finicky and tough to get working correctly.  On top of that, wooden screws will expand and contract with seasonal humidity changes so they may not always work smoothly.

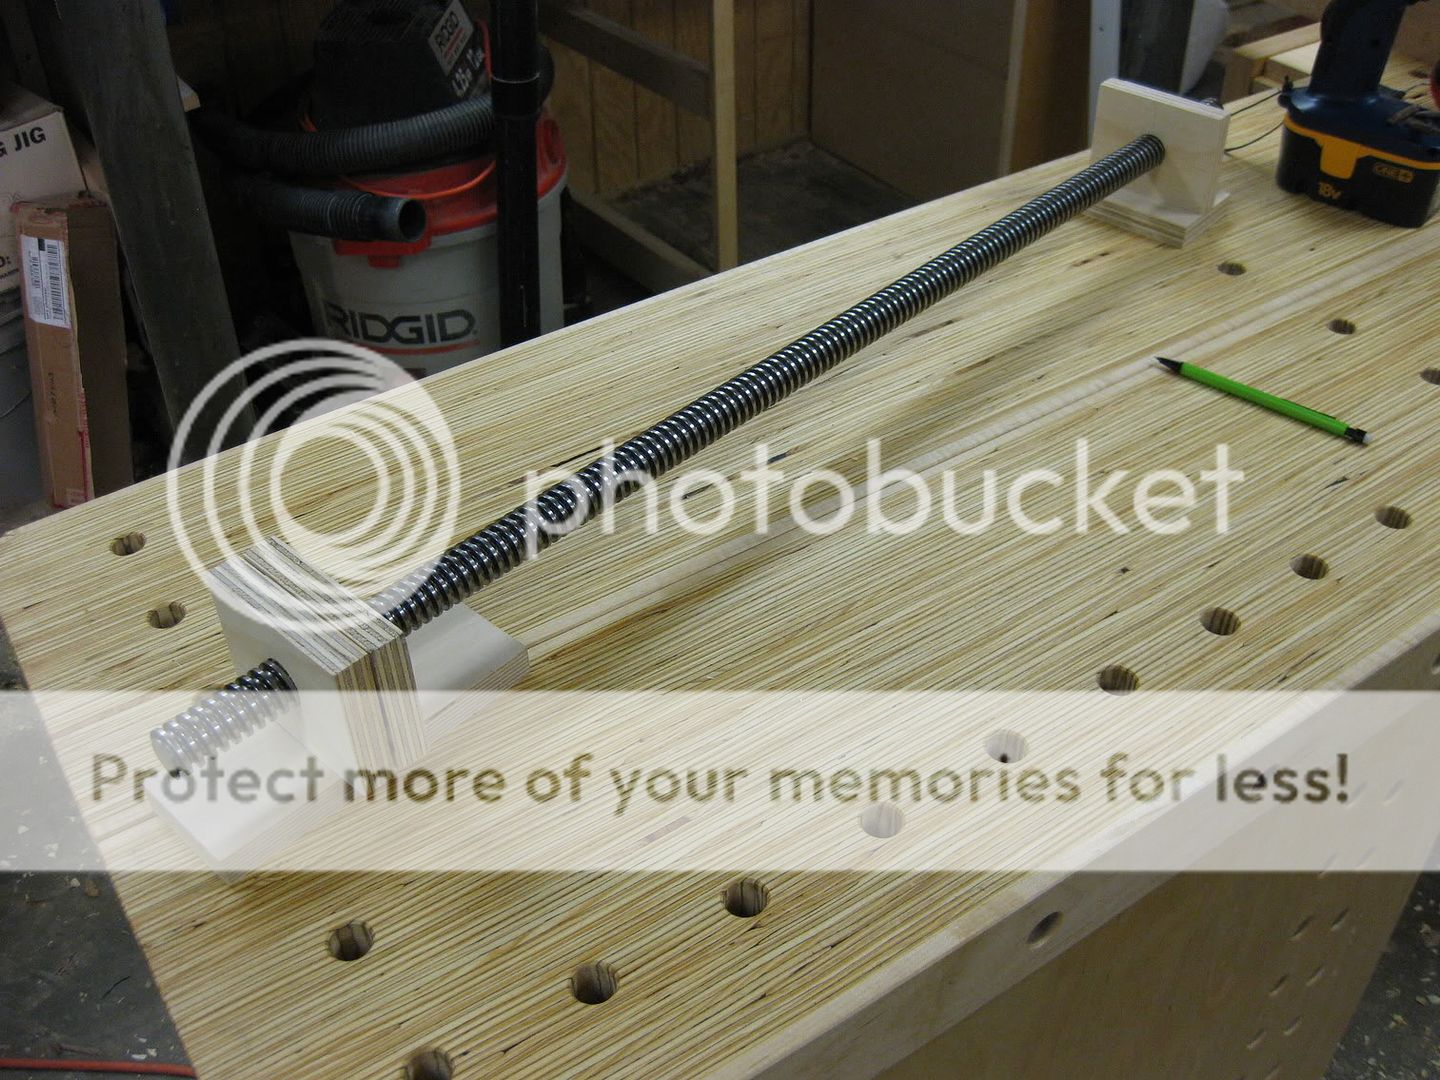
After a little googling, I was able to find a cheap source for some 1" metal rod with Acme threads.  Using metal screws avoids the problem of working with a threading kit, and another bonus is that the metal screws are 4 tpi (threads per inch).  The wooden threading kits I found were 6 tpi, so the metal screws should screw in and out 33% faster!

I got the stuff from surpluscenter.com and the part numbers you need are 1-2983-100-3 for the threaded rod and 1-2984-100N for the nuts. I tried to find some surplus Acme rockets like Wile E. Coyote used, but no luck there.  Total cost for 3ft of threaded rod and four nuts was about $60 plus shipping.  This is enough for two Moxon vises, so the cost is about the same as a threading kit.

This is all the hardware you'll need for a couple Moxon vises

The first task was to cut up the threaded rod into smaller pieces.  I needed 7" lengths of thread for my design, which yields a 2 1/2" capacity in the vise.  If you want to hold thicker boards, you may need longer screws.
I rigged up these little stands to make cutting the threaded rod easier

I wanted to cut 7" sections of the rod for my purposes

You could go crazy with a hacksaw, but I used a sawzall to make the cuts.
Slip the blade into the slot in the stand to keep the cuts as straight as possible.

Flip the stand on its side and use a metal vise to clean up the cut.
Get it close to 90 degrees, and remove all sharp edges that can injure you.

My neighbor is a wood turner and he was kind enough to turn a couple walnut handles for me.  Did I mention how much walnut we have?  The plan was to epoxy the threaded rod into the handles, and it worked like a smelly, sticky charm.

One of the walnut handles my neighbor made, a section
of threaded rod, and 5-minute epoxy.  What could go wrong?

Put the epoxy into the hole, and work the threaded rod down into
the epoxy so that the threads get filled up.

Next, I needed to make the vise body and front chop.  I used a seasoned 2x10 that was laying around the shop (well, my neighbor's shop...but he looked the other way for a couple seconds too long!)   I stayed pretty close to the dimensions from Schwarz's magazine plans.  With luck and planning you will end up with a little more than 24" between the screws.
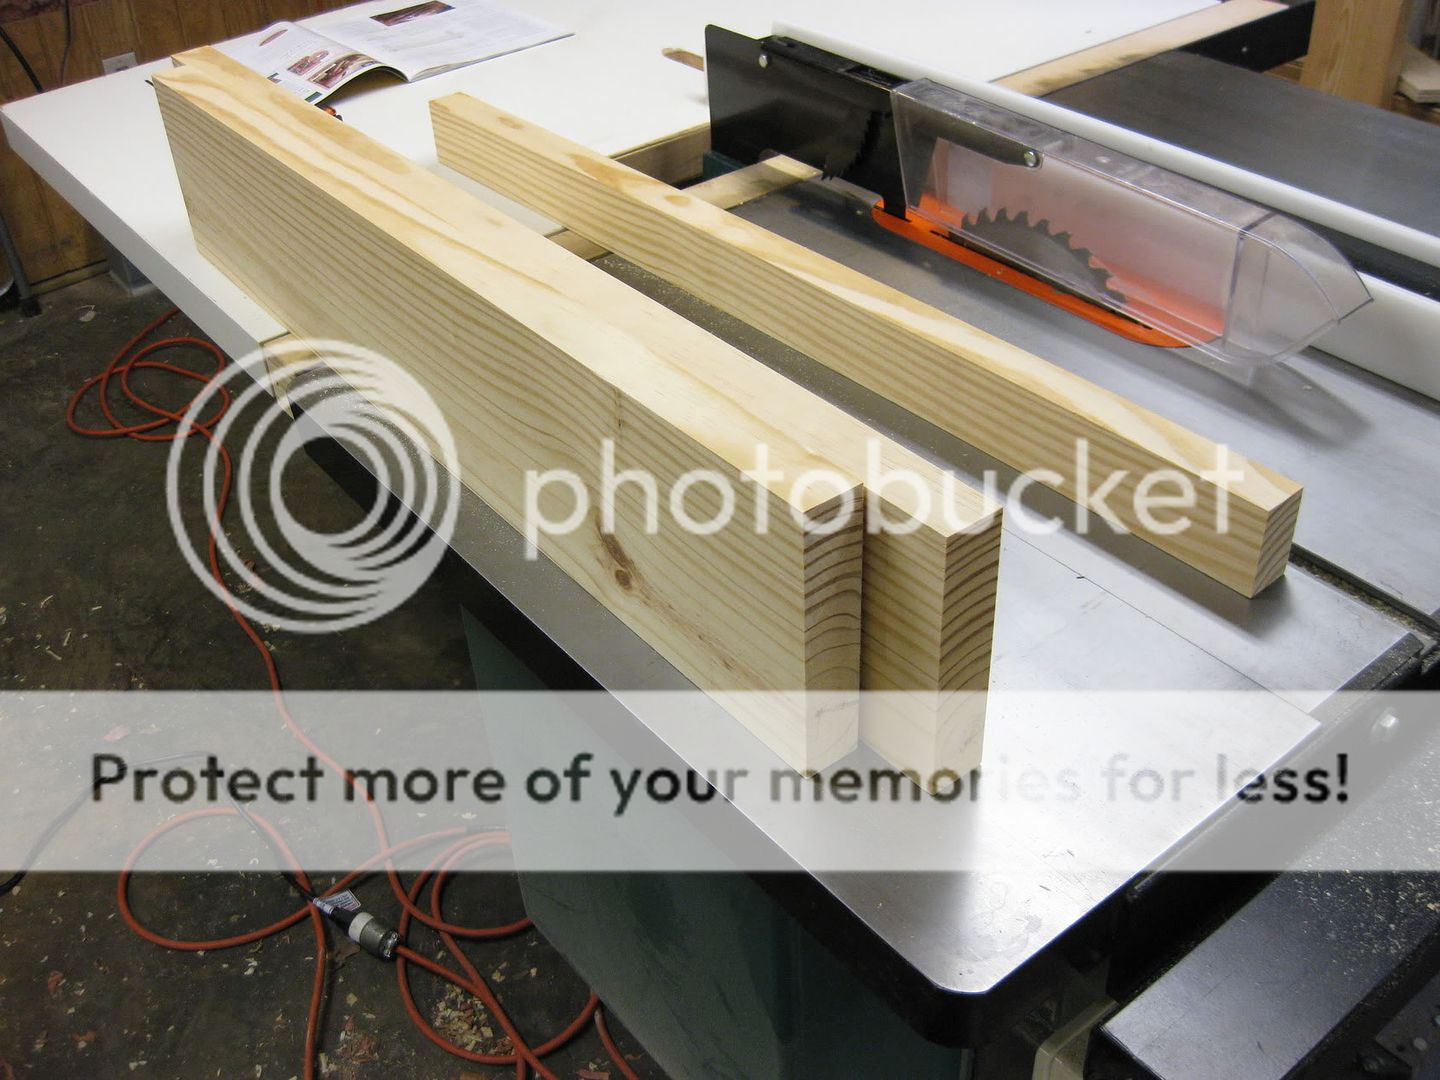
Front vise chop, rear body, and stabilizing support were cut and milled square.

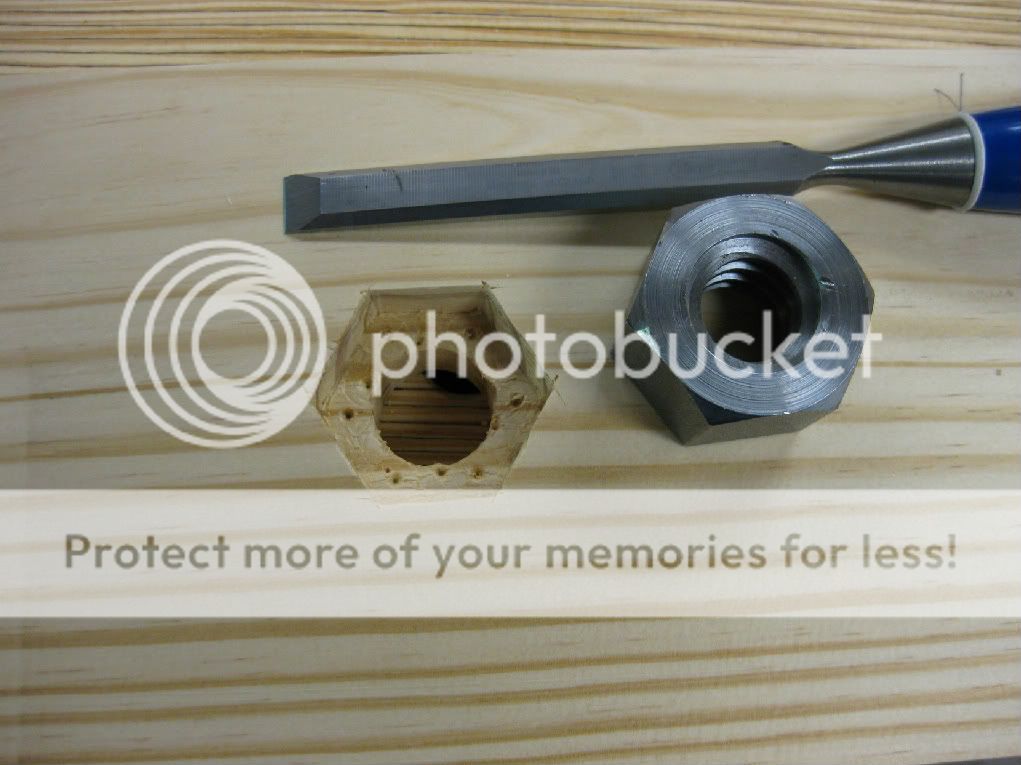
The screws go through the front chop, and thread into the rear body of the vise.  For the wooden-screw versions, you would need to use a tapping kit to cut some threads in the holes in the main body.  I simply drilled some 1" holes and sunk the nuts into the back of the body so they wouldn't spin.
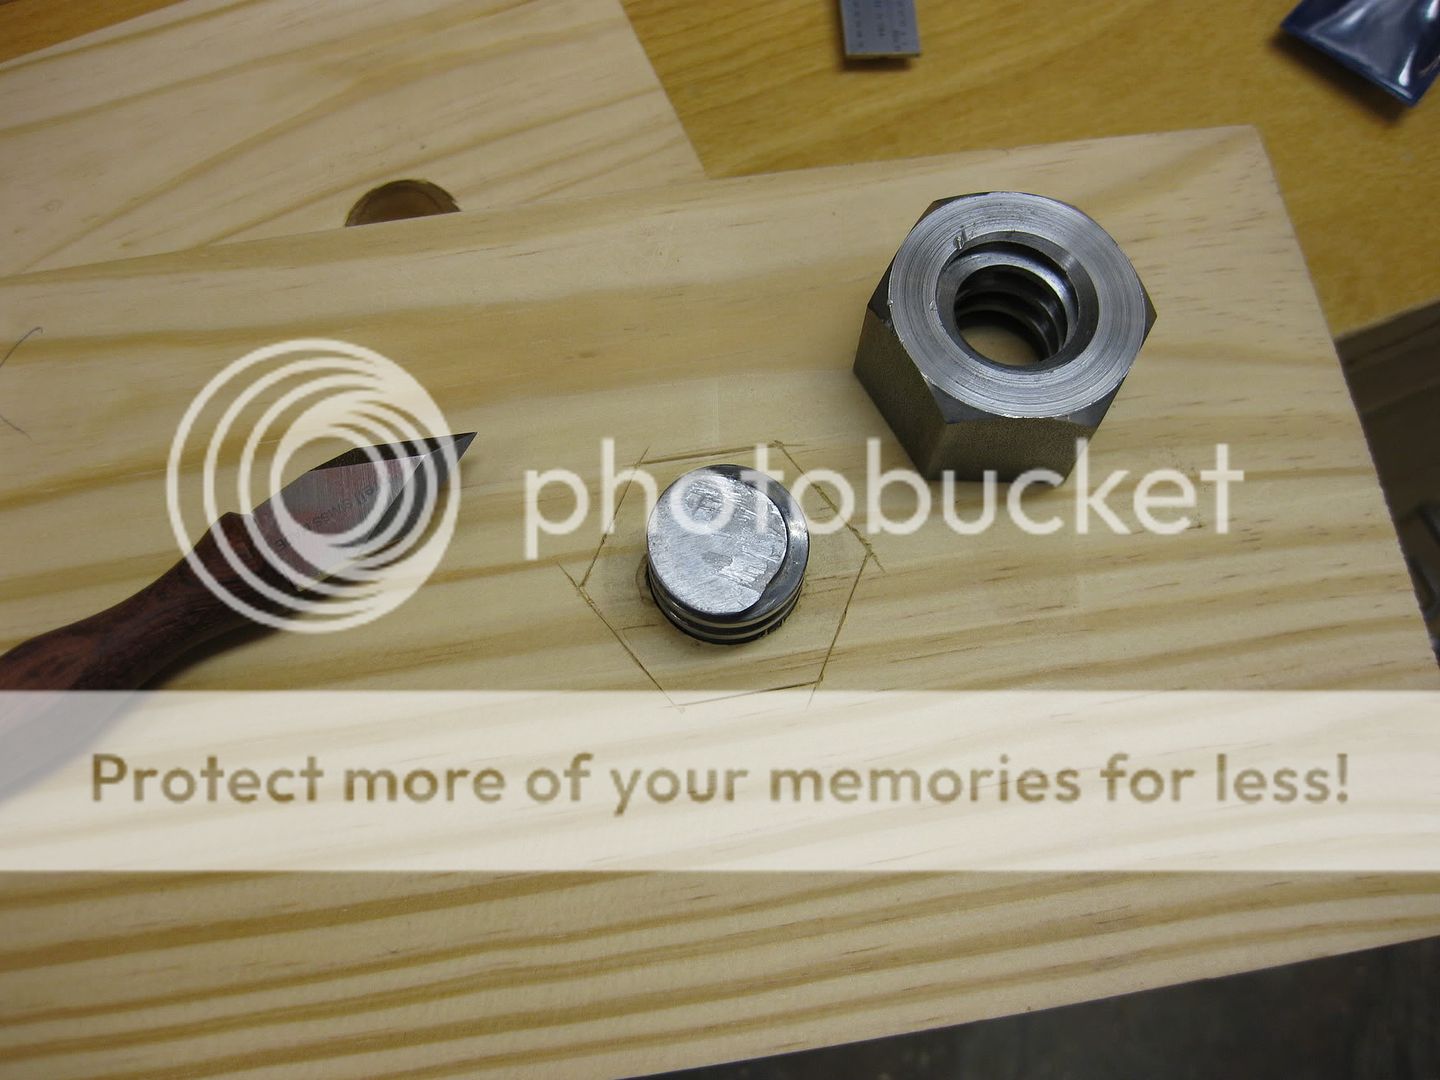
I used a knife to mark the locations of the nuts on the back of the vise.

A little drilling and chiseling created a recess for the nut to sit in.

The nuts are just friction fit, though a little epoxy would work fine also.

Here is the completed Moxon vise, shown from the back.  You can see why the nuts are countersunk, so they won't rotate when you tighten the screws.

All the edges are chamfered, and a little danish oil makes a good finish

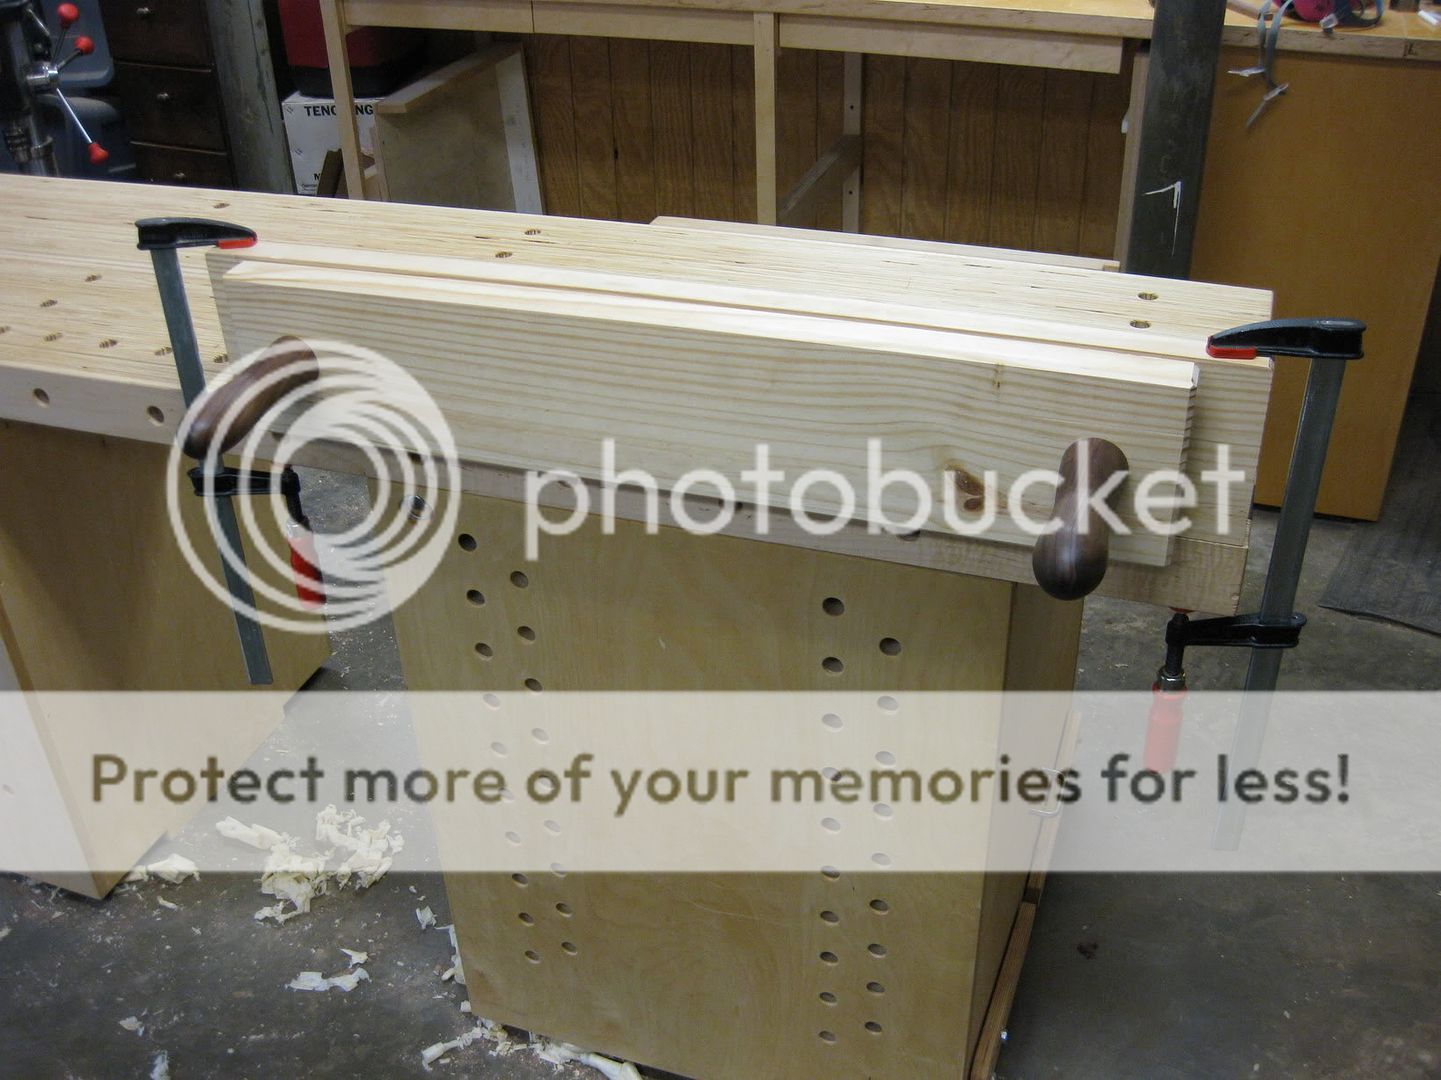
The Moxon vise sits on top of your regular workbench, and you can just clamp it down to the bench top.  This provides a rock-solid way to clamp a board for working on the end.  It's great for hand sawing, and also raises the workpiece up to a much more comfortable height.
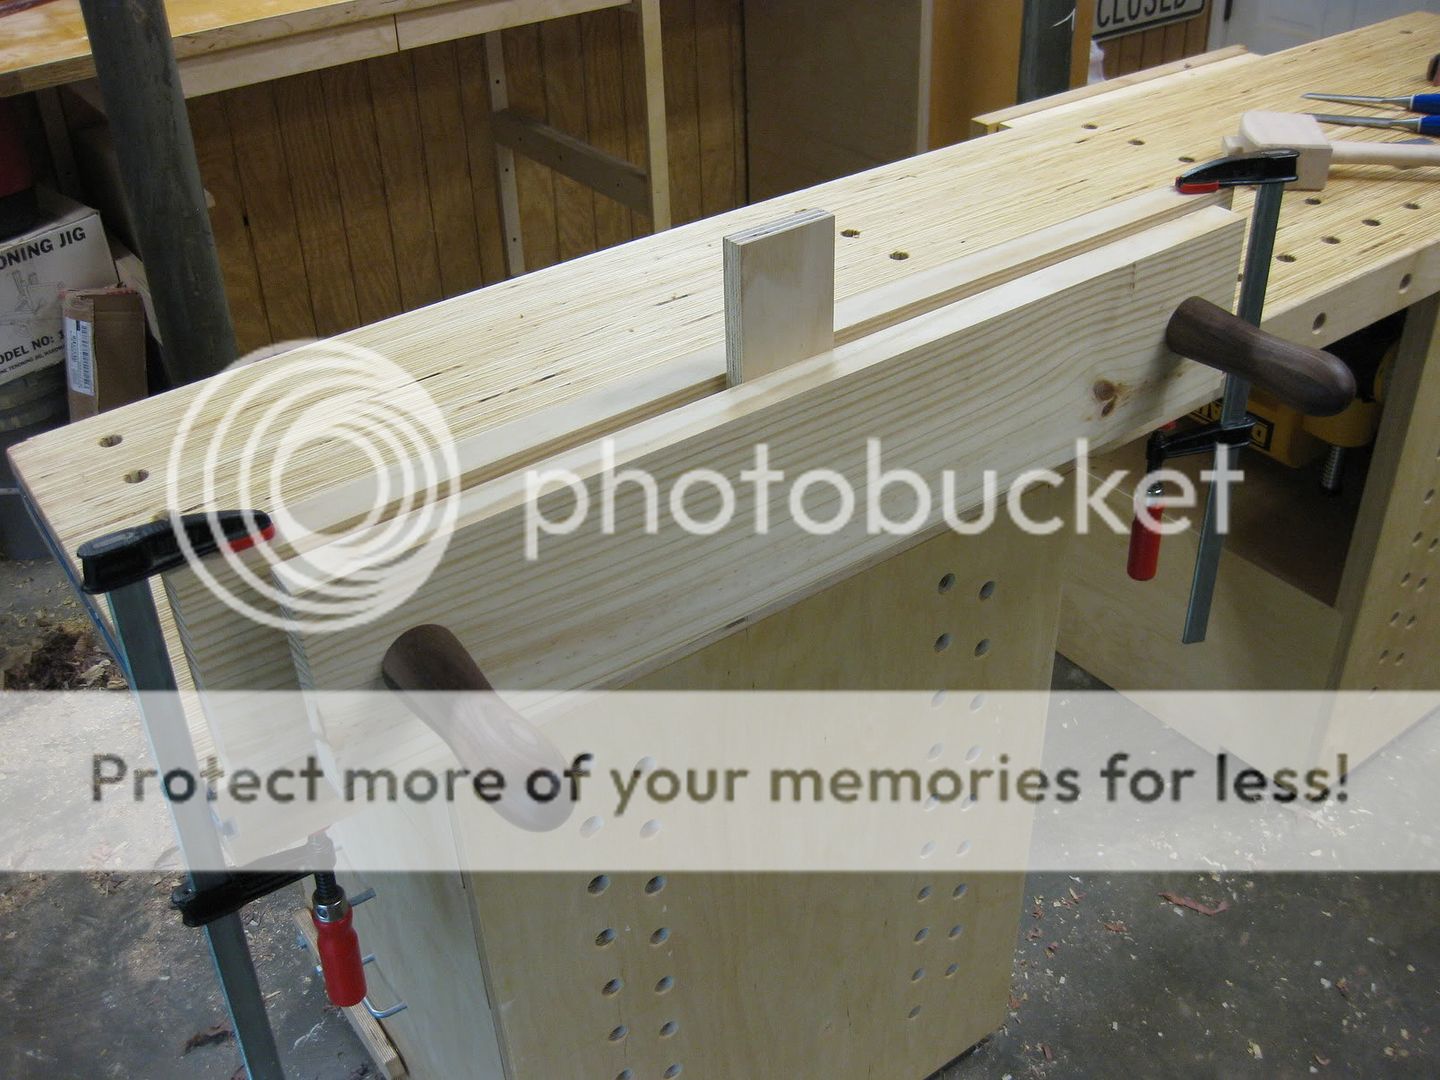
With 24" between the screws, you could dovetail the side of a cabinet in this vise.

I can see why this vise has become so popular among woodworkers.  It's an easy build, and really is specialized for working the ends of boards.  Combine this with other vises on your bench, and you will be all set for any hand tool woodworking.

Here is a picture of my wacky English woodturning neighbor giving the vise a test drive.  I think he likes it!

He's having a little too much fun!
Have you built a Moxon vise?  Let's hear about it in the comments! 

Tuesday, May 31, 2011

May Activities

A lot has happened in the last month, though you wouldn't know it from my lack of posts.  This post will be a bit of a brain dump, just to get the blogging area of my head aired out a bit.

For much of the past month, I was working on preparations for the newest Guild Build over at The Wood Whisperer Guild.  It's a Greene & Greene inspired Adirondack chair, and Marc and I held a lot of design sessions to get the plans finished.  With these Guild Builds, I started simply helping out with the SketchUp work but it has evolved over time to really be a collaborative design effort between the two of us.  I will finally be building one of these projects, and brought home a few cypress boards the other day to begin construction.  This one will be fun, so stay tuned.

Greene & Greene inspired Adirondack Chair

I also started work on a walnut desk for my wife.  It will be a modular design, and the top is already completed.  I bought a metric butt load of walnut recently and this is the first of many walnut projects to come.

Walnut Desk - Top is completed
There have also been some upgrades to the shop, as always.  After using my "Swiss cheese" workbench for a few months, I have decided to enhance my work-holding by building a Moxon-Schwarz saw vise.  The design was featured in Popular Woodworking Magazine last year, but I made a few modifications.  The biggest change I made was to use metal screws instead of shop-made wooden threaded screws.  I found a great cheap source for some 1" diameter, 4 threads-per-inch metal screws and matching hex nuts.  You'll probably be seeing more about this later, but here is a quick teaser shot.

Moxon-Schwarz Saw Vise
Metal Vise Screws?  Crazy!
Summer is fully here in Georgia, and it is getting hot.  In the coming months I'll be working on the Adirondack and the Walnut Desk, with a couple detours into other fun little projects. 

Thanks for checking in!  As always, questions and comments are very welcome.

Friday, April 15, 2011

English Layout Square - Finished!

I'm still here, and actually getting a lot done in the shop.  In the past few weeks I've stashed away a small mountain of walnut, started on a new desk project, and been working on upgrades to my workbench. On top of that, I'm working with Marc Spagnuolo to design the next project for The Wood Whisperer Guild, a Greene and Greene style Adirondack Chair.  I've got a ton of pictures, and I'll attempt to catch up on my posting.

To show you that things are getting done and I'm not sitting around eating hot pockets and playing with SketchUp - well not JUST doing that anyway - below are some pictures of my completed English layout Square.

If you read back to my previous post about the class I took with Schwarz, you will see that I still had some work to do after the class.  Here is where I stopped:

Almost ready to attach the cross brace, and lots of curves need to be smoothed out.
After I got back to my shop, I was able to cut the half-laps for the cross brace and get it glued into place.  The joints came out nice and tight, and a little smoothing plane action had everything nice and flush.  This was my first time working with walnut, but it certainly won't be the last since I recently bought a pile of walnut.

Here is another shot showing the progress I made on getting the curved details completed.  I don't have a large selection of rasps, so I had to make do with some small chisels and a dowel with some sandpaper rolled around it.  The end result turned out pretty good, I think.

Working on the curvy bits
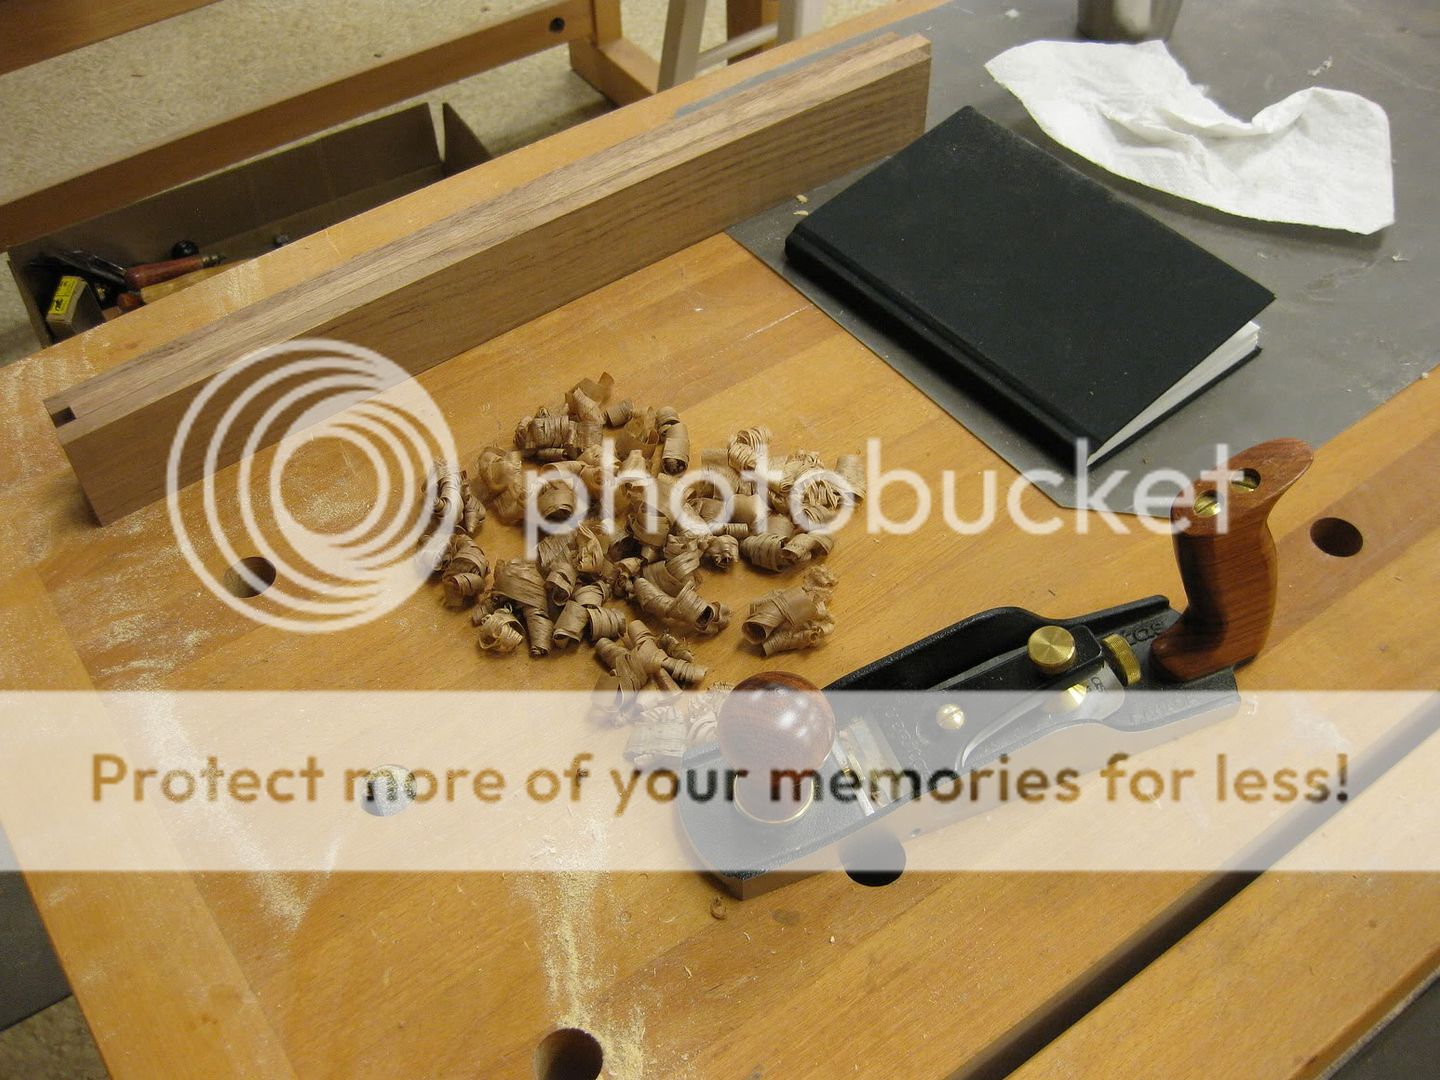
After that it was time to get the square adjusted so the corner is exactly 90 degrees.  There is a video on the Pop Woodworking site that shows how to do this.  I ended up clamping the square onto my bench on its side and just shooting along the edge with my smoothing plane. 

First one edge, then the other.  It's easy to adjust one edge at a time and get very accurate results.
After I tested and adjusted it a couple times, this simple wooden square is now more accurate than my metal framing square.  I've already used it a couple times, and it's nice to know I can easily correct things if it ever goes out of square.

Here is the final product after a couple coats of danish oil.  I've got it hanging up on one of my cabinets, and I kind of like that it looks like a big "A" for Aaron.

"A" is for Aaron, Aardvark, and Apple Pie.
It's been a while since an update, and things are getting hot in Georgia!  Is this your busy woodworking season or do you play outside in the summer and come back into the cave in the fall?

Monday, March 07, 2011

Mr. Schwarz? My brain is full.

Chris Schwarz came to Atlanta this past weekend.  He is the editor of Popular Woodworking Magazine, a workbench guru, a hand plane aficionado, and a leading voice in the use of hand tools for woodworking.  On Friday night he gave a talk about router planes and then gave the first-ever public talk about his upcoming book, The Anarchist's Tool Chest.  The talk was very compelling and I am sure the book will be very well received.

Chris Schwarz at work

On Sunday, I had the good fortune to take a day-long class with him at the Atlanta Woodcraft store.  The goal was to build a traditional English layout square, copied from an antique tool and published recently in Popular Woodworking Magazine.  Think of a wooden framing square and you'll have the right idea.

Here is how the class felt for me:

This was an 8 hour brain dump on all sorts of topics.  We talked about lots of tools and practiced a bunch of techniques.  Sharpening plane irons, planing stock square, sawing tenon cheeks, using shoulder planes, laughing at router plane "depth suggesters", fairing curves with rasps, cutting tenon shoulders cleanly, paring with a chisel, and even simple things like gluing end grain.  This class was full of great content, and well worth the time and cost to spend the day soaking it up.

After 4 hours of work, here is what was on my bench.  Three sticks of walnut that really don't look much different than when I first picked them up hours earlier.  All I can tell you is that this stock was as flat and square as I could make it, which is a critical first step toward making tight joints.

Halfway done, but not looking like much!

For the rest of the class, we rallied and worked toward cutting a bunch of half lap joints, roughing out curves on the detail areas, and making tight joints.  I don't think anybody finished the square, but some folks got pretty close.  Here is a picture of my project as I was marking the joints in the stretcher.

My progress toward the end of the day
There were only 7 students in the class, so there was plenty of personal attention. This did not always work to my advantage.  Quote of the day from Chris was "Uhh, Aaron?  Maybe you cut to the wrong side of the line." Ouch.

Thanks to Chris for making the trip, and to Steve Quehl for bringing him to our local WoodCraft.

It is always humbling for me to interact with very experienced woodworkers, but I learn so much more than I can by just reading about it or going solo.  How do you connect with the woodworking community?  Do you take classes, or just try to figure things out for yourself?

Monday, November 22, 2010

Workbench: Beware the New

I have been hinting lately about the workbench I am building, but not giving many clues about the design.  Sorry for being so secretive, but I really wanted to make sure a few things worked out before going public in case these ideas were really foolish.  I have found that medium foolishness is fine, but "really" foolish should be avoided.

Like many others out there in the woodworking community I have devoured all the recent books about workbenches, particularly those by Chris Schwarz and the extended Pop Woodworking Staff.  It's hard to have a discussion about benches without relying heavily on their material.  I scoured the internet for plans, comparing Roubo with Nicholson, Moxon with Holtzappfel, $175 benches with 21st Century benches, and all the rest.  I wanted to take all the good features from all of those and blend them together into the bench of my dreams.

Then I did a little reality check, which I will share with you now.  There isn't space in my shop for a bench unless I get rid of some large tools. I'll never be a hand tool only woodworker and after all these years of looking strategically mopey before birthdays and anniversaries I sure can't tell my wife I'm getting rid of anything.

But don't take my word for it - take a look at this panoramic picture of my shop.


Many eagle-eyed viewers will sees something that could be removed to get a ton (or three) more space in the shop.  I'll wait while you try to find it.  Hint: It has the highest horsepower rating in the shop.

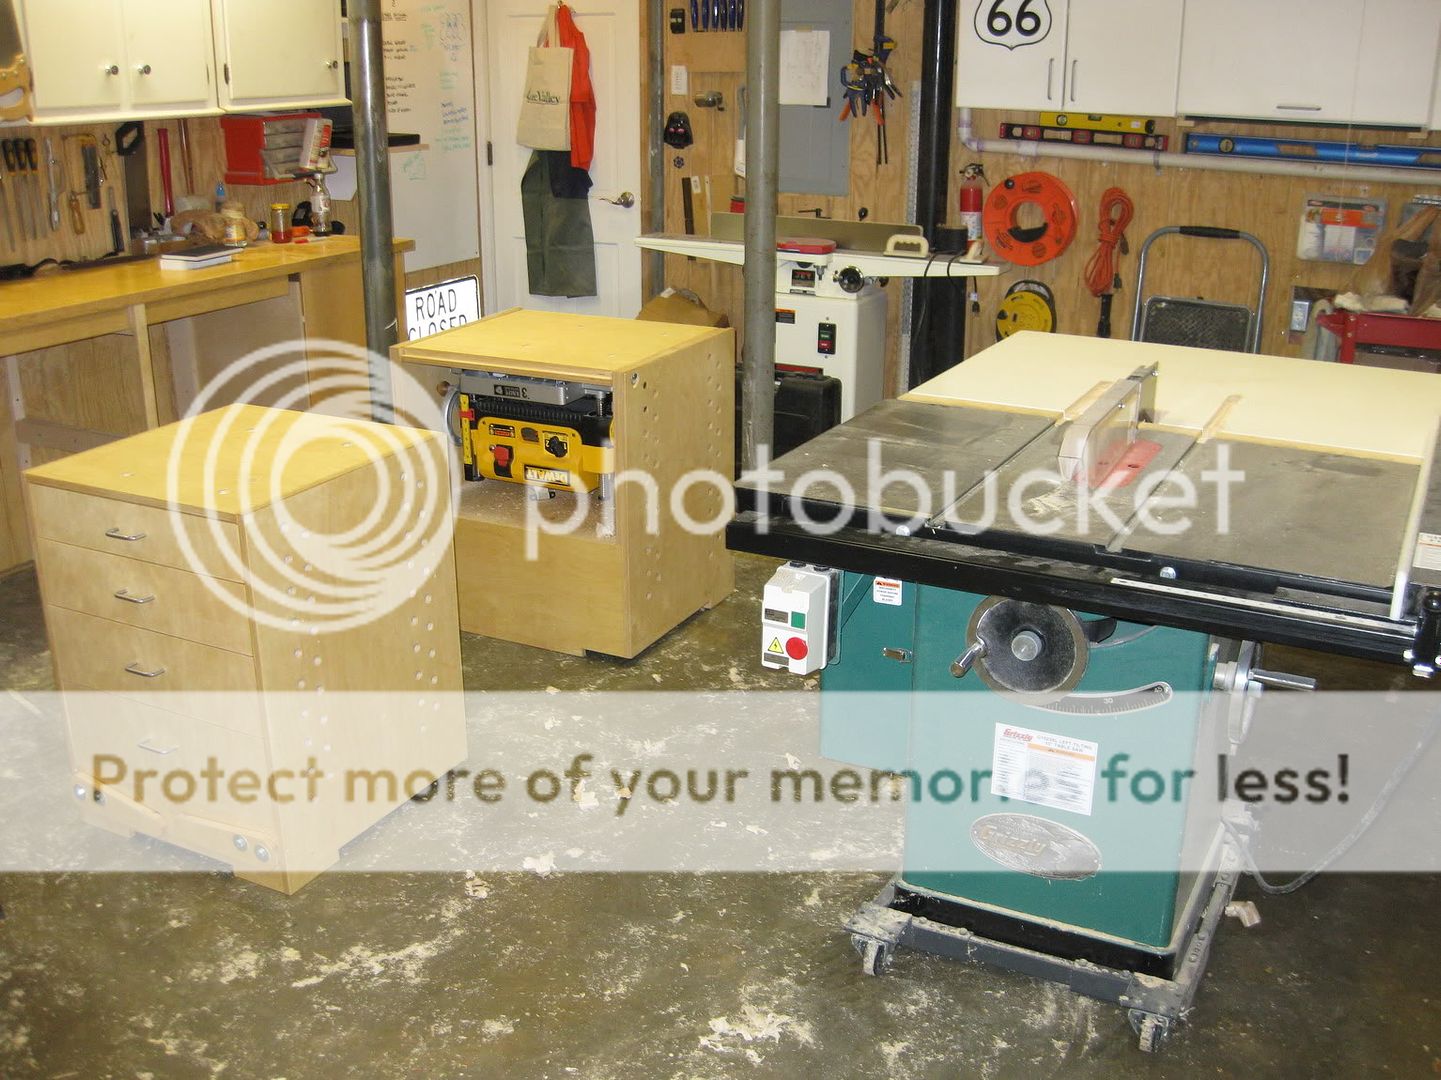
Alright, I should park the Buick elsewhere but life is a compromise.  We live in an old house downtown, and the only garage is under the house.  The car has to get parked inside, so the first rule of my shop is "everything on wheels".  The garage is 19' deep and about 16' wide so at least there is enough space to wheel everything out of the way when the car has to come back in.  I've been working on getting everything mobile and I'm about halfway done.  I still have plans for a miter saw cart and drill press cart on my to-do list.

As you can see, I also have several steel columns holding up the place.  They are perfectly positioned for maximum inconvenience, blocking the long wall where I have a countertop set up. Back to the workbench design, all this is just meant to show that space is an issue for me.  I want a full-featured bench but have nowhere to keep it.

I started reading about knockdown workbenches, but this doesn't mean the same to me as it does to most authors.  Most knockdown designs are meant to solve the "I might move someday and need to take my bench apart" problem.  I literally want to take my bench apart every night.

The last paragraph of Schwarz's newest workbench book inspired me to find a solution, and I hope he won't mind if I quote it here.  "What can I remove and still have all the functionality I need?  When I cannot remove anything else, it's time to start cutting wood."  Vises?  Don't need them - they are too heavy to hoist around anyway.  Legs?  Stretchers? Shelves?  Bah, who needs them.  After all, a bench is just a 3D clamping surface, right?  My design eventually devolved into nothing more than a top sitting on...something.  I think it works for me, but maybe others will like the concept too. 

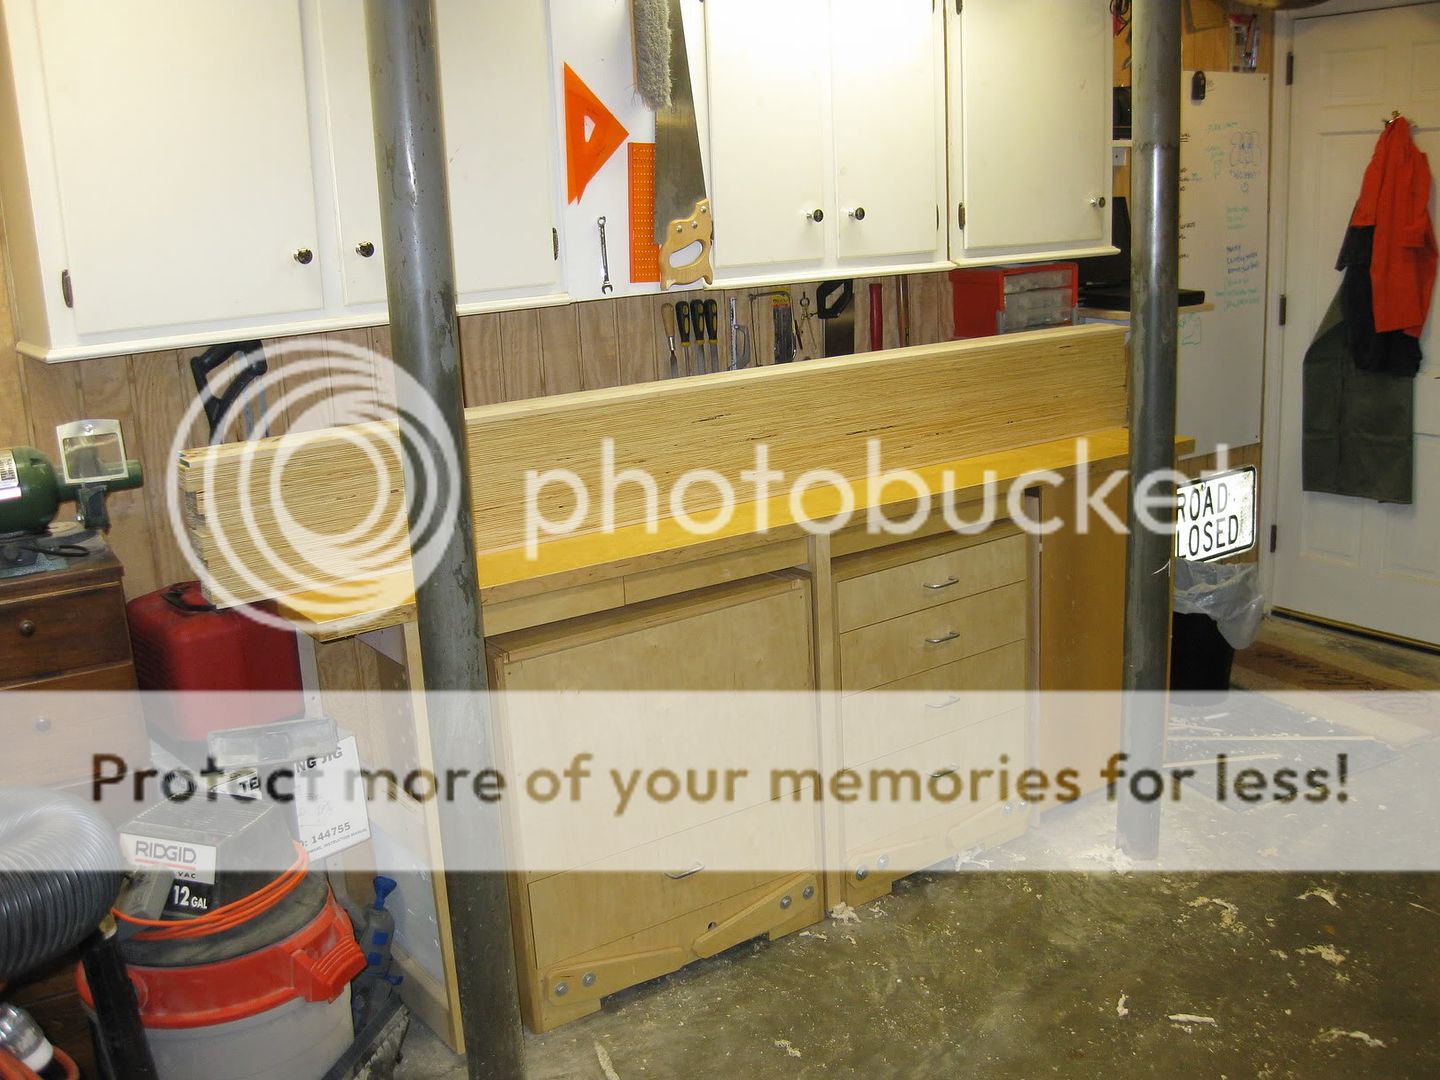
Let's see.  Here's a shot of the long wall of the shop, once the car is out and the table saw is rolled away.


In the picture above, there are two mobile carts under that countertop.  They both have retractable wheels and can roll out into the shop.  The one on the left is a flip-top stand that holds my planer and the other is simply a stack of drawers.


Roll them out, lift the wheels and the two carts make a good base to support the workbench top.  The top is made of two separate beams that are 7 feet long and about 10 inches wide.  I used LVL for the slabs after seeing the "Gluebo" at Woodworking in America.  The extra rigidity of the LVL allowed me to get the top down to about 2 1/2" thick.


When it's time to stop for the evening, I am able to take the two top slabs and stand them in the corner.  Then I just roll the cabinets back under the counter and the bench is tucked away for the night.  The whole thing takes less than 5 minutes, including moving the table saw back over and driving in the car.

There's a lot more to share about this bench but this post is getting long and I suspect you may be shaking your head.  Coming soon, I will go into details about securing the top to the base cabinets, work holding accessories, and vise replacements.  Stay tuned for more!

Think I'm a visionary, or just plain nuts?  Either way, I'd love hearing what you think about the bench design.  See any work holding tasks that may be a problem for me?  Shout it out.

Friday, October 29, 2010

The Schwarz Effect: An Academic Rebuttal

First of all, wow.  Response to my previous post about Chris Schwarz and his effect on the market for No. 80 scraper planes has been amazing.  Thanks to Chris for spreading the word.

Gye Greene went a few steps further down the rabbit hole.  He asked for a copy of the data that fed my charts, and ran it through a series of statistical contortions to determine the true likelihood of a lasting "Schwarz Effect".  I had originally recorded a few extra details of each auction, such as the condition of the scraper, the shape of the casting (there are a couple varieties), and whether the blade was missing.  Gye included all of this in his methodology, and found that price was controlled more by these factors than by Schwarz' Mojo.  Gye did confirm my observation that even the crustiest piece of crap from the bottom of the ocean would sell in the post-Schwarz era.

So it seems that Schwarz has the power to stir us all up into a frenzy of buying every tool in sight, but not necessarily to make us overpay in the long term.  Shucks.

Gye's amazingly detailed analysis is available at this link, please check it out.  Thanks to Gye for taking the time on this!  A few of his key insights:
  • Expect to pay more for a scraper in the original box. This commanded about a $25 premium.
  • Early castings have a base with a straight trailing edge, instead of the later concave curved edge.  The straight version will run you almost $10 more at auction.
  • No blade?  Expect to pay about $11 less.
You may also want to check out Gye's blog over at gyegreene.blogspot.com for more Gye goodness!

Oh and in case anybody out there finds themselves in possession of a number 80 that needs a little rehab, you may find this post by Pickering Mike interesting over at Ramblings of a Novice Woodworker.

Think Gye and I are nutjobs?  Chris Schwarz does!  Tell us what you think in the comments!

Wednesday, October 27, 2010

Behold the Power of The Schwarz!

Oh, how nefarious the woodworking world can be!  What you are about to read is a tale filled with intrigue, secrecy, arbitrage, and data analysis.  What else do you need?  Hollywood, I will be expecting your call.

A couple weeks ago, Chris Schwarz blogged about his Stanley #80 scraper plane.  As usual, it was a thoughtful and instructive post that described the advantages of these simple tools.  It was nice reading for a Monday.

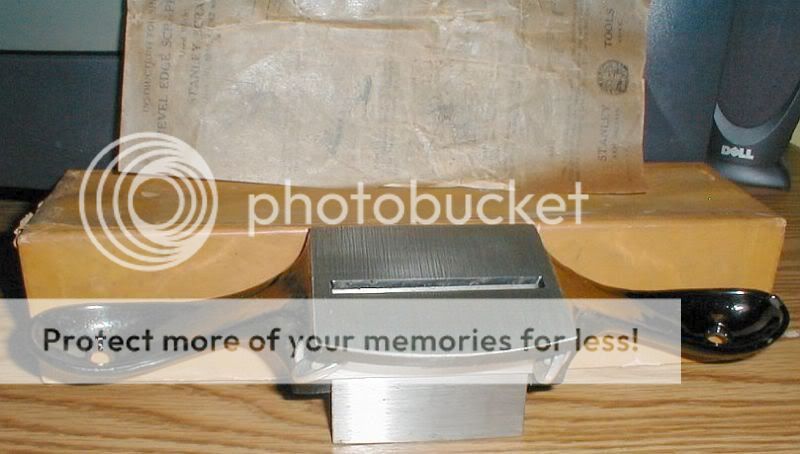
A nice Stanley #80 scraper plane
What only a lucky few knew, however, is that "The Schwarz" had previously set up a little experiment in arbitrage, woodworking style.  In the final session on the final day of Woodworking in America, Chris offered a bonus to the group.  He said that you could buy the #80's for $20 all day long on eBay, at least until he blogs about them.  Those in the room had one week to corner the market on these tools and then the public would hear about them via the blog, likely sending prices into the stratosphere.

Shall we see how the power of the Schwarz may be used for evil instead of for good?  The following chart takes a look at sales prices on eBay for the past month or so.  Each bubble is a single sale.  The total delivered price is along the left axis, and time marches out along the bottom axis.  The bubble size indicates how many bids the auction had - more bids get larger bubbles.

Click for larger version

As you can see from the chart, things were cruising along steadily in "The Good Old Days".  Average shipped price for a #80 was about $26, and things were good.  Then on October 3rd Schwarz made his speech at WIA, and the sharks smelled blood in the water.  I only have data up until the 5th because I forgot to check and eBay cleans house after 21 days, but even in the 3 days after WIA the average shipped price went up to almost $38.  After his blog post on October 11, Schwarz generated enough demand to drive the average shipped price up again to $41.51, a 60% increase over "The Good Old Days"!


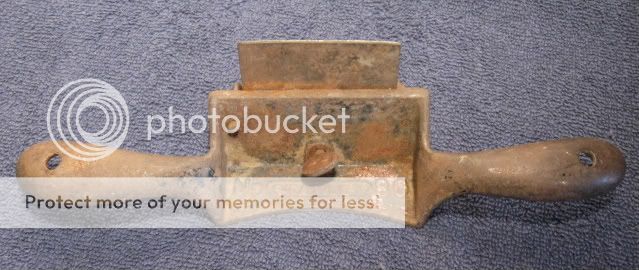
Do you need further proof of the power of the Schwarz?  From 9/22 to 10/5 there were another 12 auctions that had zero bids and therefore did not end in a sale.  Buyers weren't interested in these planes, so these listings were not included above.  Since Chris made his blog post on Oct 11 there have been no unsold scraper planes on eBay.  All auctions have ended successfully in a sale, including the gem pictured below with the absurdly optimistic description "has light rust" which sold for $24.95 shipped.


Click for larger version

What does this teach us?  Chris has the Mojo, baby.  One comment from him is enough to send literally tens and tens of people into a buying spree.  Oh, and I have too much time on my hands. On a related note, I will be starting a new hedge fund soon trading under the ticker symbol SWRZ.  Operators are standing by!
 
Care to comment?  You would be among a select few who take advantage of this once in a lifetime opportunity!
 
Footnote:  In case you are as into data geekery as I am, here is the fine print on the methodology:
  • I used the search term "Stanley scraper 80" to bring up closed auctions on eBay.
  • I only included auctions for a single tool, no bundles were allowed.
  • Only sales were counted, so auctions with no bids were excluded.
  • The price reported is the shipped price of the tool, including final bid price plus shipping cost.  I did look at the results without shipping costs and the conclusions were the same.
  • Only sellers in the US were included.
  • A few tools were sold without blades, and I kept these in the data.
  • A single bid typically means the "buy it now" feature was used.

Monday, September 06, 2010

How accurate should a SketchUp model be?

In the October 2010 issue of Popular Woodworking Magazine there is a letter about modeling drawers in SketchUp.  The reader asks how to model the small clearances required to make sure the drawers ride smoothly in their openings.  In "meatspace" this typically means the drawers are 1/32 or 1/16 undersized to the openings.  Bob Lang answered this question well, but in my opinion missed the most obvious response:  Why the heck would you need to model to this level of detail?

Look, I know more than most how tempting it can be to get every little detail correct in a SketchUp model.  I've spent time tweaking little bits and pieces to make sure they were just right, believe me.  While designing projects I can have multiple generations of a design, exploring new options and branching out into infinite possibilities.  So take it from somebody who has fallen down that rabbit hole - you have to know when to stop modeling and start building.

These days I am trying to remind myself that the goal is to make projects, not models.  My ability to create precision in SketchUp are far beyond my abilities for precision in the shop.  Wood moves with the seasons, small variations in tool setups introduce randomness during a build, and sometimes designs get changed on the fly. 

Here are a few questions I try to ask myself as I am making a model to ensure I am not sinking deeper into OCD territory.
  1. Will the extra level of detail make it easier to build the real piece?  By all means, if it makes things easier in the shop then add it to the model.  I am a strong believer in modeling details on joinery, curves, edge profiles, etc. as long as they make the time in the shop easier.  An exploded view of the project with a few key dimensions is invaluable to me as I build.  But leave out things that make no difference in the shop.
  2. Will the final dimension of the wood match the SketchUp model?  SketchUp is great at providing dimensions for raw stock.  Suppose you have a door rail that will be mortise & tenoned into the stile.  By all means, add the two tenons to the ends of the rail and use SketchUp to measure the total length of the rail.  But by the time you need to know the dimensions of the door panel, measuring the actual meatspace door is the best way to go.  A little variability could have crept in and suddenly the dimension of the panel in SketchUp doesn't match the door you built.  Until you have a CNC machine just spitting out all you project parts, you have to know when to abandon the perfection of the SketchUp planned dimensions.
  3. Does the design of the piece require a more detailed model?  If I am trying a new type of joint or I want to see how a curve would look, I add more detail until my question is answered.  Otherwise, keep it simple.  For example, when designing a piece with drawers I will often create a simple rectangle to fill the drawer opening instead of modeling a full dovetailed drawer.  Even a drawer-sized box is easy to make and fill the hole.  Until I need details about the drawer there is no need to model it beyond that point.  It's a heck of a lot easier to explore the overall size and shape of the piece this way.
Adding details to a model can be addictive, and frankly a great way to learn how to use SketchUp as a power user.  But take my advice, you have to know when to put the mouse down and back away slowly!