Showing posts with label Accuracy. Show all posts

Friday, April 15, 2011

English Layout Square - Finished!

I'm still here, and actually getting a lot done in the shop.  In the past few weeks I've stashed away a small mountain of walnut, started on a new desk project, and been working on upgrades to my workbench. On top of that, I'm working with Marc Spagnuolo to design the next project for The Wood Whisperer Guild, a Greene and Greene style Adirondack Chair.  I've got a ton of pictures, and I'll attempt to catch up on my posting.

To show you that things are getting done and I'm not sitting around eating hot pockets and playing with SketchUp - well not JUST doing that anyway - below are some pictures of my completed English layout Square.

If you read back to my previous post about the class I took with Schwarz, you will see that I still had some work to do after the class.  Here is where I stopped:

Almost ready to attach the cross brace, and lots of curves need to be smoothed out.
After I got back to my shop, I was able to cut the half-laps for the cross brace and get it glued into place.  The joints came out nice and tight, and a little smoothing plane action had everything nice and flush.  This was my first time working with walnut, but it certainly won't be the last since I recently bought a pile of walnut.

Here is another shot showing the progress I made on getting the curved details completed.  I don't have a large selection of rasps, so I had to make do with some small chisels and a dowel with some sandpaper rolled around it.  The end result turned out pretty good, I think.

Working on the curvy bits
After that it was time to get the square adjusted so the corner is exactly 90 degrees.  There is a video on the Pop Woodworking site that shows how to do this.  I ended up clamping the square onto my bench on its side and just shooting along the edge with my smoothing plane. 

First one edge, then the other.  It's easy to adjust one edge at a time and get very accurate results.
After I tested and adjusted it a couple times, this simple wooden square is now more accurate than my metal framing square.  I've already used it a couple times, and it's nice to know I can easily correct things if it ever goes out of square.

Here is the final product after a couple coats of danish oil.  I've got it hanging up on one of my cabinets, and I kind of like that it looks like a big "A" for Aaron.

"A" is for Aaron, Aardvark, and Apple Pie.
It's been a while since an update, and things are getting hot in Georgia!  Is this your busy woodworking season or do you play outside in the summer and come back into the cave in the fall?

Thursday, March 10, 2011

Sales Counter - Top Version 2

How do you make a woodworker cry?  Tell him he has to cut up a recently finished project with a circular saw.

Boo hoo hoo.

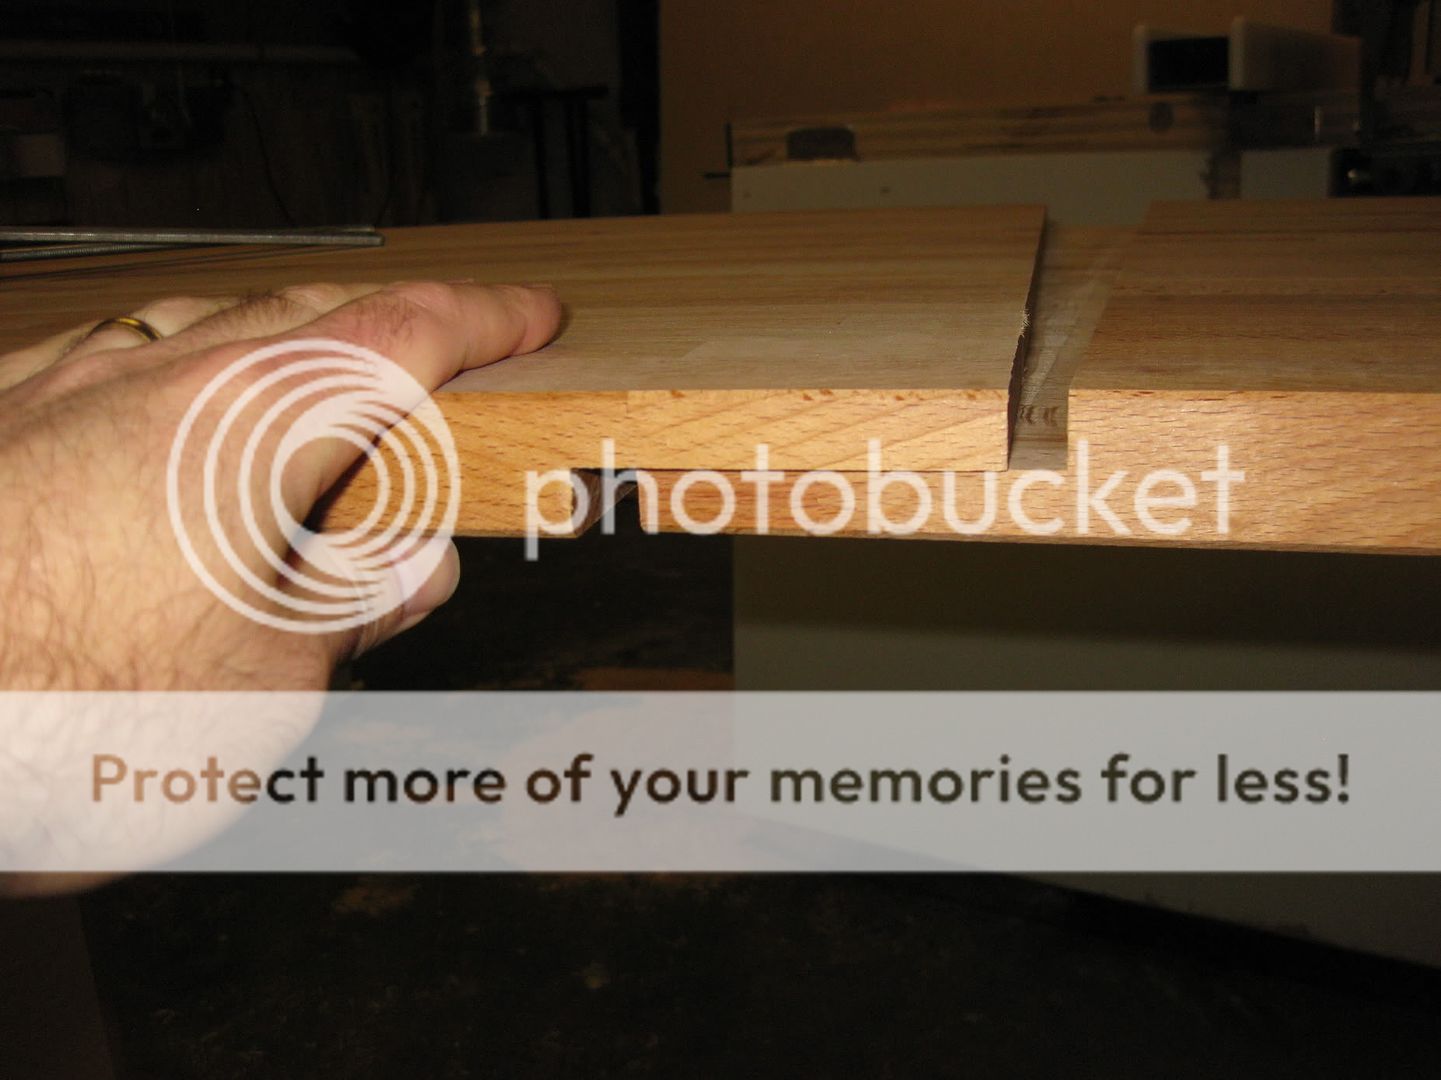
I recently made a sales counter for a friend's new store, and it turned out great.  Unfortunately it was too long.  The first time, I created a ship-lap joint to join the two long counter slabs.  This was the source of my error in measurement.

Version 1 of the joint was a strong ship-lap.  This joint was also the source of my error in length.
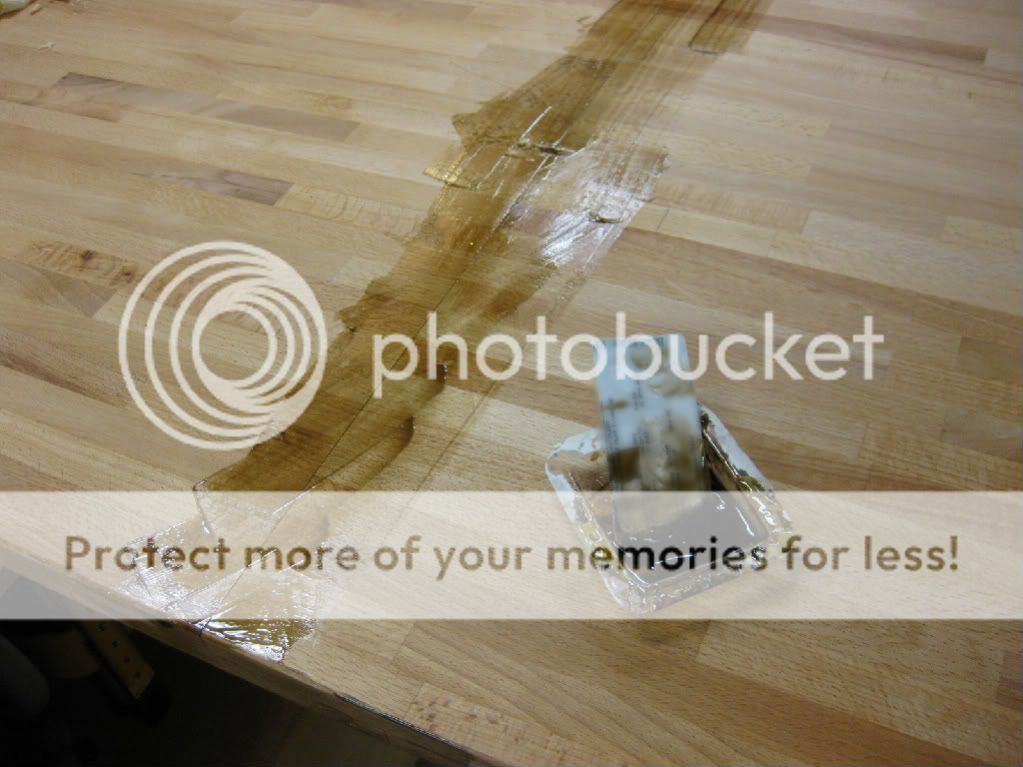
This was very strong, but I wasn't able to get the joint as tight as I would like so I had to fill the small gap with tinted epoxy.

Version 1 of the joint had a visible gap.

I used tinted epoxy to fill the gap in the original piece.

The epoxy fix turned out pretty well, but it was one of those things that drives us woodworkers crazy while nobody else really notices.  The error in length of the counter top gave me the opportunity to rethink the joint and improve the seam.

Due to the design, the only option was to cut the counter top apart and take the extra material out of the middle.  This went pretty quickly with a circular saw and straightedge.  It was very satisfying to deposit the extra chunk of material in the garbage bin, after a few choice words were exchanged.

For Version 2 of the joint, I kept things a little simpler.  First I cut the two halves to exact length to get the joint centered correctly.  Then I focused on getting the joint as tight as possible.  I ended up "shooting" the ends of both halves with my smoothing plane to get them as nice and straight as possible.

A small spacer under the slab raises it up so I can shoot the end with my planes.
This approach worked very well and I was able to get the joint super tight.  In fact, I got so excited I stopped taking pictures.  Whoops!

I decided not to so another ship-lap joint at this point.  With a tight fitting seam and no extra length remaining, I was afraid anything else I did would mess it up somehow.  Instead, I used my pocket screw jig to put in a slot every couple inches along the bottom of the slabs.  I figured I could use pocket screws to pull the two halves together during installation.

I brought the tops back over to the store, and it was much easier to transport two seven foot slabs than one 14 footer in my truck.  Installation went smoothly the second time, and the pocket screws worked great to hold the two slabs tightly together along the seam.  Luckily the cabinet design allowed me to access most of the underside easily.  I just worked slowly from one side to the other, making sure the two slabs were tight and flush before screwing them together.  The seam is much less visible than the first time, and so flush that you can barely feel it.  Even better, I didn't have to strip any finish or sand to get the joint smoothed out.

I'll have pictures of the final sales counter soon - the grand opening of the store is this weekend.  Until then, I am running laps around my tiny shop.  It feels twice as big now that the counter tops are gone!

Do you ever find yourself fixing mistakes?  I sure do!  Comments are open, operators standing by!

Monday, February 28, 2011

Arrrrrrgh! Sales Counter Top Update

No, I'm not a pirate.  That's "Arrrrrrgh" as in "I am really upset and frustrated!"  Ever have one of those days?  Me too.

As a reminder, I recently built a sales counter for a friend that is roughly 14 feet long.  It has been installed, and the last thing left to do was join two store-bought butcher block counter tops together into a single long slab for the top.

Easy, right?  Well, kind of.  I'm going to get a lot of practice.  I made it too long the first time, so I get to try again.

Here's how I did it the first time.  With a series of too-complicated router setups, I created a half-lap joint between the two top slabs.  This turned out to be ultra-strong, but was the source of my error.  Somehow I messed up and the length of the overlap was added to the total counter.  The half-lap is about 3 inches wide.

Half lap joint is very strong, but I didn't measure correctly for overall length.
If I had caught the problem at this point, fixing it would have been easy.  I could have just trimmed the ends of the counter to the correct overall length.  Instead I just plowed ahead with all the remaining steps. I sanded, stained, varnished, and delivered the top.  I plopped it down on top of the sales counter and finally discovered the length was wrong.

"Arrrrrgh!"

This sales counter has a jewelry case at each end, so part of the design called for a glass insert in each end of the top.  You can see one of the cutouts in the picture below, and there is one on the other end too.

After adding cutouts for glass inserts, the only option is to cut it back apart to fix the length.
The problem now is that the cutouts for the glass inserts prevent me from simply trimming the ends off.  I will be forced to cut the two slabs apart again and redo the center joint.

"Arrrrrgh!"

The other challenge is that the top has been stained and I have several coats of durable poly applied as a finish.  I really don't want to repeat the half lap process, because I don't want to have to sand or plane the joint to get it flush.  I haven't had good luck touching up a stain/poly finish and I don't want to strip the entire top.

I'll keep you posted.  Back to the shop.

Ever have one of those days?  Got any ideas?  How would you recover from this blunder?  I'd love to hear it!

Tuesday, January 04, 2011

SketchUp Tip: Field of View

I like SketchUp.  A lot.  Like really, a lot.  I use it to model most things I build, and many other things around the house.  Frankly, my wife is a little sick of all the models I think. 

Her:  "Honey, take out the garbage please?" 
Me:  "Wait, I need a 3D model for that!"

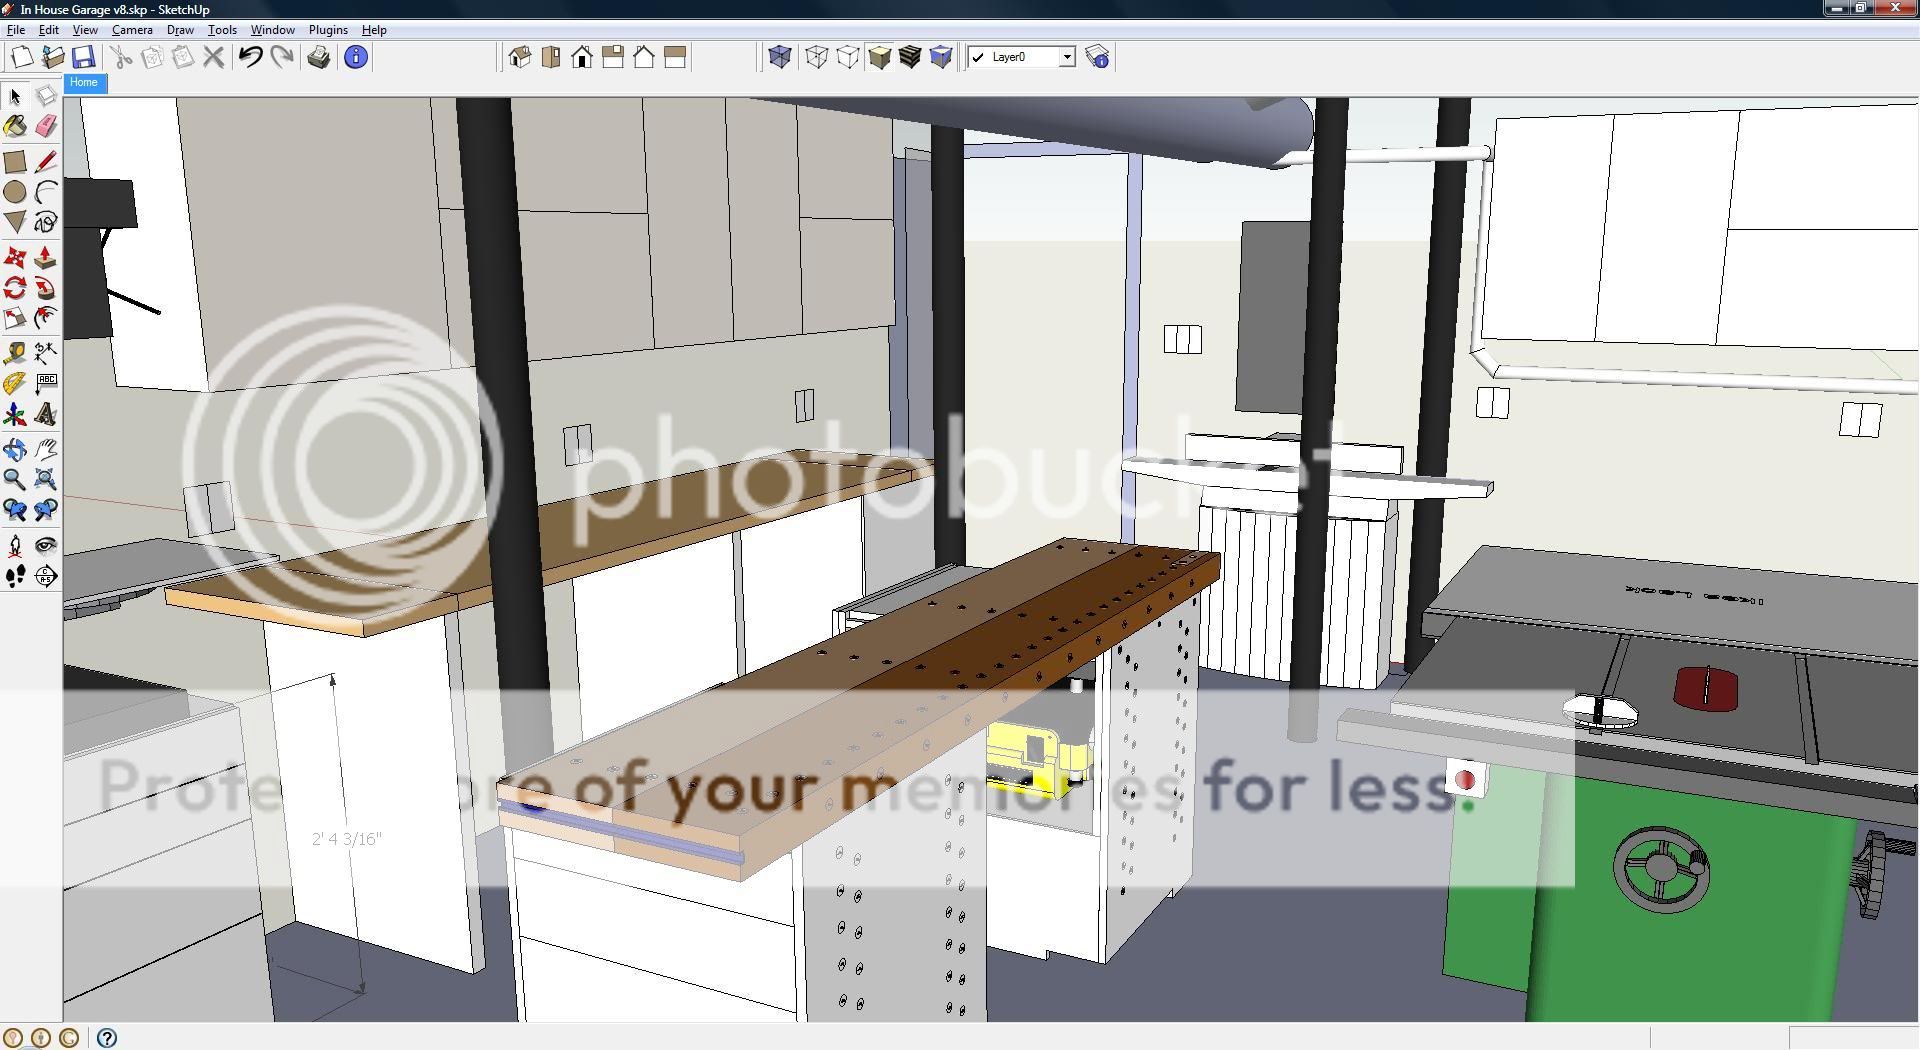
But there are times when a 3D model is very helpful.  For instance, I used it to lay out my shop to make the most of my limited space.

Click for extreme close-up
Which brings me to today's SketchUp tip.  Woodworkers tend to focus on models of a single piece of furniture, but SketchUp is also used by a bunch of architects to create entire buildings.  When you are viewing a building from the inside out, you generally want to show the viewer what they would realistically see if they were standing in the space.  This is where field of view becomes important.

The human eye has about a 120 degree field of view from side to side, or about 60 degrees per side.  It may be easier to think of this as a cone expanding outward from your eye.  The default setting in SketchUp is just 35 degrees, which is a much narrower field of view.  As a result the standard view in SketchUp can feel like you have blinders on.

For example, here is the default 35 degree view if you are standing at the garage door of my virtual shop.


SketchUp lets you easily adjust the field of view.  Here's how you do it. Click on the Zoom tool or just hit "Z" on the keyboard.  The zoom tool looks like a little magnifying glass.


After you select the zoom tool, the box in the bottom right of your SketchUp window should say "Field of View" and "35 deg".  At this point you can type in another setting and hit enter.  For example, try "60" and "Enter".  Here is the same view of my virtual shop with the 60 degree setting.


You may want to play around with different settings for different effects.  Rather than typing in each new setting, you can hold down the Shift key and the Left mouse button, and then drag the mouse around to widen or narrow the point of view.  This seems a bit awkward and unless you are comfortable with camera navigation in SketchUp I recommend just typing in your number.

One last note is that SketchUp can accept field of view settings in degrees or millimeters.  The "mm" settings are handy if you are a photographer and want to get the effect of a specific lens, such as "50 mm".  When you are typing in your new setting SketchUp stays in the current "deg" or "mm" scale unless you specifically switch to the other scale.  Note that for the human eye, 60 degrees is about the same as a 35mm lens.

That's all it takes to get a new field of view in SketchUp, and it can really help to make models look more natural for the viewer.

Got a question about SketchUp?  I'd love to hear from you in the comments.

Monday, September 06, 2010

How accurate should a SketchUp model be?

In the October 2010 issue of Popular Woodworking Magazine there is a letter about modeling drawers in SketchUp.  The reader asks how to model the small clearances required to make sure the drawers ride smoothly in their openings.  In "meatspace" this typically means the drawers are 1/32 or 1/16 undersized to the openings.  Bob Lang answered this question well, but in my opinion missed the most obvious response:  Why the heck would you need to model to this level of detail?

Look, I know more than most how tempting it can be to get every little detail correct in a SketchUp model.  I've spent time tweaking little bits and pieces to make sure they were just right, believe me.  While designing projects I can have multiple generations of a design, exploring new options and branching out into infinite possibilities.  So take it from somebody who has fallen down that rabbit hole - you have to know when to stop modeling and start building.

These days I am trying to remind myself that the goal is to make projects, not models.  My ability to create precision in SketchUp are far beyond my abilities for precision in the shop.  Wood moves with the seasons, small variations in tool setups introduce randomness during a build, and sometimes designs get changed on the fly. 

Here are a few questions I try to ask myself as I am making a model to ensure I am not sinking deeper into OCD territory.
  1. Will the extra level of detail make it easier to build the real piece?  By all means, if it makes things easier in the shop then add it to the model.  I am a strong believer in modeling details on joinery, curves, edge profiles, etc. as long as they make the time in the shop easier.  An exploded view of the project with a few key dimensions is invaluable to me as I build.  But leave out things that make no difference in the shop.
  2. Will the final dimension of the wood match the SketchUp model?  SketchUp is great at providing dimensions for raw stock.  Suppose you have a door rail that will be mortise & tenoned into the stile.  By all means, add the two tenons to the ends of the rail and use SketchUp to measure the total length of the rail.  But by the time you need to know the dimensions of the door panel, measuring the actual meatspace door is the best way to go.  A little variability could have crept in and suddenly the dimension of the panel in SketchUp doesn't match the door you built.  Until you have a CNC machine just spitting out all you project parts, you have to know when to abandon the perfection of the SketchUp planned dimensions.
  3. Does the design of the piece require a more detailed model?  If I am trying a new type of joint or I want to see how a curve would look, I add more detail until my question is answered.  Otherwise, keep it simple.  For example, when designing a piece with drawers I will often create a simple rectangle to fill the drawer opening instead of modeling a full dovetailed drawer.  Even a drawer-sized box is easy to make and fill the hole.  Until I need details about the drawer there is no need to model it beyond that point.  It's a heck of a lot easier to explore the overall size and shape of the piece this way.
Adding details to a model can be addictive, and frankly a great way to learn how to use SketchUp as a power user.  But take my advice, you have to know when to put the mouse down and back away slowly!