Showing posts with label plans. Show all posts

Tuesday, March 06, 2012

Woodworking Doodles

This is what happpens when a woodworker is stuck on a boring conference call.  I've had leg vises on my mind lately.
Exploded leg vise


In case you were wondering, SketchUp is just an enabler for my natural tendencies.

Tuesday, December 07, 2010

Workbench: Floating Bases

One of the key features of my workbench is the ability to take it apart and store it away quickly.  Like every guy with a small shop, I am trying to put all my stuff on wheels.  I came up with the idea of using base cabinets under my workbench instead of the more typical sawhorses.  The bases are an important part of this design, both for workholding and for stability.  They needed to be mobile but still sturdy enough to support the benchtop with all the forces from planing and pounding.

The retractable wheels on the bases allow me to quickly roll the cabinets under a stretch of countertop and get them out of the way.  When it's time to use the bench, I just wheel them out again.

I have two cabinets, one slightly smaller than the other.  Here is a picture of the small cabinet, with a bunch of drawers.  The height is just right for me, so that adding on the top slabs makes a workbench that is 34" from the floor.


Here is how the retractable wheels work, courtesy of SketchUp.  Way easier to show you this than to flip over the real thing!


I made a few changes when I built the cabinets, but these pictures give you the general idea. Underneath each base cabinet is a recess that is about five inches deep.  Inside, there are two casters on each side, mounted to a pivoting board.  This "wheelie" board is attached to the bottom of the cabinet with a couple standard door hinges I had laying around, but any strong hinge will do.  The hinges are shown in red above, and the yellow circles are there to remind me that the casters need to be able to spin freely. Don't put them too close to the corners.

Here it is right-side up, it is easier to see how the levers work in this view I think.


The levers are mounted with a couple bolts through the front apron of the cabinet and into the "wheelie" boards.  When you want to lower the wheels, just step on the end of the lever and the wheels get forced down which also raises one side of the cabinet off the floor.  These have a surprisingly strong lever action, and are able to lift up very heavy loads - at least a couple hundred pounds.  I suppose it depends on how much force you can get into the lever by stepping on it, but I have been eating my Wheaties and am well over 200 lbs.

But what keeps the wheels down?  Aha!  Take a look at the next picture.


Scrounging my pile of spare parts, I put a couple of door latches into the bottom apron.  When you step on the levers, they move down and the latches pop out to hold them in place.  Now you can wheel the cabinet around and when you are done, just give the latches a kick with your toe to drop the cabinet back down onto the ground.  These latches are cheap, and you can also buy just the latch at the big box stores.

In the picture above, you can see a hint of the arc that is cut out of the apron around each bolt - above bolt #3.  The bolts for the levers just pass through the apron and into the "wheelie" board.  You may also notice that one of the levers is lower than the other.  There is some flex in the wheelie boards, so when I was ready to add the latches I just cranked down on the levers until there was a quarter inch of clearance all around, especially in the back of the cabinet.  I then marked a line and this is where the latches ended up. I also made the apron removable in case things sag over time and I need to make a new one.

I have mentioned before that my garage floor has more waves than the Atlantic ocean.  In order to prevent the cabinets from rocking when they are dropped, I made them with three feet.  You can see that in the SketchUp pictures above, or in this picture of the back corner.


Once the cabinets are dropped down in place, they are very stable.  Not necessarily level, but stable.  This was pretty important since I don't want the bench to rock back and forth.  These things aren't going anywhere, since they are both pretty heavy.  The larger cabinet is about 30 inches wide and has my 13 inch planer mounted on a flip top, so that cabinet has to be almost 200 pounds with all the plywood and the planer.  The drawer unit is lighter, but I would still estimate it at over 100 pounds.  Add in 90 pounds for the top slabs and I've got a 400 pound bench that wheels away easily.

Here are some things I learned when building the retractable wheels, in case anybody wants to try this.  The drawings show the "wheelie" boards as 3/4 plywood, but this has a lot of flex when the wheels are up.  I had to do some weird stuff to stiffen the boards like you might do along the front edge of a shelf.  I recommend gluing up a double-thick board that is 1 1/2" thick, but I would use plywood again with no problems.  In order to do this, you need a slightly deeper recess under the cabinet.  I was trying to save every last bit of vertical space, and it got a little tight for me.  It's based on the height of your casters - with a 1 1/2" thick wheelie board, your recess should be at least 2 1/2" deeper than the caster height.  Plan to get the wheelie board roughly level with the floor when the wheels are down, though a little tilt is fine.

Next time I'll talk about some workholding stuff.  With a few accessories, I don't even care that this bench has no vises.

What next?  I've got more to talk about with the bench, but do you have a question?  Put it in the comments!

Monday, November 22, 2010

Workbench: Beware the New

I have been hinting lately about the workbench I am building, but not giving many clues about the design.  Sorry for being so secretive, but I really wanted to make sure a few things worked out before going public in case these ideas were really foolish.  I have found that medium foolishness is fine, but "really" foolish should be avoided.

Like many others out there in the woodworking community I have devoured all the recent books about workbenches, particularly those by Chris Schwarz and the extended Pop Woodworking Staff.  It's hard to have a discussion about benches without relying heavily on their material.  I scoured the internet for plans, comparing Roubo with Nicholson, Moxon with Holtzappfel, $175 benches with 21st Century benches, and all the rest.  I wanted to take all the good features from all of those and blend them together into the bench of my dreams.

Then I did a little reality check, which I will share with you now.  There isn't space in my shop for a bench unless I get rid of some large tools. I'll never be a hand tool only woodworker and after all these years of looking strategically mopey before birthdays and anniversaries I sure can't tell my wife I'm getting rid of anything.

But don't take my word for it - take a look at this panoramic picture of my shop.


Many eagle-eyed viewers will sees something that could be removed to get a ton (or three) more space in the shop.  I'll wait while you try to find it.  Hint: It has the highest horsepower rating in the shop.

Alright, I should park the Buick elsewhere but life is a compromise.  We live in an old house downtown, and the only garage is under the house.  The car has to get parked inside, so the first rule of my shop is "everything on wheels".  The garage is 19' deep and about 16' wide so at least there is enough space to wheel everything out of the way when the car has to come back in.  I've been working on getting everything mobile and I'm about halfway done.  I still have plans for a miter saw cart and drill press cart on my to-do list.

As you can see, I also have several steel columns holding up the place.  They are perfectly positioned for maximum inconvenience, blocking the long wall where I have a countertop set up. Back to the workbench design, all this is just meant to show that space is an issue for me.  I want a full-featured bench but have nowhere to keep it.

I started reading about knockdown workbenches, but this doesn't mean the same to me as it does to most authors.  Most knockdown designs are meant to solve the "I might move someday and need to take my bench apart" problem.  I literally want to take my bench apart every night.

The last paragraph of Schwarz's newest workbench book inspired me to find a solution, and I hope he won't mind if I quote it here.  "What can I remove and still have all the functionality I need?  When I cannot remove anything else, it's time to start cutting wood."  Vises?  Don't need them - they are too heavy to hoist around anyway.  Legs?  Stretchers? Shelves?  Bah, who needs them.  After all, a bench is just a 3D clamping surface, right?  My design eventually devolved into nothing more than a top sitting on...something.  I think it works for me, but maybe others will like the concept too. 

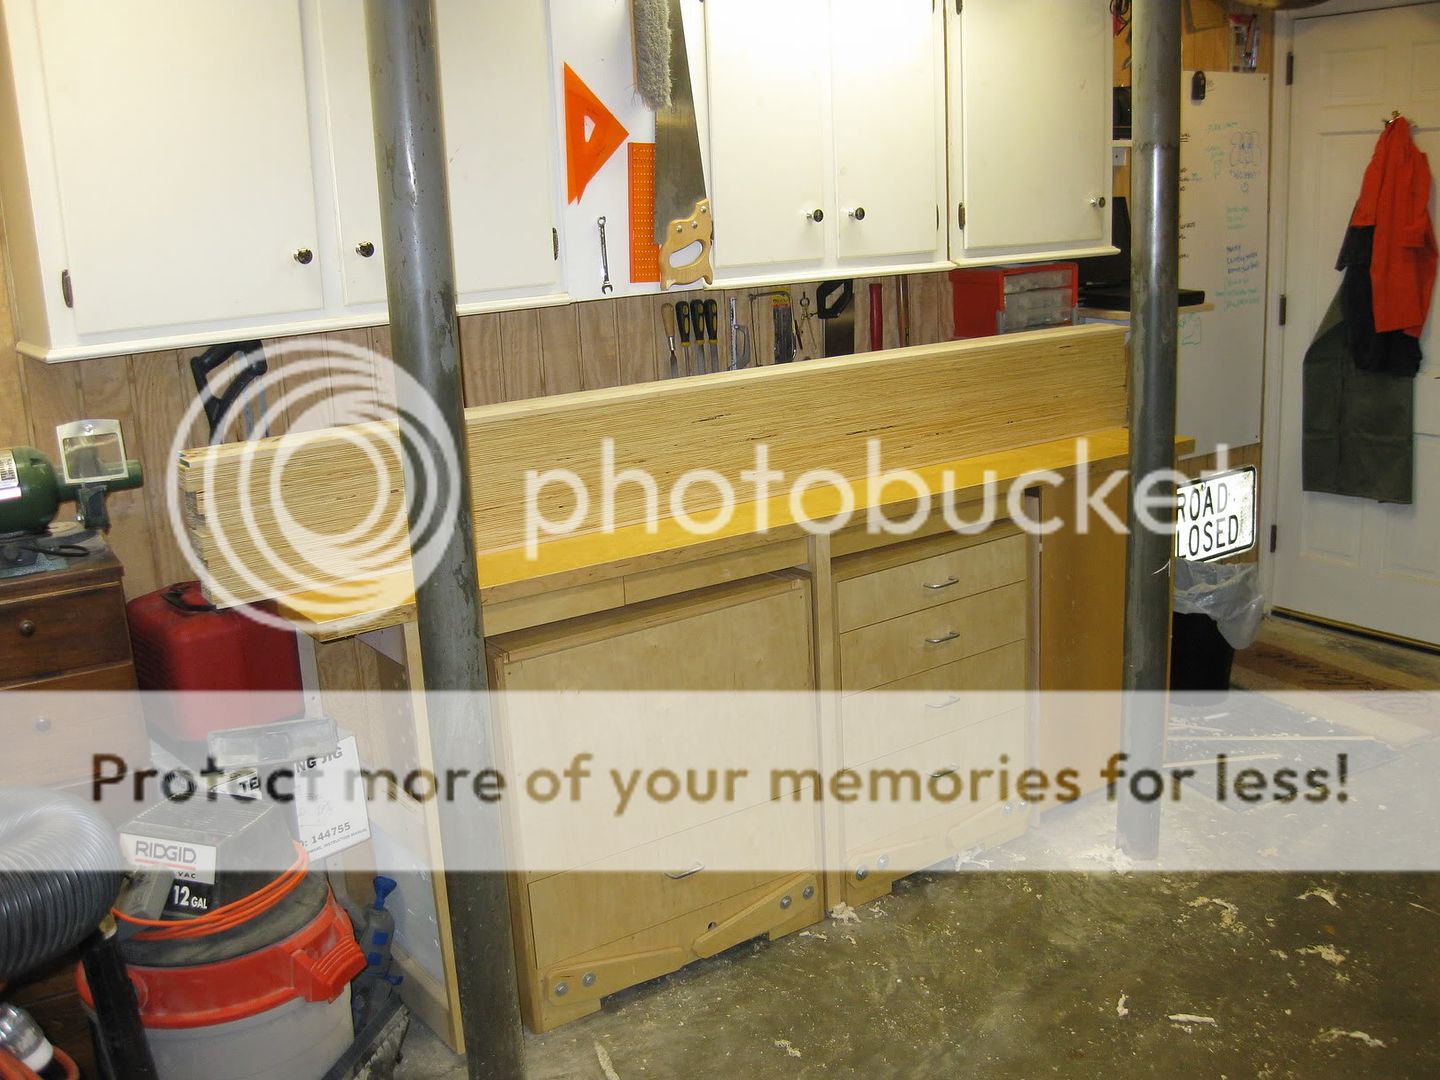
Let's see.  Here's a shot of the long wall of the shop, once the car is out and the table saw is rolled away.


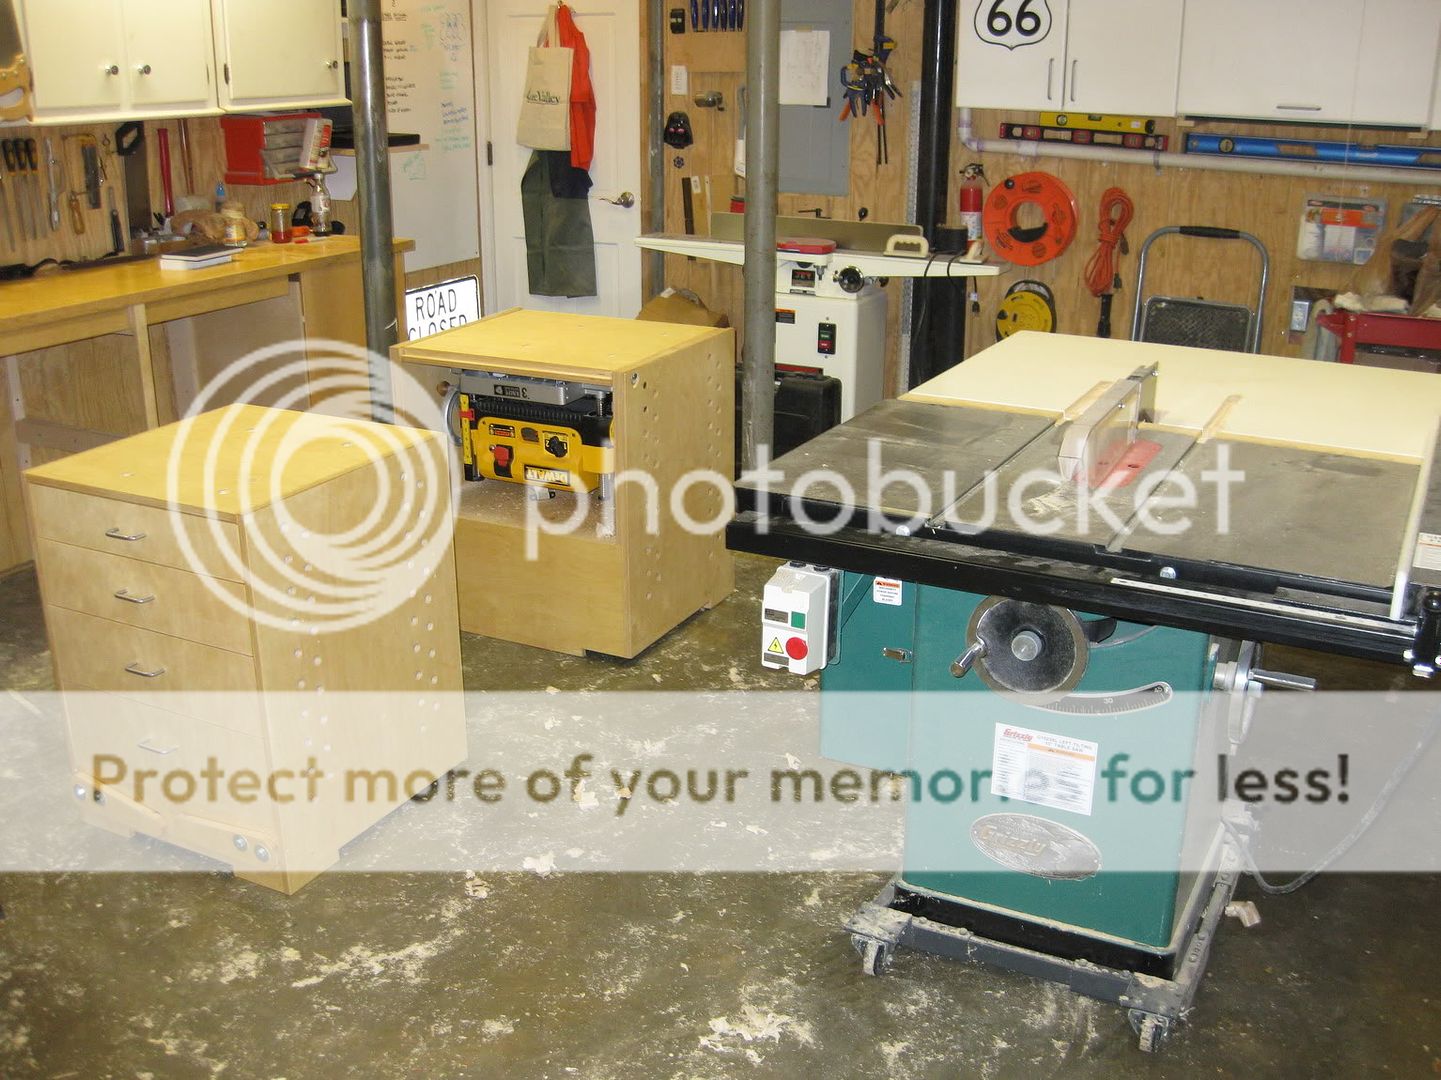
In the picture above, there are two mobile carts under that countertop.  They both have retractable wheels and can roll out into the shop.  The one on the left is a flip-top stand that holds my planer and the other is simply a stack of drawers.


Roll them out, lift the wheels and the two carts make a good base to support the workbench top.  The top is made of two separate beams that are 7 feet long and about 10 inches wide.  I used LVL for the slabs after seeing the "Gluebo" at Woodworking in America.  The extra rigidity of the LVL allowed me to get the top down to about 2 1/2" thick.


When it's time to stop for the evening, I am able to take the two top slabs and stand them in the corner.  Then I just roll the cabinets back under the counter and the bench is tucked away for the night.  The whole thing takes less than 5 minutes, including moving the table saw back over and driving in the car.

There's a lot more to share about this bench but this post is getting long and I suspect you may be shaking your head.  Coming soon, I will go into details about securing the top to the base cabinets, work holding accessories, and vise replacements.  Stay tuned for more!

Think I'm a visionary, or just plain nuts?  Either way, I'd love hearing what you think about the bench design.  See any work holding tasks that may be a problem for me?  Shout it out.

Tuesday, November 09, 2010

Blast From the Past - Table Saw Enlarger

Some dilemmas just don't go away, as today's Blast From the Past proves.  How many times have we all realized that a tool was just not quite as good as we needed, and tried to improve it?

When I was just getting started in woodworking, my kind wife bought me a small table saw.  To my beginner's eyes, this $300 beauty was all the saw I would ever want.  I built some great projects with that small saw, and it was good way to dip my toes in the hobby before diving in.  Eventually though I came to realize that bigger saws had more to offer than my little direct-drive universal motor saw could provide.  I became expert at rattling off the benefits to my wife:  the added power of a larger motor, the extra weight of a larger saw to combat vibration, the accuracy of a better fence, the dust collection allowed by an enclosed base, and a larger table surface than my starter saw provided.  When a deal popped up, I eventually sold off the saw to a co-worker and upgraded to a Craigslist Grizzly cabinet saw.

In the meantime though, I did try to improve the performance of my starter saw.  There are a few good ways to do this.  Zero clearance inserts - though the small Delta I had used a weird 1/8" thick plate so I had to make my own.  A better blade was a no-brainer, and I became a fan of the Forrest Woodworker II, thin kerf version of course.  A blade stabilizer didn't hurt with the thin-kerf blade either.  Also, don't overlook the benefits of a good tune up to make sure the saw is aligned properly - miter slot parallel with the blade and fence dialed in just right.  I even flattened the arbor washer on a piece of sandpaper to squeeze every last bit of juice out of the saw.

One thing I thought about doing, but never got around to was making a larger enclosure for my small saw to sit in.  You may have seen these around the web, and even Norm himself made a version on The New Yankee Workshop.  This type of extended table enclosure adds table surface and mass to a small saw, and it could help with dust collection also. Fancy versions may even have a better fence, adding accuracy to the setup.

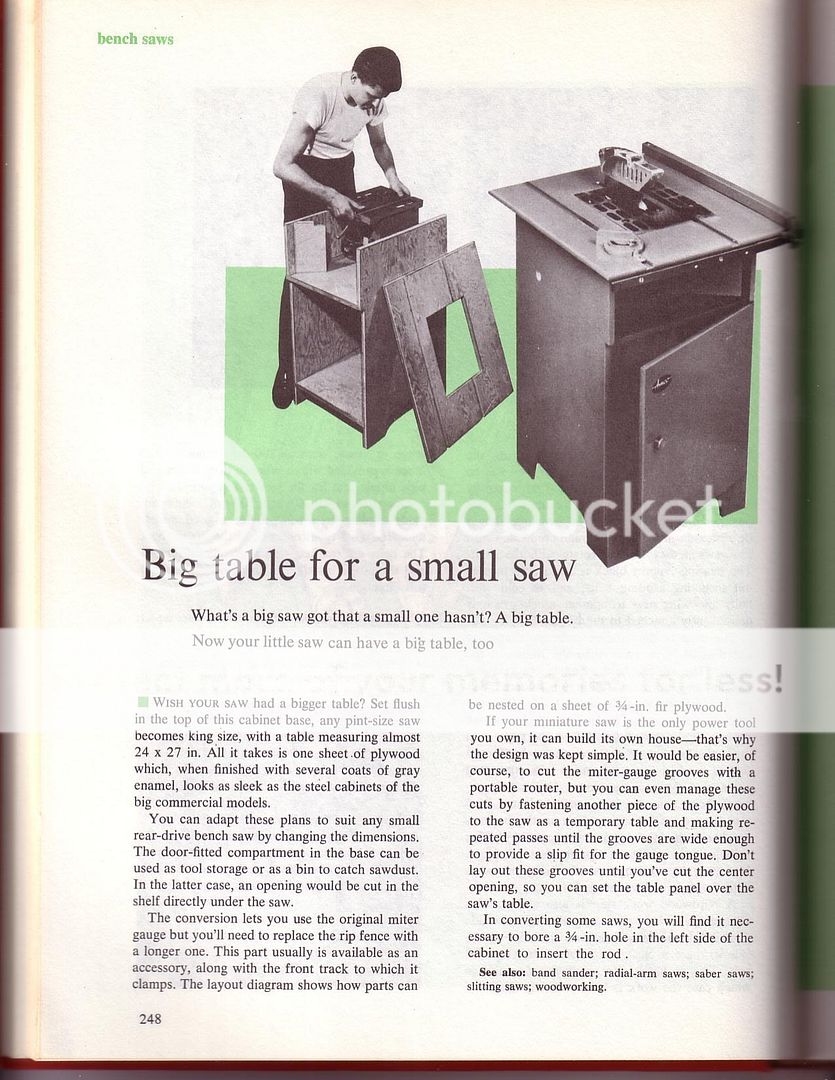
Proving that there aren't many new ideas, here is today's Blast From the Past - click for larger versions of the plans.

Click to Zoom
This table is designed to accept a very small saw - the opening is just 10"x13".  The larger surface of the enclosure is still just 24"x27", which just goes to show that saw sizes have grown over the years.  The plan efficiently uses just one sheet of plywood.  I would be tempted to make the top a little thicker, but maybe it's thick enough given how small and light that tiny saw must be.

Click to Zoom
While the exact dimensions in this plan are unlikely to be useful, the idea lives on today.  There is hope for small tools, and always a way to improve them.  Enjoy!

Did you have a similar experience with upgrading a "starter tool"?  Is there a tool you currently have that you want to improve?  Let's hear about it in the comments!