Showing posts with label shop upgrade. Show all posts

Monday, September 12, 2011

Moxon Vise with Metal Screws

Workbenches and vises have been very popular topics for magazines, bloggers, and manufacturers for the past few years. Thanks to Chris Schwarz and others, we have all been able to dive deeply into workholding theory for the shop. Building a capable workbench is becoming a rite of passage for modern woodworkers.

It doesn't look like this resurgence will slow any time soon. In fact, there are a couple great workbench builds going on right now across the web. For instance, check out Kari Hultman's blog, The Village Carpenter as she begins construction of a Roubo style bench. In addition, Marc Spagnuolo has announced that the winter build for The Wood Whisperer Guild will be a Benchcrafted Split-Top Roubo Workbench.

One design that has gotten a lot of recent attention is the Moxon Vise, which is a handy clamping accessory for working on the ends of boards. It excels at holding boards for dovetailing or tenoning with a hand saw. Based on a 17th century manuscript by Moxon, the common design spreading through the woodworking world comes from a recent article in Popular Woodworking Magazine by Schwarz. That guy is everywhere! The Moxon is a twin-screw vise that clamps on top of your workbench, so it raises the work up to a better height for sawing.

Schwarz's version of the Moxon vise
One downside to the Schwarz design is that it uses shop-made wooden screws, so you will need a threading and tapping kit.  This is about a $50 pain in the butt, and I've heard that the tapping kits are very finicky and tough to get working correctly.  On top of that, wooden screws will expand and contract with seasonal humidity changes so they may not always work smoothly.

After a little googling, I was able to find a cheap source for some 1" metal rod with Acme threads.  Using metal screws avoids the problem of working with a threading kit, and another bonus is that the metal screws are 4 tpi (threads per inch).  The wooden threading kits I found were 6 tpi, so the metal screws should screw in and out 33% faster!

I got the stuff from surpluscenter.com and the part numbers you need are 1-2983-100-3 for the threaded rod and 1-2984-100N for the nuts. I tried to find some surplus Acme rockets like Wile E. Coyote used, but no luck there.  Total cost for 3ft of threaded rod and four nuts was about $60 plus shipping.  This is enough for two Moxon vises, so the cost is about the same as a threading kit.

This is all the hardware you'll need for a couple Moxon vises

The first task was to cut up the threaded rod into smaller pieces.  I needed 7" lengths of thread for my design, which yields a 2 1/2" capacity in the vise.  If you want to hold thicker boards, you may need longer screws.
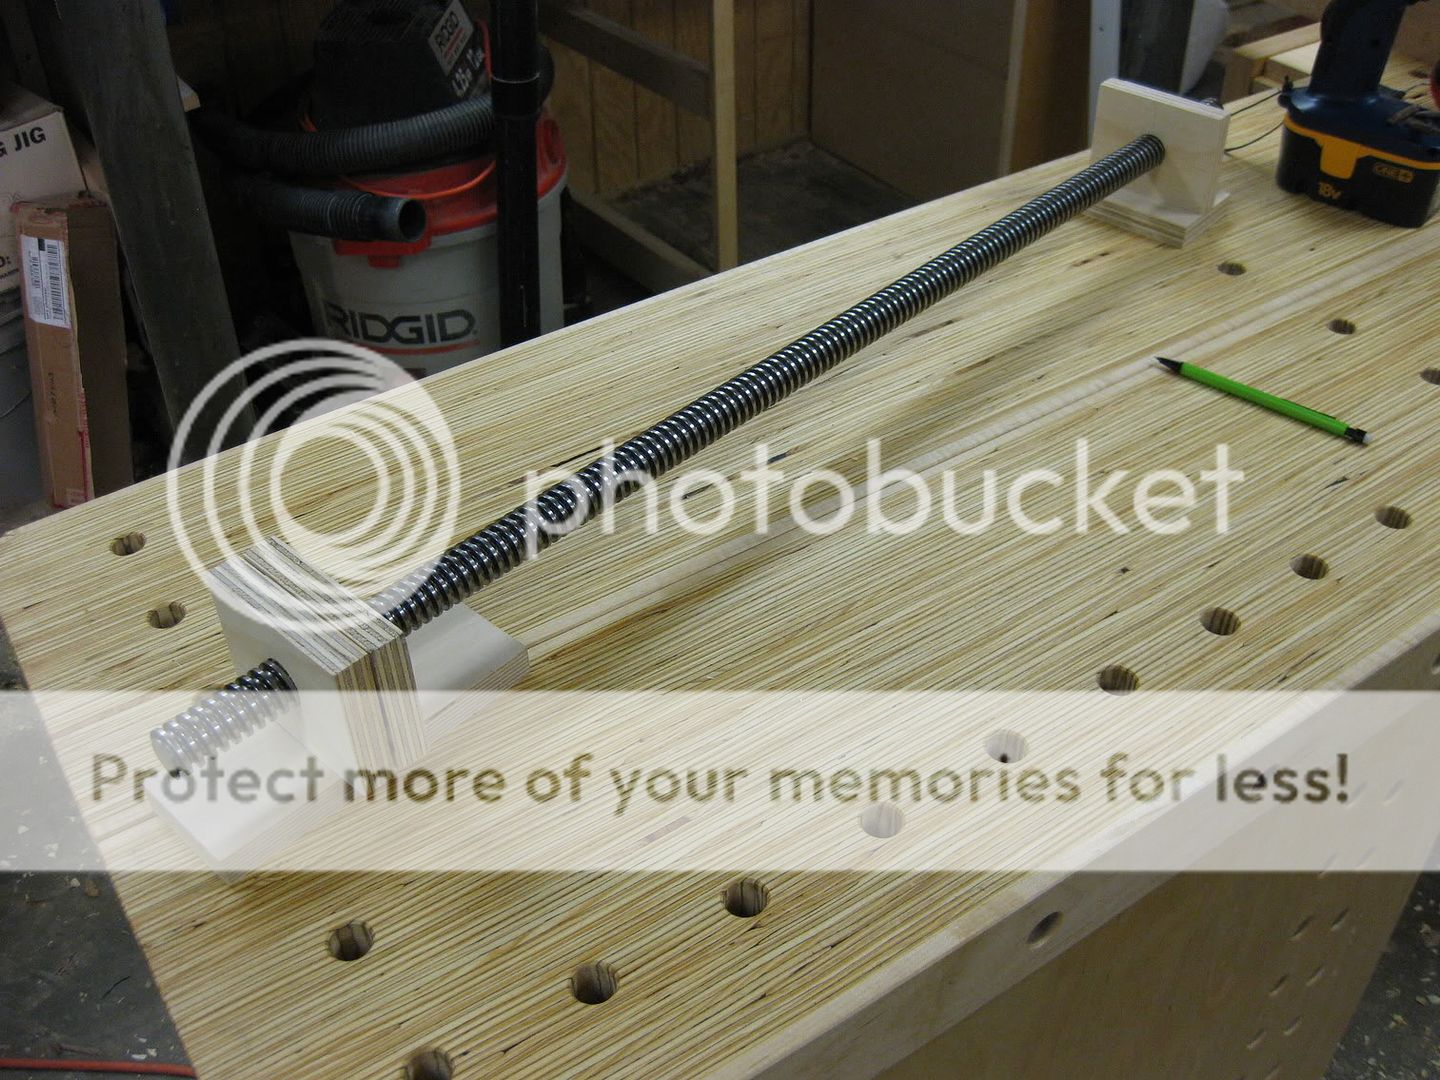
I rigged up these little stands to make cutting the threaded rod easier

I wanted to cut 7" sections of the rod for my purposes

You could go crazy with a hacksaw, but I used a sawzall to make the cuts.
Slip the blade into the slot in the stand to keep the cuts as straight as possible.

Flip the stand on its side and use a metal vise to clean up the cut.
Get it close to 90 degrees, and remove all sharp edges that can injure you.

My neighbor is a wood turner and he was kind enough to turn a couple walnut handles for me.  Did I mention how much walnut we have?  The plan was to epoxy the threaded rod into the handles, and it worked like a smelly, sticky charm.

One of the walnut handles my neighbor made, a section
of threaded rod, and 5-minute epoxy.  What could go wrong?

Put the epoxy into the hole, and work the threaded rod down into
the epoxy so that the threads get filled up.

Next, I needed to make the vise body and front chop.  I used a seasoned 2x10 that was laying around the shop (well, my neighbor's shop...but he looked the other way for a couple seconds too long!)   I stayed pretty close to the dimensions from Schwarz's magazine plans.  With luck and planning you will end up with a little more than 24" between the screws.
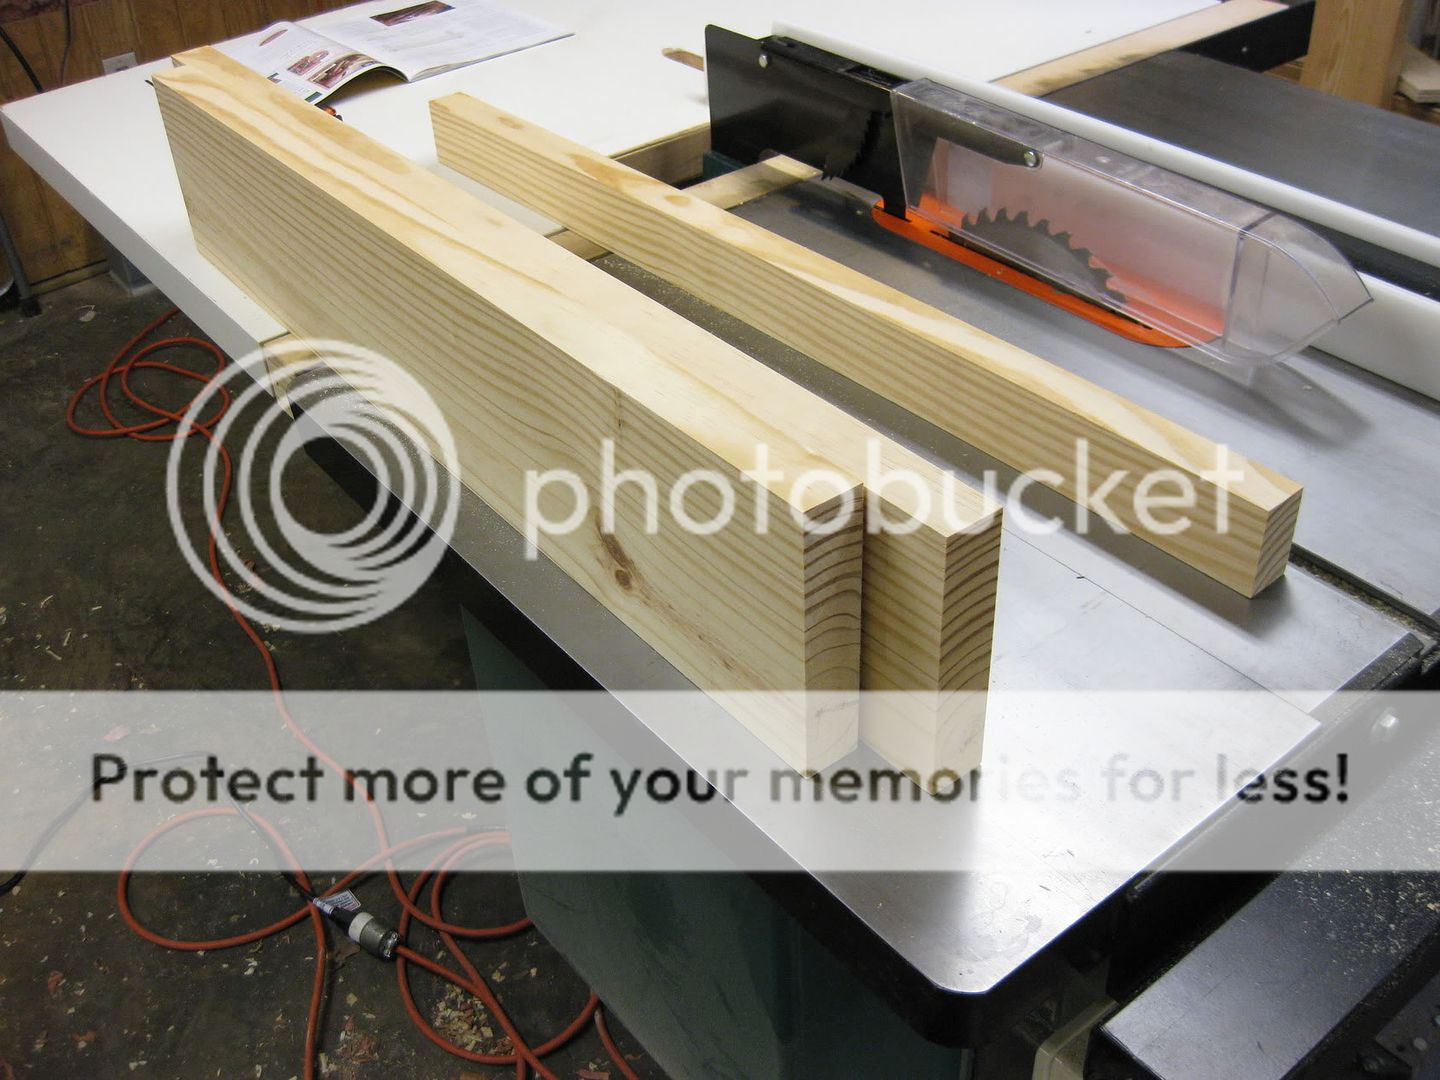
Front vise chop, rear body, and stabilizing support were cut and milled square.

The screws go through the front chop, and thread into the rear body of the vise.  For the wooden-screw versions, you would need to use a tapping kit to cut some threads in the holes in the main body.  I simply drilled some 1" holes and sunk the nuts into the back of the body so they wouldn't spin.
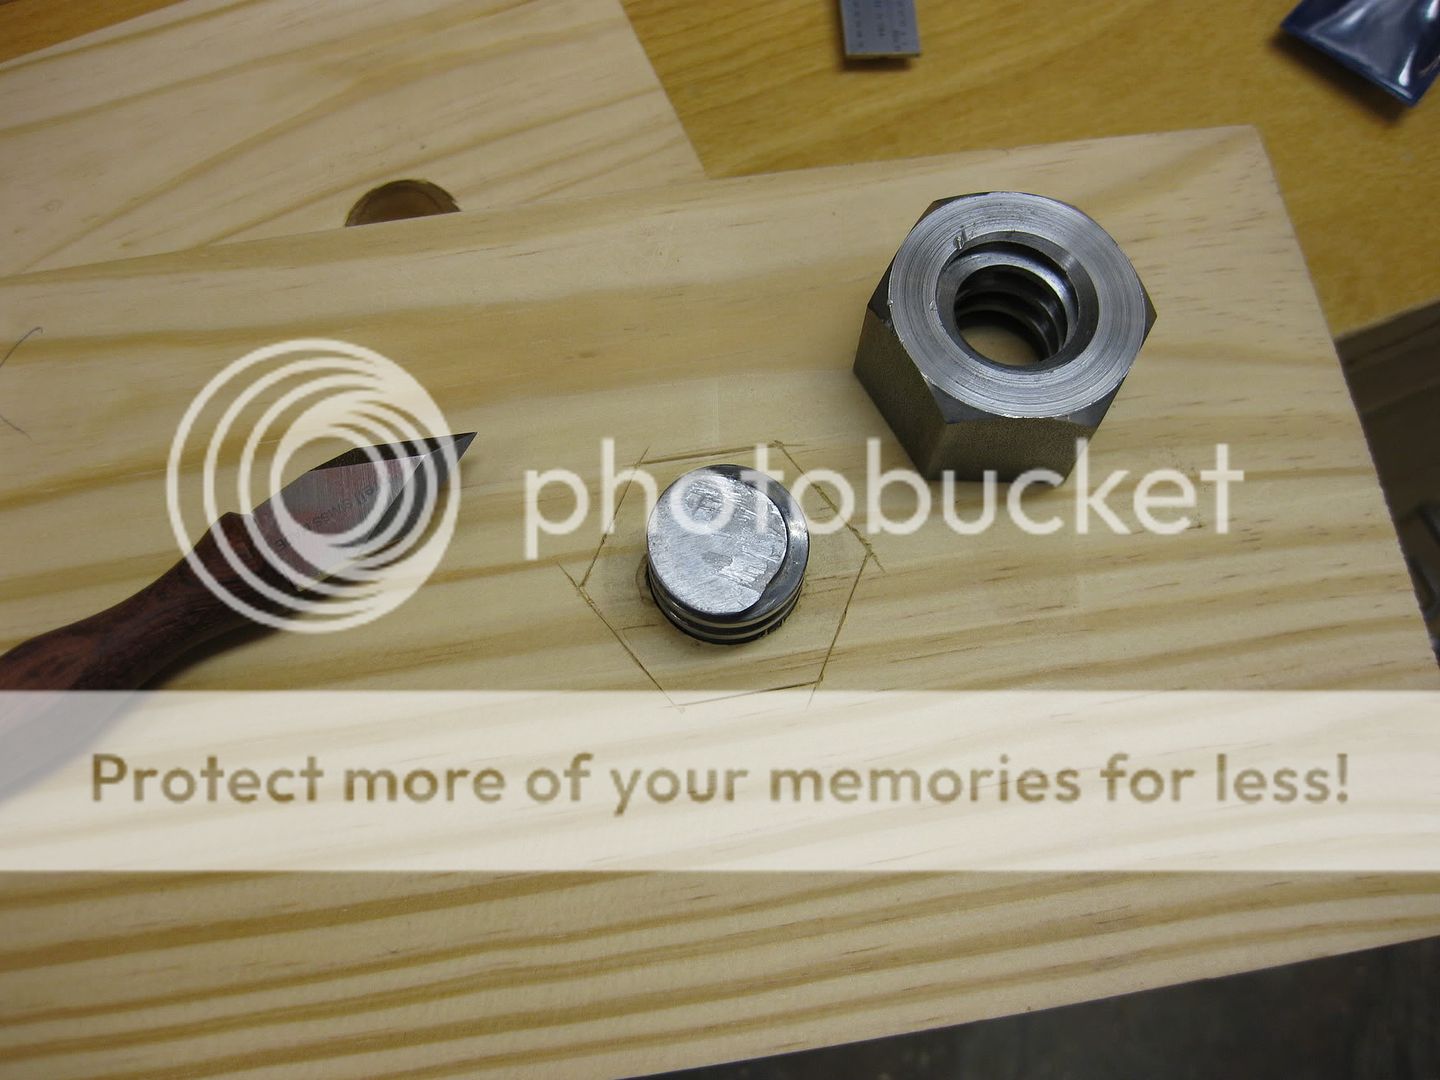
I used a knife to mark the locations of the nuts on the back of the vise.

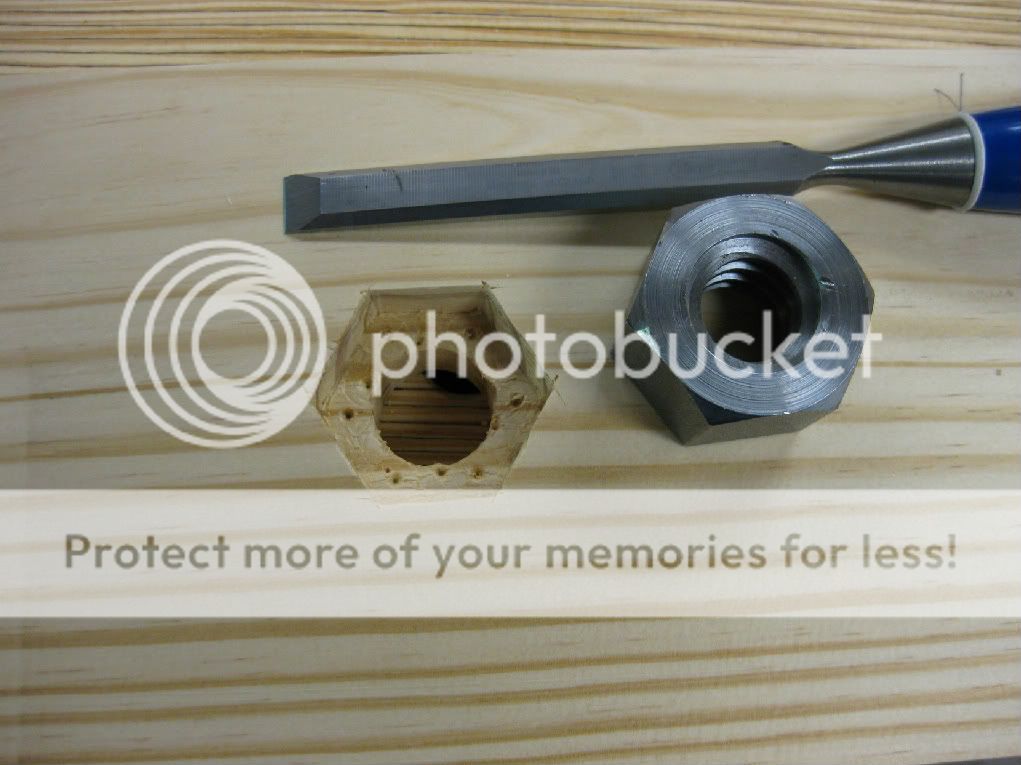
A little drilling and chiseling created a recess for the nut to sit in.

The nuts are just friction fit, though a little epoxy would work fine also.

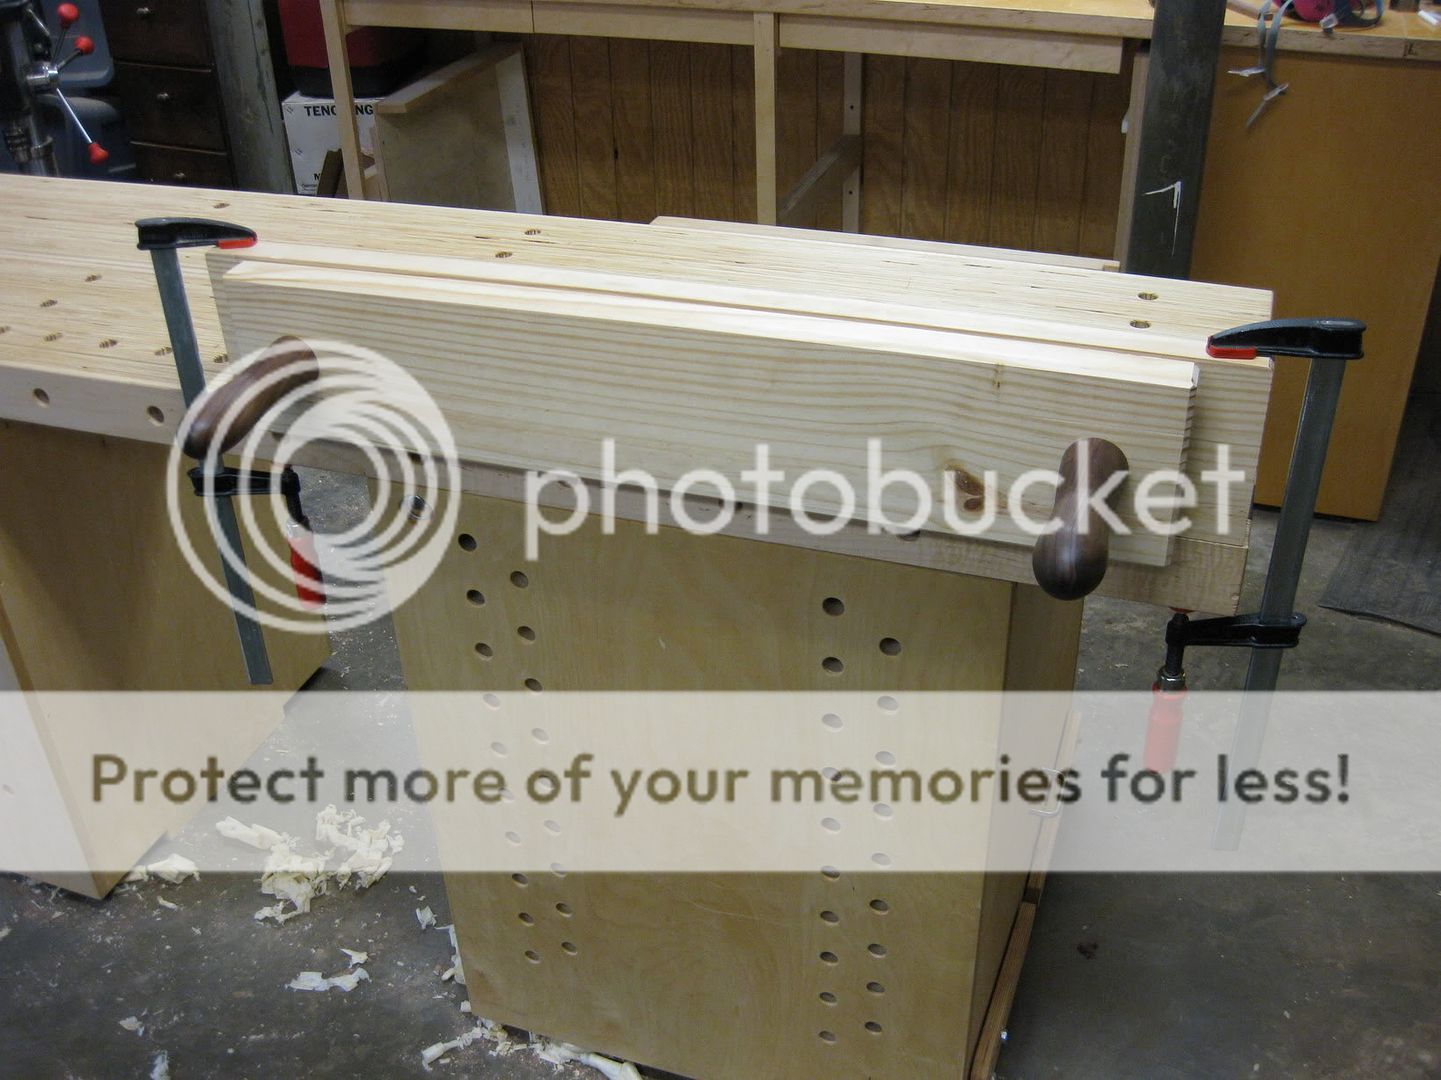
Here is the completed Moxon vise, shown from the back.  You can see why the nuts are countersunk, so they won't rotate when you tighten the screws.

All the edges are chamfered, and a little danish oil makes a good finish

The Moxon vise sits on top of your regular workbench, and you can just clamp it down to the bench top.  This provides a rock-solid way to clamp a board for working on the end.  It's great for hand sawing, and also raises the workpiece up to a much more comfortable height.
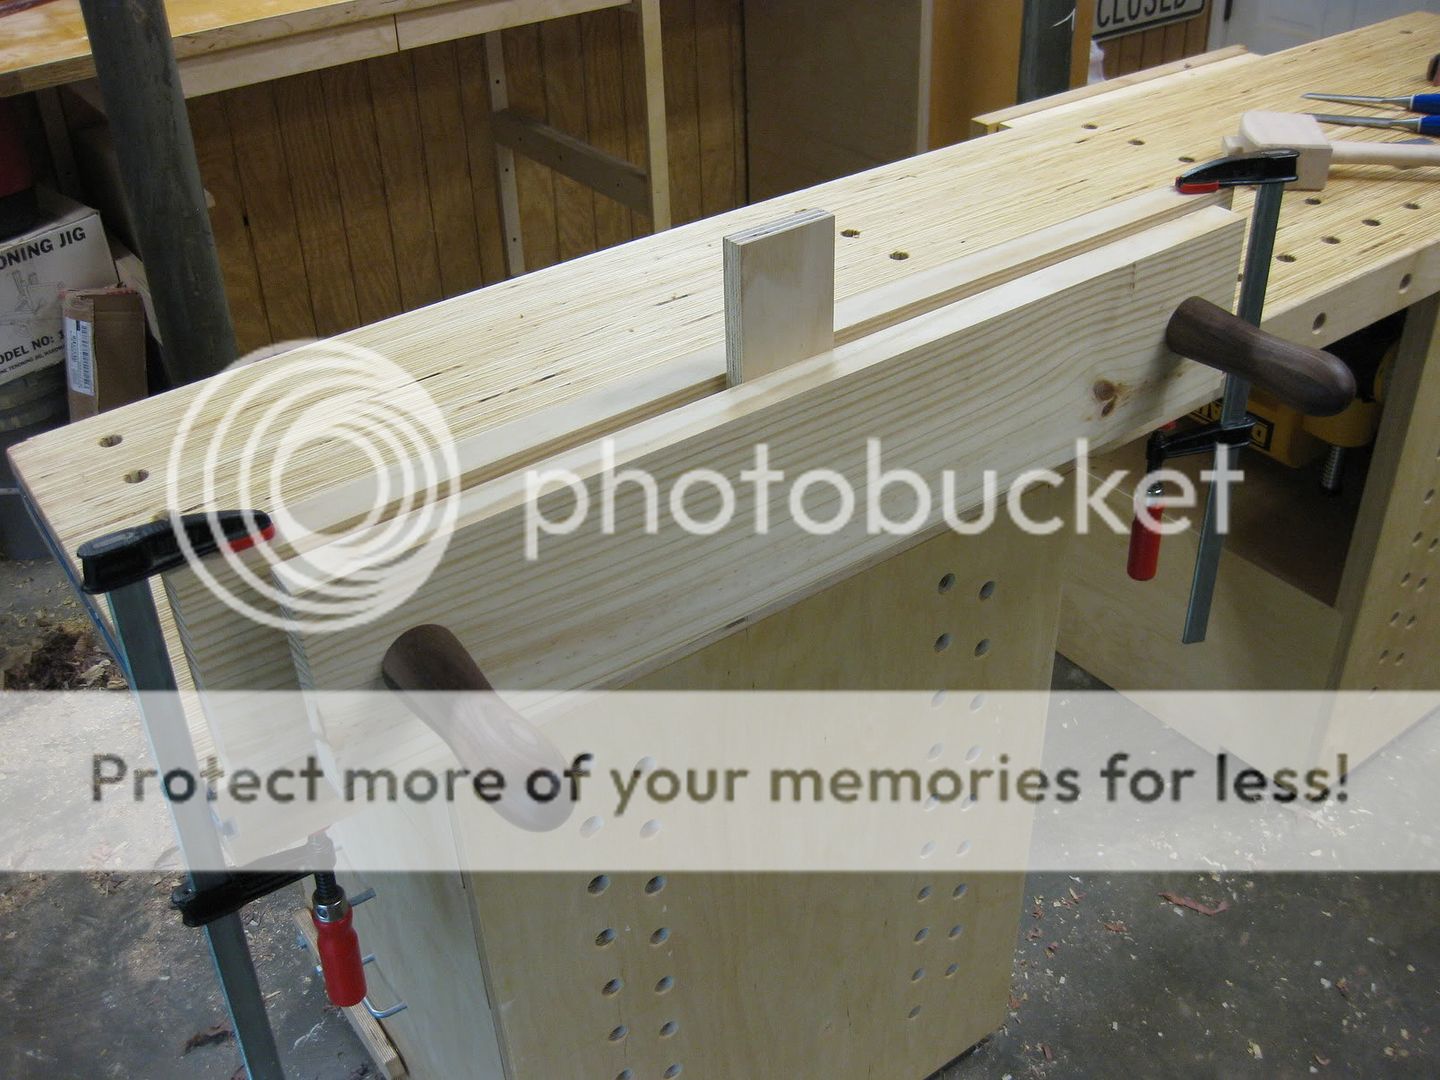
With 24" between the screws, you could dovetail the side of a cabinet in this vise.

I can see why this vise has become so popular among woodworkers.  It's an easy build, and really is specialized for working the ends of boards.  Combine this with other vises on your bench, and you will be all set for any hand tool woodworking.

Here is a picture of my wacky English woodturning neighbor giving the vise a test drive.  I think he likes it!

He's having a little too much fun!
Have you built a Moxon vise?  Let's hear about it in the comments! 

Monday, July 11, 2011

Apologies to Benny Hill

My last post was about a cart I built for my short drill press, and the possibly dangerous creative use of a couple rachet straps to hoist it onto the cart.  It had been sitting on the floor for years, and I finally managed to raise it up to a better working height.  Of course, I didn't plan ahead so I had to order the wheels.

The wheels came in, and hilarity ensued.

Thursday, June 02, 2011

Not the Brightest Idea I Ever Had

I did something yesterday that worked just fine, but was a little risky.  I got scolded when my wife found out about it, and that says "blog post" to me.

For almost two years, my drill press has been sitting on the ground.  It's a full size drill press with a short column, that's meant to be mounted on a stand.  It's way too heavy to be considered a bench-top tool, since there's no way anybody could move this thing alone.

Floor level is not ergonomically correct
I have a bunch of drill press tasks coming up, and I'm getting tired of crouching down to use the drill press anyway.  I've also had an extra sheet of nice Baltic Birch plywood kicking around the shop for a while, earmarked for a drill press stand.

To those who know me as an uber-geek, here is proof that I don't model everything in SketchUp:  my rough sketch for the drill press stand.  I suppose I lose some points for blogging about it, but surely I am still ahead in the accounting.
Very technical plans
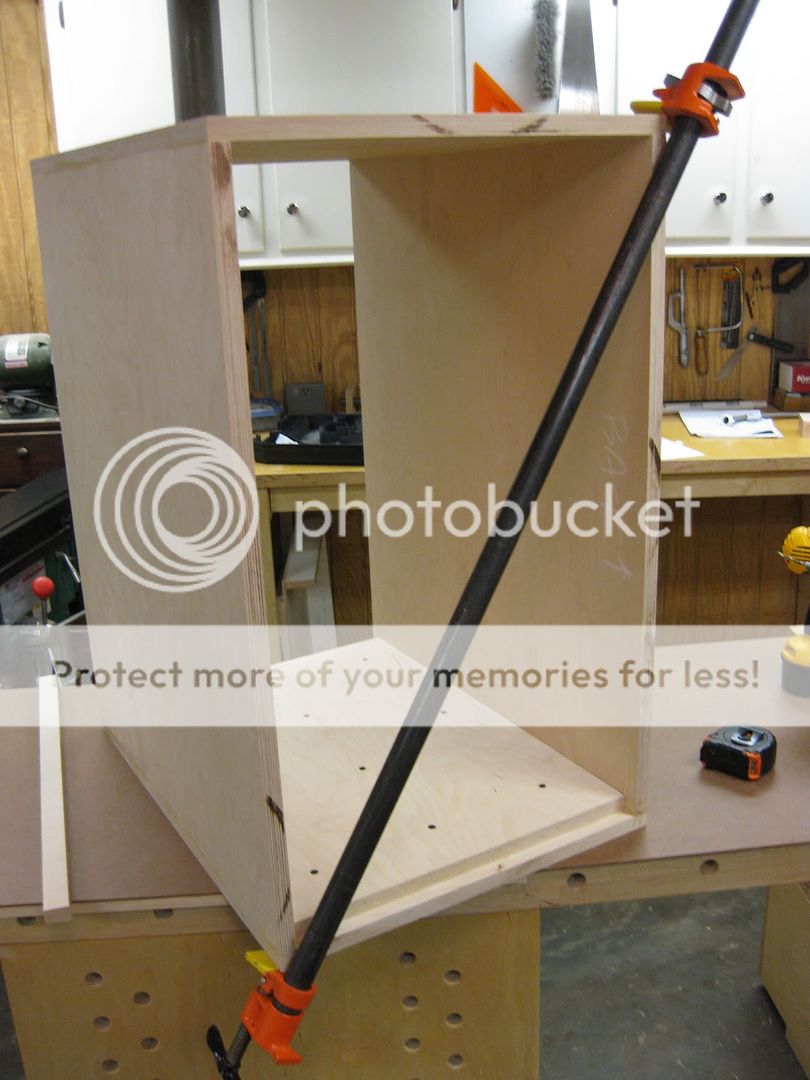
After a very quick session with the table saw, I glued and screwed the cabinet together.  Here is a shot just before I added a 1/2" plywood back.  It's upside down, and those  of you with eagle eyes will notice that I reinforced the top to prevent sagging from the heavy drill press.

Drill press stand - almost complete
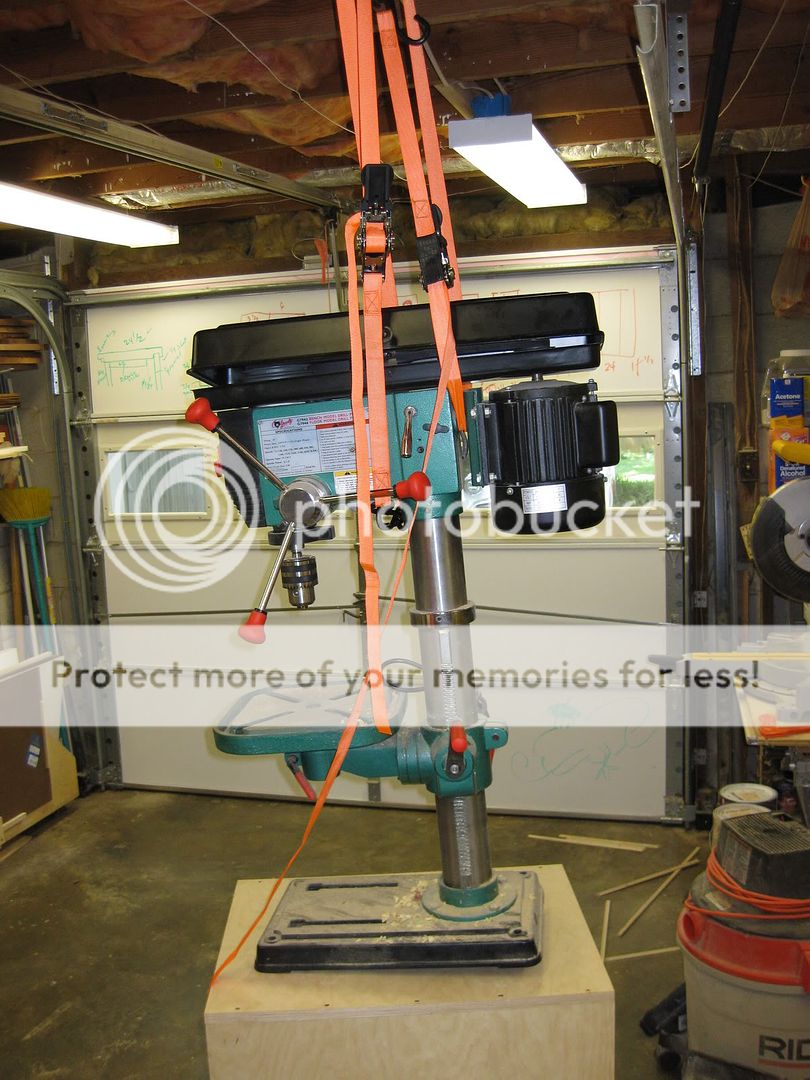
Now, here is the not bright part.  I wanted to put the drill press on the new stand, but I couldn't lift it alone.  It would have been tough even with two people honestly.  So I went out to my truck and got a couple ratcheting tie-down straps.  A few minutes later and I had the drill press positioned under a convenient 2x4 in the ceiling, ready to hoist.

Hoping my wife doesn't see this
It was slow going because the straps would only tighten about 8 inches at a time.  I would raise the drill press with the first one, then switch to the second strap and then back again.  It was a little nerve-wracking. After a couple of minutes of clicky-clicky ratcheting, I had the drill press high enough off the floor to slide the new stand underneath.  After I started breathing again, I remembered to take a picture.

Whew!  Made it!
All's well that ends well, or at least that's what I told my wife.  I will be adding some casters eventually, and likely some drawers inside the cabinet.  For now, I am just happy to be up off the floor.

Have you ever pushed the limits of foolishness?  Tell us about it!

Tuesday, May 31, 2011

May Activities

A lot has happened in the last month, though you wouldn't know it from my lack of posts.  This post will be a bit of a brain dump, just to get the blogging area of my head aired out a bit.

For much of the past month, I was working on preparations for the newest Guild Build over at The Wood Whisperer Guild.  It's a Greene & Greene inspired Adirondack chair, and Marc and I held a lot of design sessions to get the plans finished.  With these Guild Builds, I started simply helping out with the SketchUp work but it has evolved over time to really be a collaborative design effort between the two of us.  I will finally be building one of these projects, and brought home a few cypress boards the other day to begin construction.  This one will be fun, so stay tuned.

Greene & Greene inspired Adirondack Chair

I also started work on a walnut desk for my wife.  It will be a modular design, and the top is already completed.  I bought a metric butt load of walnut recently and this is the first of many walnut projects to come.

Walnut Desk - Top is completed
There have also been some upgrades to the shop, as always.  After using my "Swiss cheese" workbench for a few months, I have decided to enhance my work-holding by building a Moxon-Schwarz saw vise.  The design was featured in Popular Woodworking Magazine last year, but I made a few modifications.  The biggest change I made was to use metal screws instead of shop-made wooden threaded screws.  I found a great cheap source for some 1" diameter, 4 threads-per-inch metal screws and matching hex nuts.  You'll probably be seeing more about this later, but here is a quick teaser shot.

Moxon-Schwarz Saw Vise
Metal Vise Screws?  Crazy!
Summer is fully here in Georgia, and it is getting hot.  In the coming months I'll be working on the Adirondack and the Walnut Desk, with a couple detours into other fun little projects. 

Thanks for checking in!  As always, questions and comments are very welcome.

Wednesday, December 29, 2010

Workbench: Planing Stop

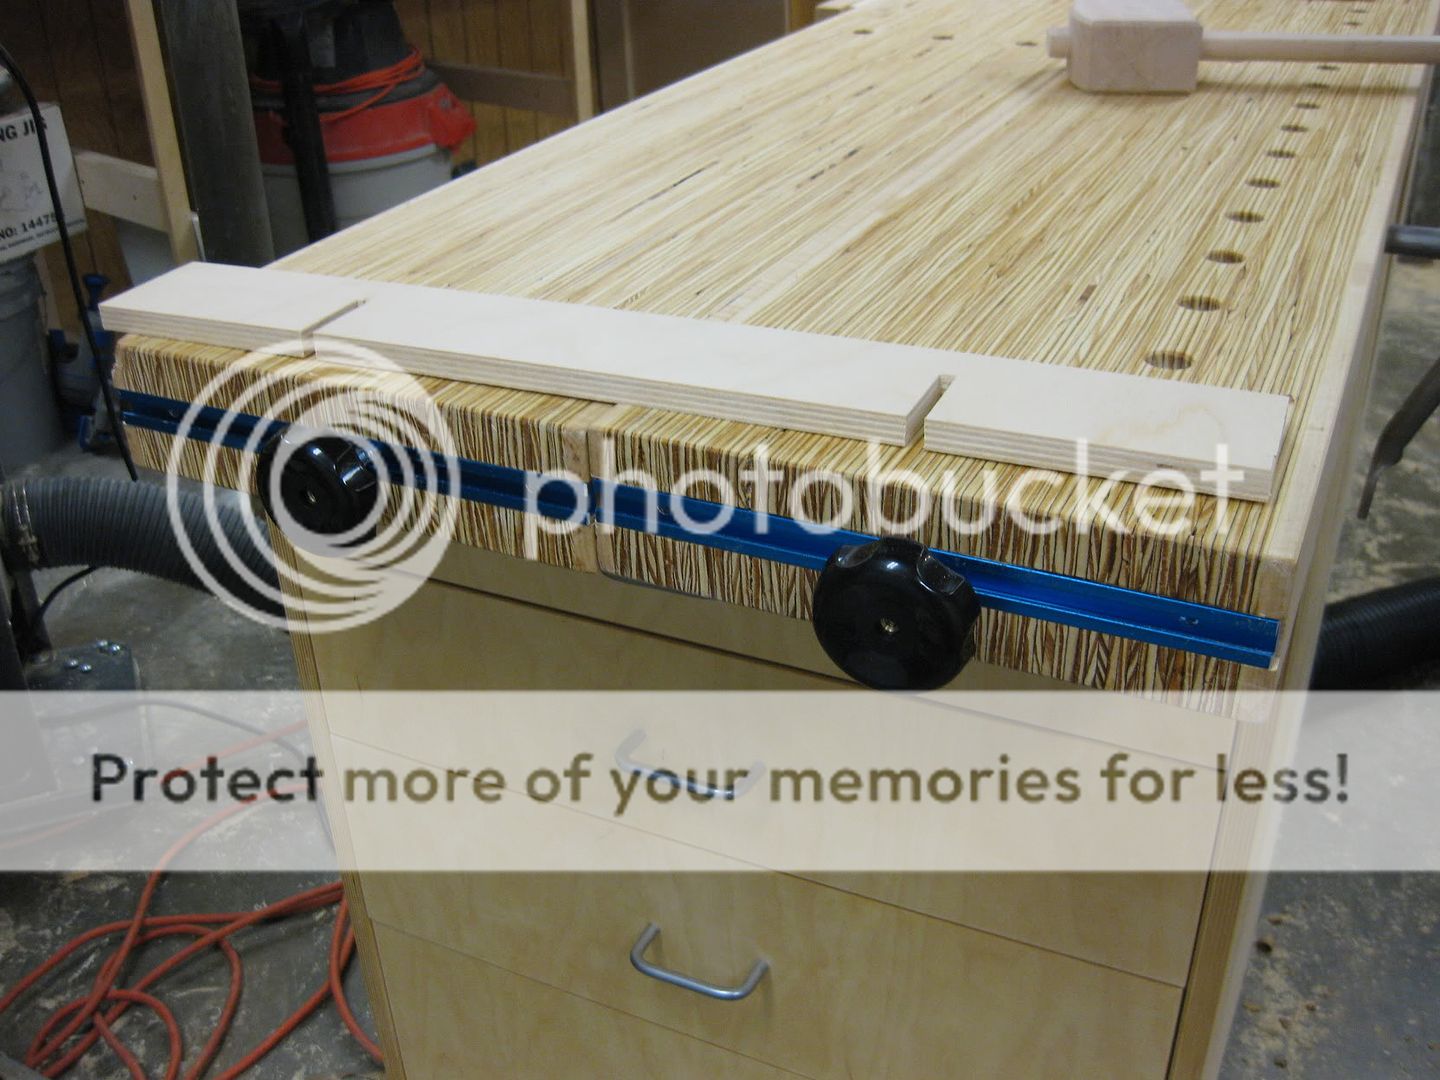
Here's an old idea you've seen before, perfect for a lazy blog post on December 29th.  At the left end of my weirdo no-vise workbench I installed a planing stop.  It's just a half inch thick piece of Baltic birch plywood I had in the scrap bin, attached to the end of the bench with some T-Track and a couple knobs.

Planing stop works great at the left end of the bench
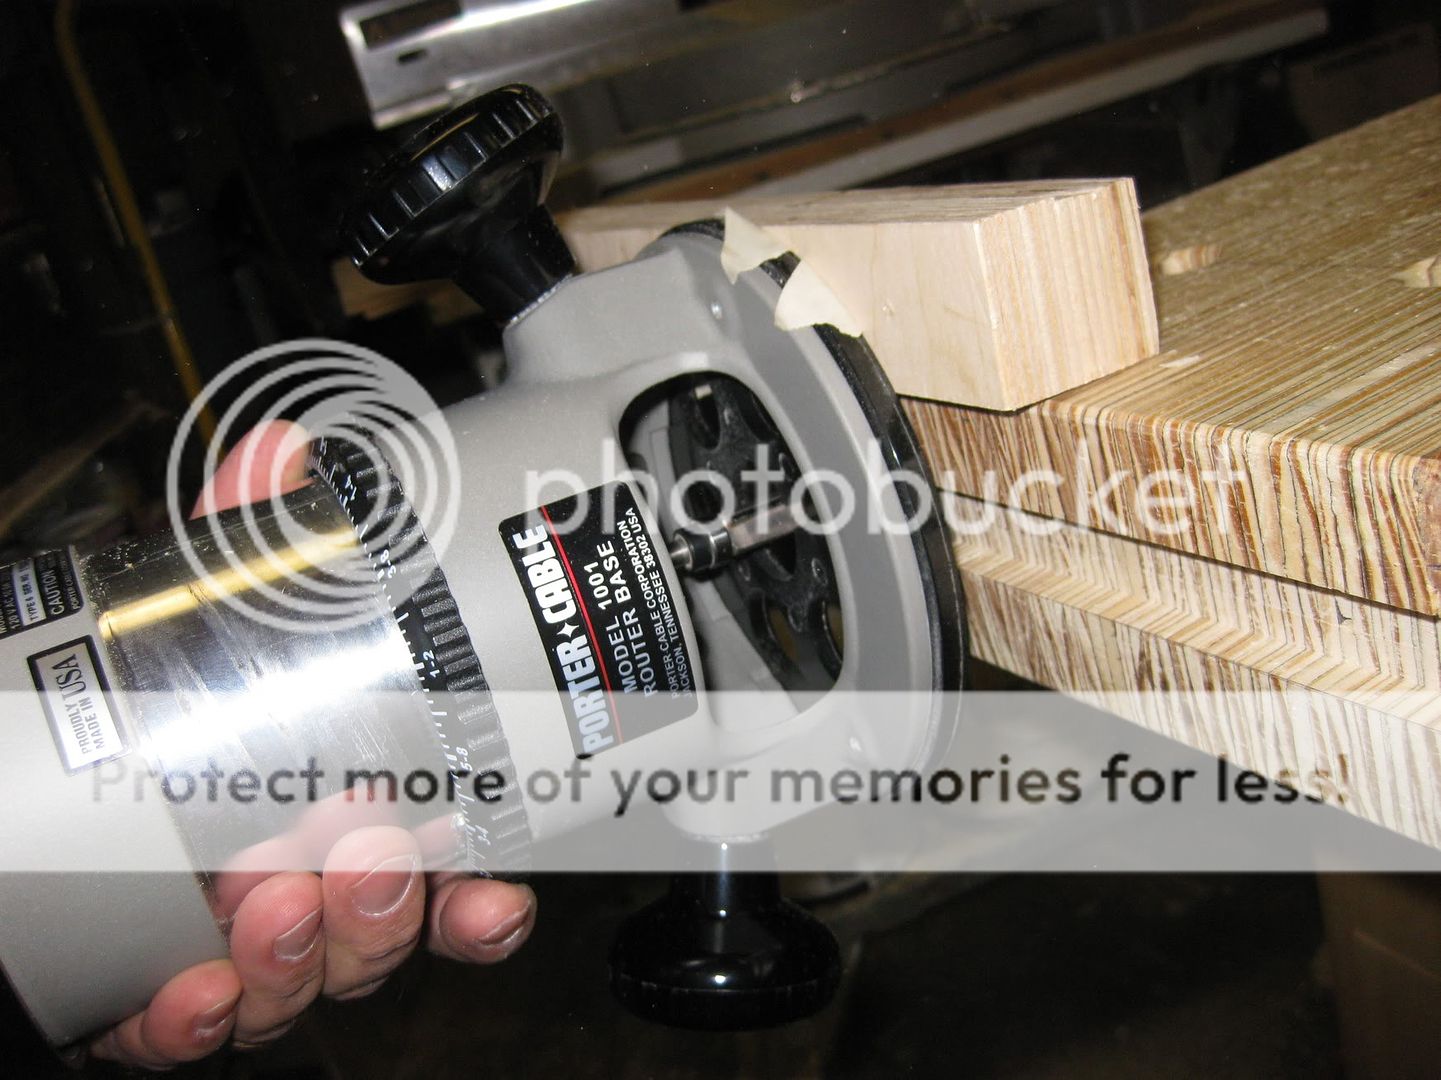
It was a little tricky to come up with a way to cut the groove in the end grain of the top slabs.  I considered (and even started) doing it with a handsaw and chisel, but the results were pretty horrible.  Next, I actually stood the bench slab on end and rigged up a superbly unsafe router jig.  In the picture below, you can see that (1) I am an idiot, and (2) that my wife's car is not in the shot. I am at least clever enough to behave foolishly while she is away from home.

To my wife: I swear I didn't do it this way
Thankfully, common sense took back over and I stepped away long enough to come up with a simpler solution involving some double-sided tape, a scrap of wood, and both feet planted firmly on the ground.

Routing a groove for T-Track
Once the groove was there, it was simple to cut some T-Track to fit the two bench slabs.  A few screws later, and the track holds a couple T-Bolts with handles from Highland Woodworking.  It's so convenient to have them right around the corner from me, but pretty dangerous for the wallet too.

Planing stop attaches with a couple knobs - easy to adjust.
Voila! One removable planing stop.
I like this solution because it is simple to use, and also because it fits my theme of having a bench that breaks down daily.  When it's time to quit, the planing stop board pops free, and the knobs just slide right out of the track and into a drawer.  Most of the time the parts stay in the drawer, since I don't use the planing stop every day.

Have a happy New Year!

There are other options for planing stops too.  What do you have on your bench?  Or do you just flatten boards with a planer like nature intended?

Tuesday, December 14, 2010

Tail vise? I Wonder.

Wow, the titles to these posts are getting silly.  In this case though it's accurate also.  There is no tail vise on my bench.  Blasphemy!  For that matter, there is no face vise either, but we'll get to that later.

Because of my desire to break down the bench for daily storage, I challenged myself to come up with work holding solutions that don't require vises permanently mounted to the bench top.  Vises add weight and complexity, and the good news is that with a few accessories they aren't needed.  Hey, I'm not saying I wouldn't love to have a nice Benchcrafted Tail Vise, but it's not going to work on this bench.

If you haven't been following along, here is the bench in all its naked vise-free glory.


For the tail vise duties, I turned to a Veritas Wonder Pup.  This is a clever little gizmo that seats into a standard 3/4" dog hole.


I chose the the Wonder Pup because it has a shorter shaft than the Wonder Dog, so I can use it in any hole in the bench without hitting the cabinets below.  Both version have a total range on their screws of about four inches, so as long as your dog holes are closer than that you have total coverage to hold any length board.  In the picture above you can see that the first hole in the front corner is about three inches in from the end of the bench.  This is helpful because the handle of the Wonder Dog will overhang the end of the bench and be easier to spin quickly.  The screw pitch is fairly tight on these, so for big adjustments I hold the Wonder Pup by the screw and shake it around until the shaft spins around like a hula hoop.

To hold a workpiece to the bench, just put a regular bench dog at the other end and use the Wonder Pup to apply pressure.  As you can see below, even with thin stock the dog can be adjusted low enough to be out of the way.  By the way, I don't ever plane 1/4" thick plywood.  This is just to show the options for holding thin stock.

It's possible to get a bench dog low enough to hold 1/4" thin material.

Even among fans of the Wonder Dog, they will agree that it isn't great for working with thin stock.  The block on the end is 5/8" thick so it works fine for 3/4" or thicker material.  You often see the suggestion to add a thin tapered block to the end of the Wonder Dog, and the two screw holes in the block make this possible.  You also sometimes see the suggestion to add support shims underneath a workpiece to hold it up higher off the bench, but the difficulty is needing a lot of different thicknesses and widths to support different sized boards.

The standard Wonder Dog isn't great at holding thin stock.

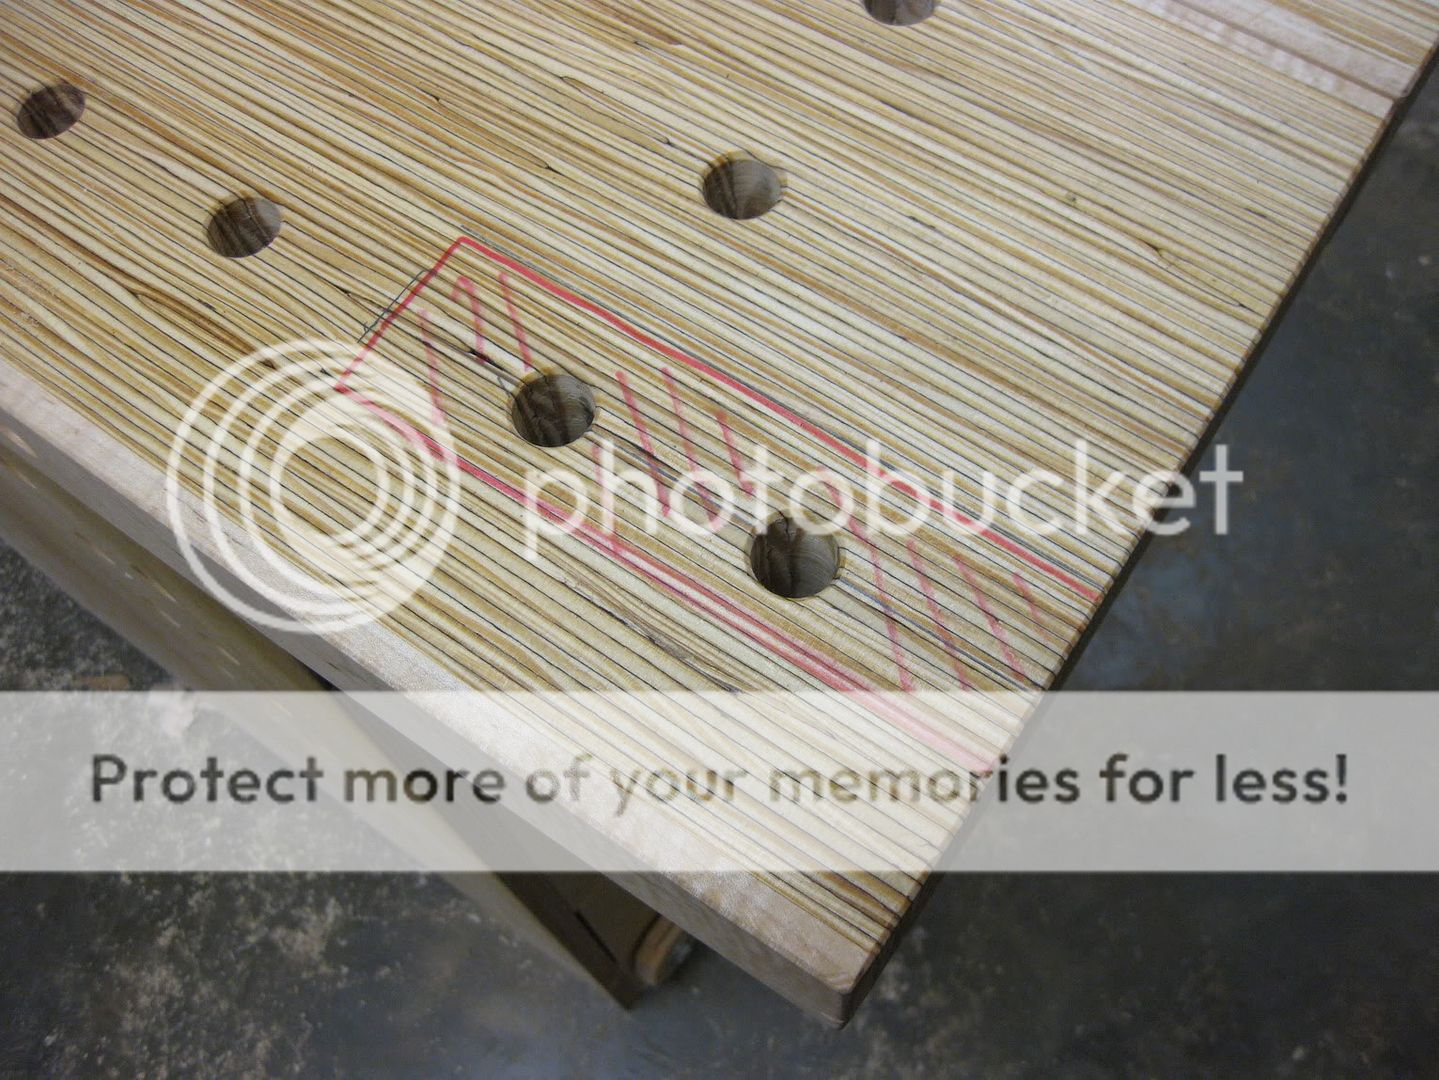
All of the information above is old hat if you have read about workbenches elsewhere.  This is where I am going to take you off the beaten path.  Instead of messing around with shims or tapered blocks, I recommend making a shallow pocket in your bench top for the Wonder Dog to sit in.  Here is the outline of the pocket, just slightly wider than the head of the Wonder Dog.  The total length is about 7 inches so that both dog holes can still be used.

The plan is to remove the area marked in red.

To make the pocket, I made a quick router template.  I hogged out most of the material with a straight bit, then finished up with a dovetail bit around the edges.  This creates a sliding dovetail so that I can use a filler block in the pocket when I don't need it.  I used an 8 degree dovetail bit since I was trying not to undercut the LVL too much.  In a standard hardwood bench I don't think the angle would matter.

Use a router to create a sliding dovetailed pocket in the end of the bench.

The pocket is 1/2" deep, so the head of the Wonder Dog sticks up only about 1/8" above the bench surface.  This is adjustable, so you could of course raise the whole assembly to get anything between 1/8" and 5/8'.  With this pocket, the Wonder Dog is able to clamp thin stock like a champ.

Wonder Dog + 1/2" deep pocket = thin stock clamping goodness

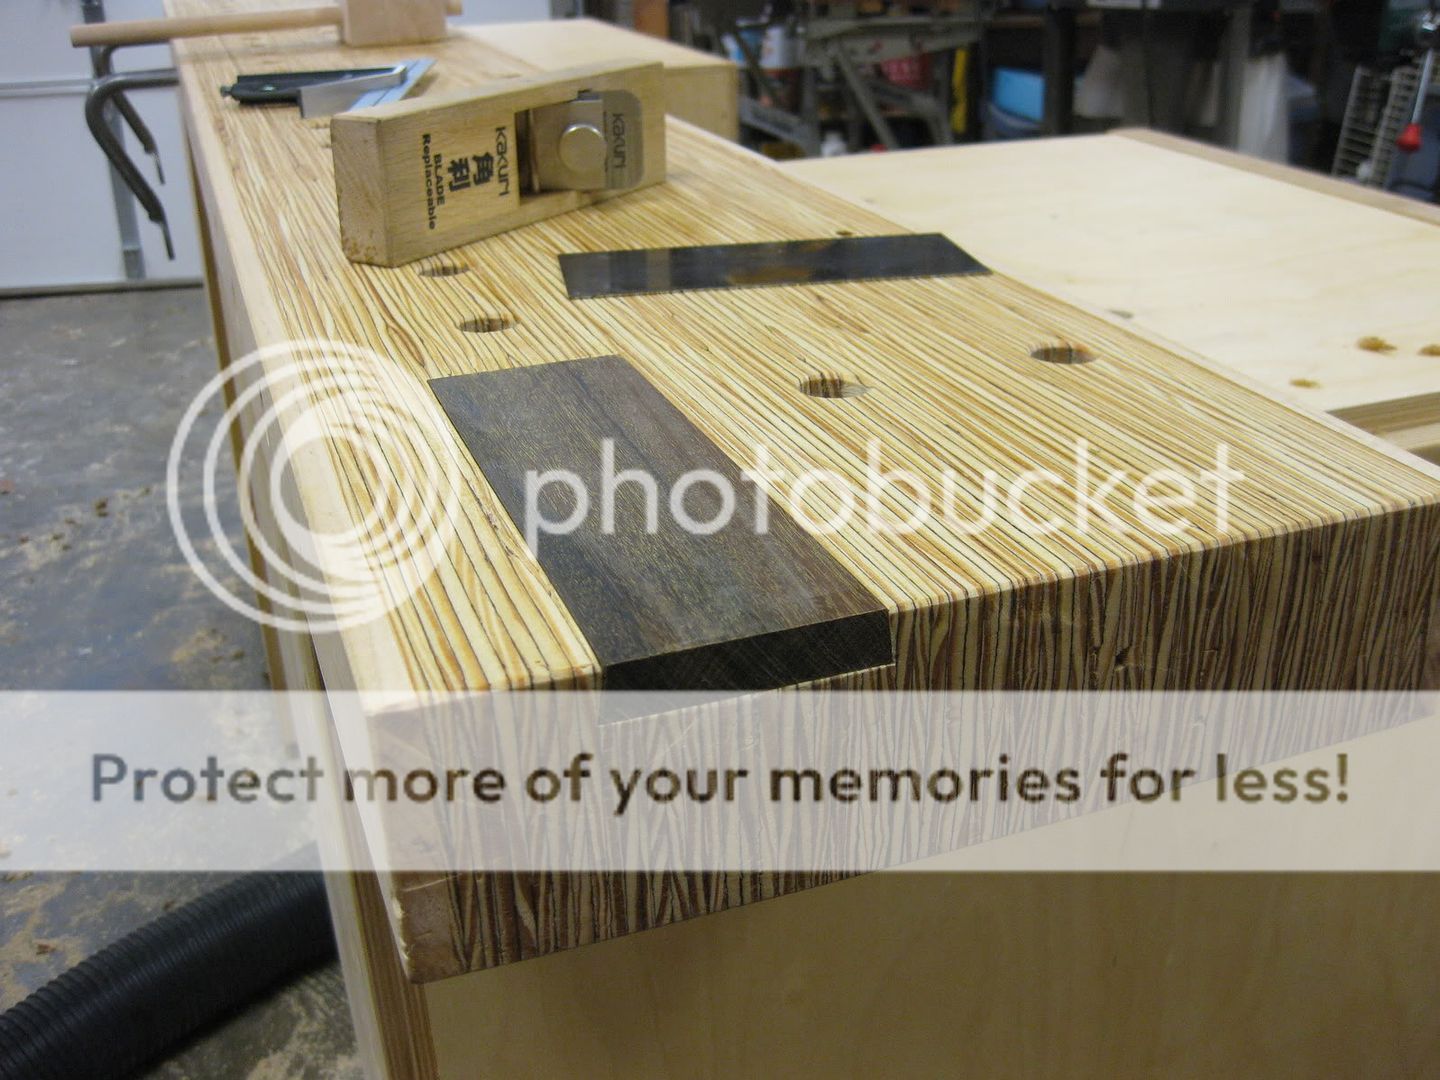
The next trick is to make a filler block to close up the pocket when it's not needed.  Thanks to the dovetailed sides of the pocket, this can just slide in from the end of the bench. I made a block out of some Ipe in my scrap bin, but any hardwood should be fine.  I cut the block on the table saw to get the 8 degree sides and snuck up on a nice friction fit with a hand plane and scraper.

Filler block should be a nice friction fit
The block will be easier to slide after the two holes are drilled in it.

After I had the block fit correctly, I used a forstner bit to mark the locations of the dog holes from under the bench.  Then just drill the dog holes in the filler block and chamfer the edges of the holes.

This little modification really helps get rid of a big limitation of using the Wonder Dog as a tail vise.  When you want to work on thin material, just slide out the filler block.

Holding thin stock - filler block removed

Most of the time the filler block stays in the pocket, and the Wonder Dog works normally.

Filler block does not affect normal operation of the Wonder Dog

There are a couple other tips I can give you.  If you are trying to plane a thin board that is also less than two inches wide, you may find that the end wants to sink down into the pocket since it is unsupported.  For this, I kept a little offcut from the filler block and put it in the pocket to support the workpiece.  I haven't ever needed it, but I keep it in the drawer just in case.

Narrow boards may need a little support to keep them out of the pocket

One last thing about the Wonder Dog is that the top of the anchoring shaft sticks above the holding block.  This can interfere with planing, even on 3/4" thick stock.  This is another great reason to use the pocket even on thicker stock - to get the shaft out of the way of a plane.  It's not all that problematic though since most right-handed woodworkers will plane away from the shaft.

Top of the shaft can interfere with planing

I'm not suggesting that this little modification makes the Wonder Dog the perfect tail vise. For a permanent bench I would probably still consider a more traditional tail vise, just for the convenience.  For me though, this is a good enhancement to make the relatively cheap Wonder Dog perform a new trick. Sorry about that.

What type of tail vise does your dream bench have? Next time, more bad puns!  Thanks for reading.

Tuesday, December 07, 2010

Workbench: Floating Bases

One of the key features of my workbench is the ability to take it apart and store it away quickly.  Like every guy with a small shop, I am trying to put all my stuff on wheels.  I came up with the idea of using base cabinets under my workbench instead of the more typical sawhorses.  The bases are an important part of this design, both for workholding and for stability.  They needed to be mobile but still sturdy enough to support the benchtop with all the forces from planing and pounding.

The retractable wheels on the bases allow me to quickly roll the cabinets under a stretch of countertop and get them out of the way.  When it's time to use the bench, I just wheel them out again.

I have two cabinets, one slightly smaller than the other.  Here is a picture of the small cabinet, with a bunch of drawers.  The height is just right for me, so that adding on the top slabs makes a workbench that is 34" from the floor.


Here is how the retractable wheels work, courtesy of SketchUp.  Way easier to show you this than to flip over the real thing!


I made a few changes when I built the cabinets, but these pictures give you the general idea. Underneath each base cabinet is a recess that is about five inches deep.  Inside, there are two casters on each side, mounted to a pivoting board.  This "wheelie" board is attached to the bottom of the cabinet with a couple standard door hinges I had laying around, but any strong hinge will do.  The hinges are shown in red above, and the yellow circles are there to remind me that the casters need to be able to spin freely. Don't put them too close to the corners.

Here it is right-side up, it is easier to see how the levers work in this view I think.


The levers are mounted with a couple bolts through the front apron of the cabinet and into the "wheelie" boards.  When you want to lower the wheels, just step on the end of the lever and the wheels get forced down which also raises one side of the cabinet off the floor.  These have a surprisingly strong lever action, and are able to lift up very heavy loads - at least a couple hundred pounds.  I suppose it depends on how much force you can get into the lever by stepping on it, but I have been eating my Wheaties and am well over 200 lbs.

But what keeps the wheels down?  Aha!  Take a look at the next picture.


Scrounging my pile of spare parts, I put a couple of door latches into the bottom apron.  When you step on the levers, they move down and the latches pop out to hold them in place.  Now you can wheel the cabinet around and when you are done, just give the latches a kick with your toe to drop the cabinet back down onto the ground.  These latches are cheap, and you can also buy just the latch at the big box stores.

In the picture above, you can see a hint of the arc that is cut out of the apron around each bolt - above bolt #3.  The bolts for the levers just pass through the apron and into the "wheelie" board.  You may also notice that one of the levers is lower than the other.  There is some flex in the wheelie boards, so when I was ready to add the latches I just cranked down on the levers until there was a quarter inch of clearance all around, especially in the back of the cabinet.  I then marked a line and this is where the latches ended up. I also made the apron removable in case things sag over time and I need to make a new one.

I have mentioned before that my garage floor has more waves than the Atlantic ocean.  In order to prevent the cabinets from rocking when they are dropped, I made them with three feet.  You can see that in the SketchUp pictures above, or in this picture of the back corner.


Once the cabinets are dropped down in place, they are very stable.  Not necessarily level, but stable.  This was pretty important since I don't want the bench to rock back and forth.  These things aren't going anywhere, since they are both pretty heavy.  The larger cabinet is about 30 inches wide and has my 13 inch planer mounted on a flip top, so that cabinet has to be almost 200 pounds with all the plywood and the planer.  The drawer unit is lighter, but I would still estimate it at over 100 pounds.  Add in 90 pounds for the top slabs and I've got a 400 pound bench that wheels away easily.

Here are some things I learned when building the retractable wheels, in case anybody wants to try this.  The drawings show the "wheelie" boards as 3/4 plywood, but this has a lot of flex when the wheels are up.  I had to do some weird stuff to stiffen the boards like you might do along the front edge of a shelf.  I recommend gluing up a double-thick board that is 1 1/2" thick, but I would use plywood again with no problems.  In order to do this, you need a slightly deeper recess under the cabinet.  I was trying to save every last bit of vertical space, and it got a little tight for me.  It's based on the height of your casters - with a 1 1/2" thick wheelie board, your recess should be at least 2 1/2" deeper than the caster height.  Plan to get the wheelie board roughly level with the floor when the wheels are down, though a little tilt is fine.

Next time I'll talk about some workholding stuff.  With a few accessories, I don't even care that this bench has no vises.

What next?  I've got more to talk about with the bench, but do you have a question?  Put it in the comments!

Thursday, December 02, 2010

Workbench: About the Top

For the top of my new workbench, I needed a solution that would let me take the bench apart easily at the end of the day.  What I eventually ended up with are two 10" wide slabs of LVL.  They are 7 ft long and a little over 2 1/2" thick.  The seven foot length is about as long as the beams can be since I want to stand them up on end for storage and I have a low ceiling in the shop.

I had seen an article in Fine Woodworking magazine a couple years ago that showed a couple of beams being used on sawhorses for all the typical workbench tasks.  The ones in the article were torsion boxes made of melamine and homasote, and I was all set to make these until I got the "workbench bug" like so many other woodworkers out there.  After reading - obsessing really - about historical bench designs, I wanted to go in a more traditional direction and make a solid bench top with dog holes to enable the use of dogs and hold fasts.

Some bench designs such as Bob Lang's 21st Century bench have a large tool tray between two separate sections of their top.  From this, I realized I could just make two slabs and not have to muscle around one large top.  When the two slabs are butted up together, my bench top is 20" deep.  If needed I could also move the back slab toward the rear and get a deeper top by leaving a 4"-6" gap between the slabs.

The final piece dropped into place at Woodworking in America.  Megan Fitzpatrick was kind enough to take me backstage and show me her "Gluebo" bench on the last day of WIA.  According to the Internet, the LVL she used is lighter than other lumber I was considering, such as Southern Yellow Pine (SYP).  LVL comes in around 37 lbs/cubic foot, and SYP is 41 lbs/cubic foot.  On top of that, LVL makes a stiffer beam so you can get away with a thinner top.  Like Megan's LVL benchtop, my top is a little over 2 1/2" thick.  Each LVL beam weighs about 45 lbs compared to a 4" thick beam of SYP which would be about 80 lbs.

The LVL makes an attractive top, but there are a few things I noticed when working with it.  The front and rear edges of the bench were pretty ugly since the plies of the LVL were exposed.  I ended up putting a 3/8" thick strip of maple on the front and rear edges of both slabs.  This makes it look better, but it also protects the long edges of the LVL beams which have a bad tendency to split and break off at the edges.  You will want to chamfer the edges of the slabs if you don't wrap them as I did.  The LVL also had a few voids but some careful layout allowed me to flip most of these down onto the bottom of each slab.

To attach the beams to my base cabinets, I am simply relying on gravity and "bullets".  The bullets are made from 3/4" dowels with slightly rounded ends that help line each slab up with pre-drilled holes in the top of the base cabinets.


When it is time to go to work, I just wheel out the base cabinets (more on that next, I promise!) and tilt the front slab onto the cabinets.  I put the bullets into the bottom of the slab first because the hole in the cabinet top goes all the way through so setting the top down could just knock the bullet through the top of the cabinet.  It was a little fussy to get the holes lined up perfectly between the slab and the base, so you may notice an extra hole on the left that I plugged up after the fact.


After the first slab is in place, I just get the second one up there and drop it in place.  The bullets are a little tight at first but after you use them a few times the fibers compress and the slabs just drop right in place.


With both slabs in place, the bench is very solid.  The top doesn't shift around at all, and the two slabs butting up together seems to really lock them in place.  The bases are pretty heavy, especially the one with the planer inside.  Even during aggressive hand planing, this bench doesn't move or slide around.


The only negative I have noticed is that the slabs may not sit fully down onto the bases, because my floor is not level in the garage.  There are a couple spots on my concrete floor that are really wacky, so there can be a small gap between the slab and the base cabinets, shown in the next picture.


This would be a problem with any bench, requiring me to level the feet to prevent rocking.  To account for the warped floor, I specifically made the base cabinets so that they will not rock on unlevel floors - but more on that next time.  The good news is that even with a small gap under the top slabs, the bench is still extremely solid and stable, just not always level.  I planned to use a deck of cards to shim up the top under the raised end, but in practice this doesn't seem to be needed.

So that's how I came up with the top for the bench, and how it works.  Next time, due to popular demand I'll show the bases and how the retractable wheels work.  Stay tuned!

I'm curious to know if anyone else has tried using LVL or another "wood product" for their bench top.  Come on Dyami, tell us about that Timberstrand!