Showing posts with label SketchUp. Show all posts

Tuesday, May 31, 2011

May Activities

A lot has happened in the last month, though you wouldn't know it from my lack of posts.  This post will be a bit of a brain dump, just to get the blogging area of my head aired out a bit.

For much of the past month, I was working on preparations for the newest Guild Build over at The Wood Whisperer Guild.  It's a Greene & Greene inspired Adirondack chair, and Marc and I held a lot of design sessions to get the plans finished.  With these Guild Builds, I started simply helping out with the SketchUp work but it has evolved over time to really be a collaborative design effort between the two of us.  I will finally be building one of these projects, and brought home a few cypress boards the other day to begin construction.  This one will be fun, so stay tuned.

Greene & Greene inspired Adirondack Chair

I also started work on a walnut desk for my wife.  It will be a modular design, and the top is already completed.  I bought a metric butt load of walnut recently and this is the first of many walnut projects to come.

Walnut Desk - Top is completed
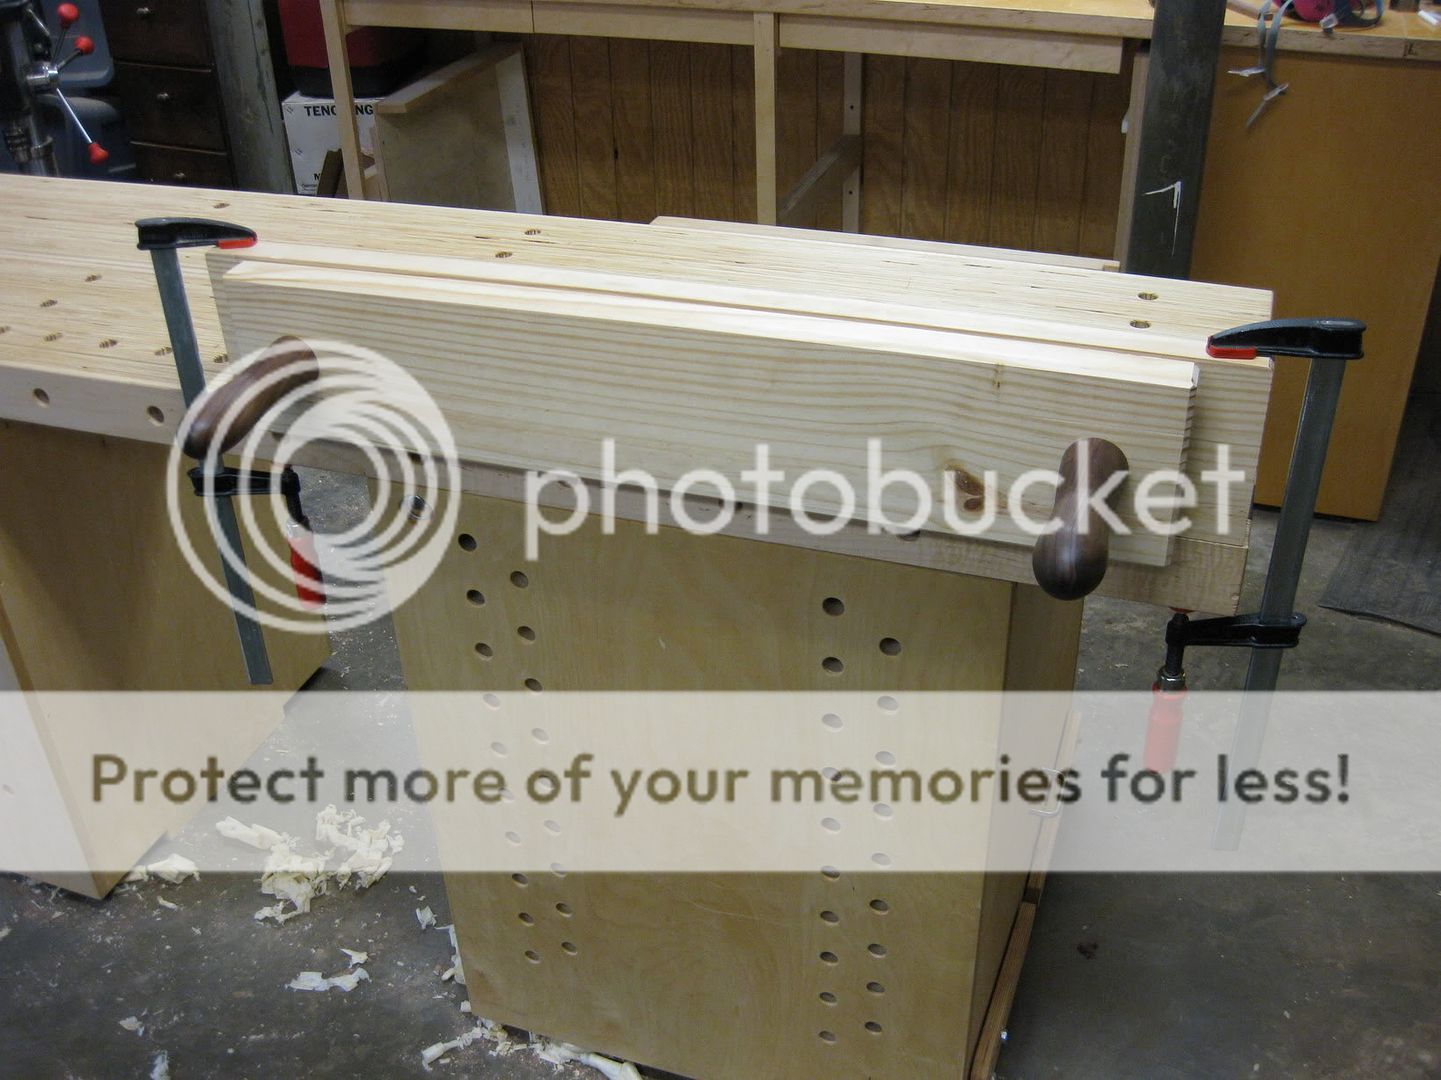
There have also been some upgrades to the shop, as always.  After using my "Swiss cheese" workbench for a few months, I have decided to enhance my work-holding by building a Moxon-Schwarz saw vise.  The design was featured in Popular Woodworking Magazine last year, but I made a few modifications.  The biggest change I made was to use metal screws instead of shop-made wooden threaded screws.  I found a great cheap source for some 1" diameter, 4 threads-per-inch metal screws and matching hex nuts.  You'll probably be seeing more about this later, but here is a quick teaser shot.

Moxon-Schwarz Saw Vise
Metal Vise Screws?  Crazy!
Summer is fully here in Georgia, and it is getting hot.  In the coming months I'll be working on the Adirondack and the Walnut Desk, with a couple detours into other fun little projects. 

Thanks for checking in!  As always, questions and comments are very welcome.

Tuesday, February 01, 2011

Sales Counter Project

January was a busy month for me, so unfortunately I couldn't blog as much as I would like.  I have been working out in the shop though, and I am happy to share some pictures of the project that's been keeping me busy.

Our friend has a clothing boutique in the Atlanta area, and she is opening another location soon.  This friend is like my wife's crack dealer for dresses and accessories, and she always provides a personalized "Boutique Experience" when I need birthday or anniversary gift ideas.  When she asked me to build the sales counter for the new store, I happily agreed.

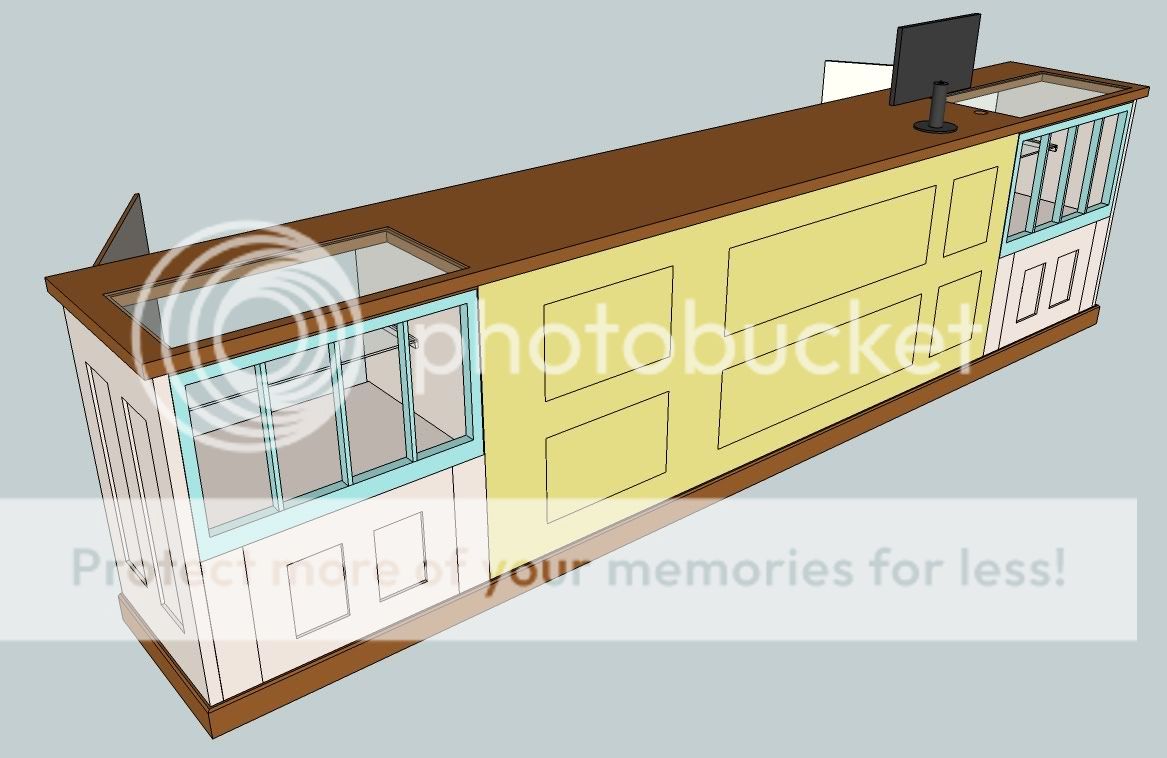
The design process was an easy collaboration, and of course I went to SketchUp for the final model.  Here's a shot of the whole project.


The style of the piece emphasizes reclaimed materials.  Two old window sashes became doors to the jewelry cabinets at each end, and a few salvaged doors cover the front and sides of the piece.  We raided a salvage yard together and found some lovely decrepit doors and windows for the project.  To stabilize all the old flaky paint, I sprayed the windows and the yellow door with shellac, using a simple household spray bottle.  This did a good job of getting in all the nooks and crannies and under the old paint, and the old stuff is much more firmly attached now.


I spent some time rebuilding the windows so that they will be sturdy enough for cabinet doors.  I took out all the old glass and what little putty remained.  I put in new glass with bedding caulk and some shop made 1/4" square stops.  For good measure I also pegged each corner of the window frame with two 1/4" dowels to combat sagging since the windows are about 32 inches wide.

The piece is coming together nicely, though it is a bit of a challenge in my small shop.  The counter is almost 14 feet long, and my shop is just 16x19.  Thankfully I came up with a modular design that can be assembled later.  The two end cabinets are standard plywood cases with end panels made from door slabs.  There will be an 8 foot middle section between the end cabinets, and this is just a stack of plywood dividers and shelves that get assembled later.  What makes this possible is that the middle section is just a few stretchers, shown in the picture below.


The countertop is really the biggest space challenge, since it will be a single piece almost 14 feet long.  I took the easy way out and went to Ikea for a couple 8 foot long sections of countertop, and I will join these together to make a single top slab for the sales counter.  I'm not really sure how I will do this yet, but I am thinking a ten inch long half-lap will be likely.


I am enjoying the unique aspects of this project such as incorporating old reclaimed materials into a design. Making it look old and crusty while still being functional and crisply assembled is an interesting contrast. Delivery and installation will be in the next couple weeks, and I'll try to get some pictures of the final piece. In the meantime, back to work for me!

Tuesday, January 04, 2011

SketchUp Tip: Field of View

I like SketchUp.  A lot.  Like really, a lot.  I use it to model most things I build, and many other things around the house.  Frankly, my wife is a little sick of all the models I think. 

Her:  "Honey, take out the garbage please?" 
Me:  "Wait, I need a 3D model for that!"

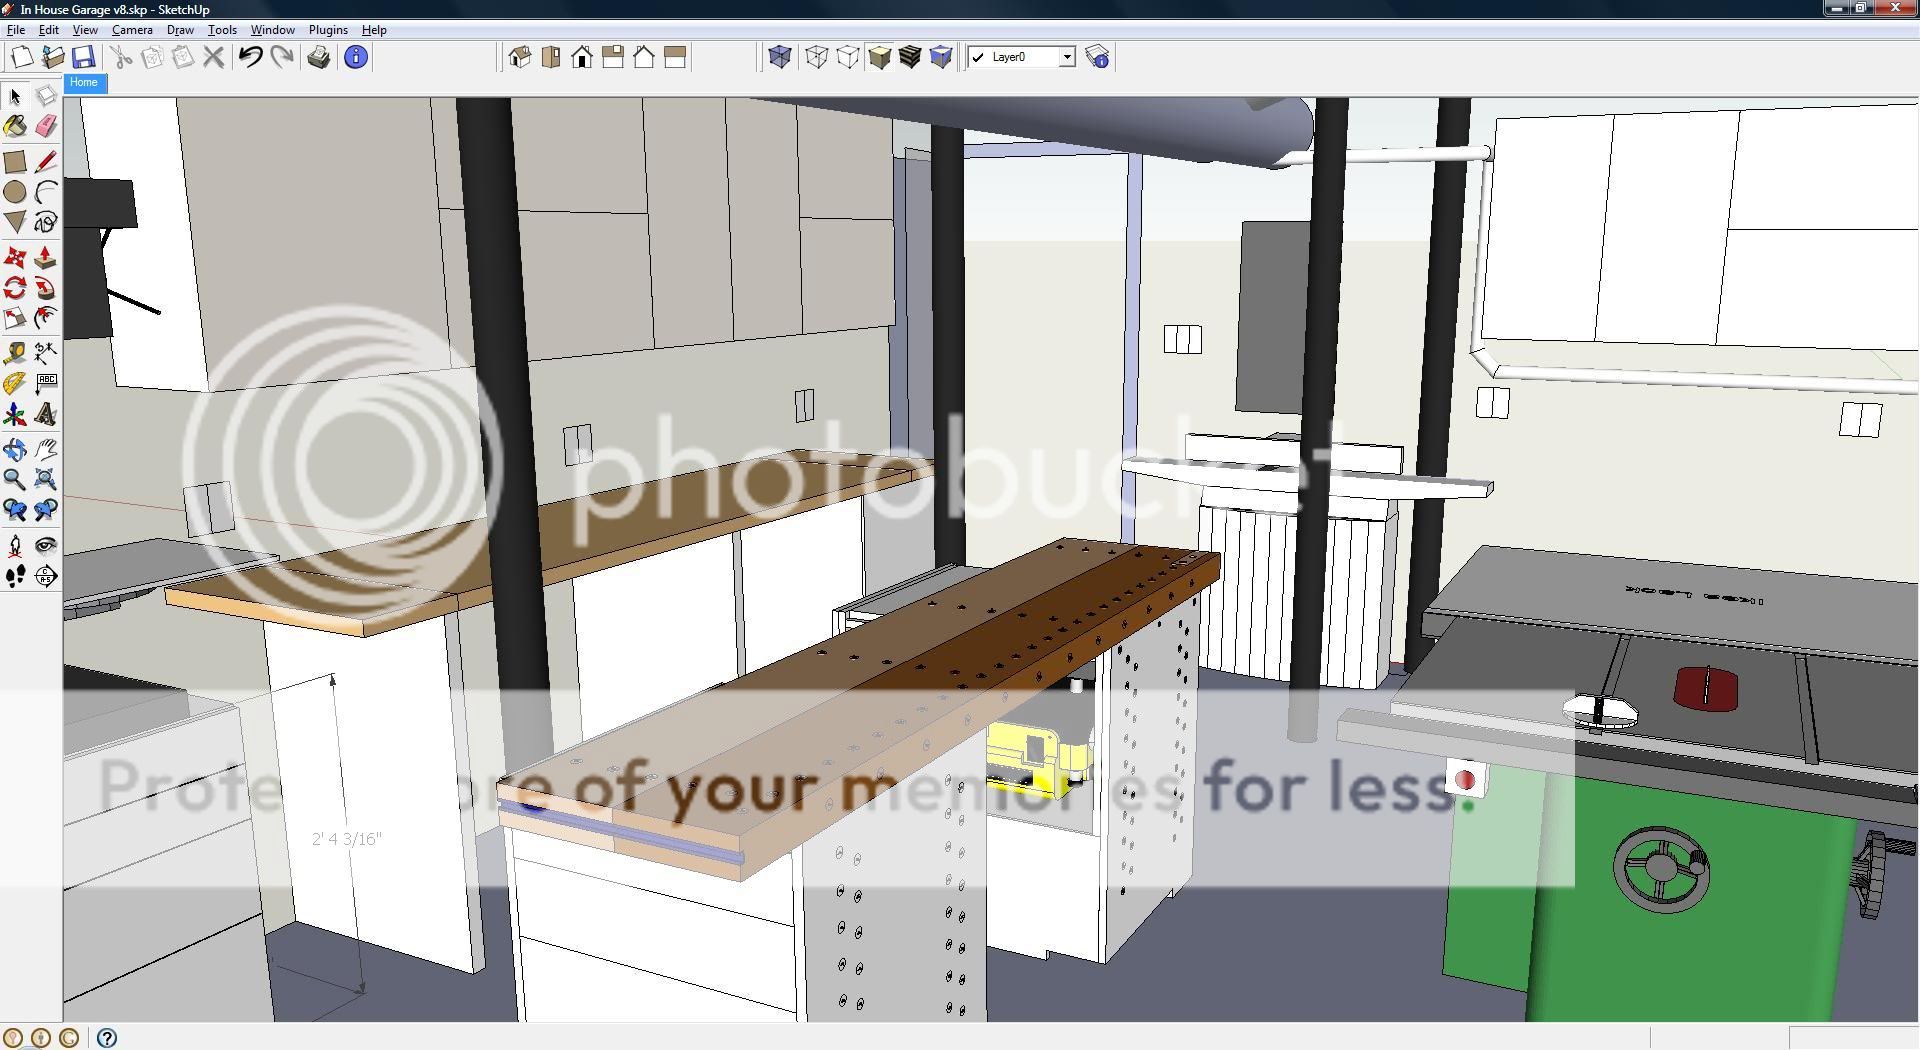
But there are times when a 3D model is very helpful.  For instance, I used it to lay out my shop to make the most of my limited space.

Click for extreme close-up
Which brings me to today's SketchUp tip.  Woodworkers tend to focus on models of a single piece of furniture, but SketchUp is also used by a bunch of architects to create entire buildings.  When you are viewing a building from the inside out, you generally want to show the viewer what they would realistically see if they were standing in the space.  This is where field of view becomes important.

The human eye has about a 120 degree field of view from side to side, or about 60 degrees per side.  It may be easier to think of this as a cone expanding outward from your eye.  The default setting in SketchUp is just 35 degrees, which is a much narrower field of view.  As a result the standard view in SketchUp can feel like you have blinders on.

For example, here is the default 35 degree view if you are standing at the garage door of my virtual shop.


SketchUp lets you easily adjust the field of view.  Here's how you do it. Click on the Zoom tool or just hit "Z" on the keyboard.  The zoom tool looks like a little magnifying glass.


After you select the zoom tool, the box in the bottom right of your SketchUp window should say "Field of View" and "35 deg".  At this point you can type in another setting and hit enter.  For example, try "60" and "Enter".  Here is the same view of my virtual shop with the 60 degree setting.


You may want to play around with different settings for different effects.  Rather than typing in each new setting, you can hold down the Shift key and the Left mouse button, and then drag the mouse around to widen or narrow the point of view.  This seems a bit awkward and unless you are comfortable with camera navigation in SketchUp I recommend just typing in your number.

One last note is that SketchUp can accept field of view settings in degrees or millimeters.  The "mm" settings are handy if you are a photographer and want to get the effect of a specific lens, such as "50 mm".  When you are typing in your new setting SketchUp stays in the current "deg" or "mm" scale unless you specifically switch to the other scale.  Note that for the human eye, 60 degrees is about the same as a 35mm lens.

That's all it takes to get a new field of view in SketchUp, and it can really help to make models look more natural for the viewer.

Got a question about SketchUp?  I'd love to hear from you in the comments.

Tuesday, December 07, 2010

Workbench: Floating Bases

One of the key features of my workbench is the ability to take it apart and store it away quickly.  Like every guy with a small shop, I am trying to put all my stuff on wheels.  I came up with the idea of using base cabinets under my workbench instead of the more typical sawhorses.  The bases are an important part of this design, both for workholding and for stability.  They needed to be mobile but still sturdy enough to support the benchtop with all the forces from planing and pounding.

The retractable wheels on the bases allow me to quickly roll the cabinets under a stretch of countertop and get them out of the way.  When it's time to use the bench, I just wheel them out again.

I have two cabinets, one slightly smaller than the other.  Here is a picture of the small cabinet, with a bunch of drawers.  The height is just right for me, so that adding on the top slabs makes a workbench that is 34" from the floor.


Here is how the retractable wheels work, courtesy of SketchUp.  Way easier to show you this than to flip over the real thing!


I made a few changes when I built the cabinets, but these pictures give you the general idea. Underneath each base cabinet is a recess that is about five inches deep.  Inside, there are two casters on each side, mounted to a pivoting board.  This "wheelie" board is attached to the bottom of the cabinet with a couple standard door hinges I had laying around, but any strong hinge will do.  The hinges are shown in red above, and the yellow circles are there to remind me that the casters need to be able to spin freely. Don't put them too close to the corners.

Here it is right-side up, it is easier to see how the levers work in this view I think.


The levers are mounted with a couple bolts through the front apron of the cabinet and into the "wheelie" boards.  When you want to lower the wheels, just step on the end of the lever and the wheels get forced down which also raises one side of the cabinet off the floor.  These have a surprisingly strong lever action, and are able to lift up very heavy loads - at least a couple hundred pounds.  I suppose it depends on how much force you can get into the lever by stepping on it, but I have been eating my Wheaties and am well over 200 lbs.

But what keeps the wheels down?  Aha!  Take a look at the next picture.


Scrounging my pile of spare parts, I put a couple of door latches into the bottom apron.  When you step on the levers, they move down and the latches pop out to hold them in place.  Now you can wheel the cabinet around and when you are done, just give the latches a kick with your toe to drop the cabinet back down onto the ground.  These latches are cheap, and you can also buy just the latch at the big box stores.

In the picture above, you can see a hint of the arc that is cut out of the apron around each bolt - above bolt #3.  The bolts for the levers just pass through the apron and into the "wheelie" board.  You may also notice that one of the levers is lower than the other.  There is some flex in the wheelie boards, so when I was ready to add the latches I just cranked down on the levers until there was a quarter inch of clearance all around, especially in the back of the cabinet.  I then marked a line and this is where the latches ended up. I also made the apron removable in case things sag over time and I need to make a new one.

I have mentioned before that my garage floor has more waves than the Atlantic ocean.  In order to prevent the cabinets from rocking when they are dropped, I made them with three feet.  You can see that in the SketchUp pictures above, or in this picture of the back corner.


Once the cabinets are dropped down in place, they are very stable.  Not necessarily level, but stable.  This was pretty important since I don't want the bench to rock back and forth.  These things aren't going anywhere, since they are both pretty heavy.  The larger cabinet is about 30 inches wide and has my 13 inch planer mounted on a flip top, so that cabinet has to be almost 200 pounds with all the plywood and the planer.  The drawer unit is lighter, but I would still estimate it at over 100 pounds.  Add in 90 pounds for the top slabs and I've got a 400 pound bench that wheels away easily.

Here are some things I learned when building the retractable wheels, in case anybody wants to try this.  The drawings show the "wheelie" boards as 3/4 plywood, but this has a lot of flex when the wheels are up.  I had to do some weird stuff to stiffen the boards like you might do along the front edge of a shelf.  I recommend gluing up a double-thick board that is 1 1/2" thick, but I would use plywood again with no problems.  In order to do this, you need a slightly deeper recess under the cabinet.  I was trying to save every last bit of vertical space, and it got a little tight for me.  It's based on the height of your casters - with a 1 1/2" thick wheelie board, your recess should be at least 2 1/2" deeper than the caster height.  Plan to get the wheelie board roughly level with the floor when the wheels are down, though a little tilt is fine.

Next time I'll talk about some workholding stuff.  With a few accessories, I don't even care that this bench has no vises.

What next?  I've got more to talk about with the bench, but do you have a question?  Put it in the comments!

Monday, September 06, 2010

How accurate should a SketchUp model be?

In the October 2010 issue of Popular Woodworking Magazine there is a letter about modeling drawers in SketchUp.  The reader asks how to model the small clearances required to make sure the drawers ride smoothly in their openings.  In "meatspace" this typically means the drawers are 1/32 or 1/16 undersized to the openings.  Bob Lang answered this question well, but in my opinion missed the most obvious response:  Why the heck would you need to model to this level of detail?

Look, I know more than most how tempting it can be to get every little detail correct in a SketchUp model.  I've spent time tweaking little bits and pieces to make sure they were just right, believe me.  While designing projects I can have multiple generations of a design, exploring new options and branching out into infinite possibilities.  So take it from somebody who has fallen down that rabbit hole - you have to know when to stop modeling and start building.

These days I am trying to remind myself that the goal is to make projects, not models.  My ability to create precision in SketchUp are far beyond my abilities for precision in the shop.  Wood moves with the seasons, small variations in tool setups introduce randomness during a build, and sometimes designs get changed on the fly. 

Here are a few questions I try to ask myself as I am making a model to ensure I am not sinking deeper into OCD territory.
  1. Will the extra level of detail make it easier to build the real piece?  By all means, if it makes things easier in the shop then add it to the model.  I am a strong believer in modeling details on joinery, curves, edge profiles, etc. as long as they make the time in the shop easier.  An exploded view of the project with a few key dimensions is invaluable to me as I build.  But leave out things that make no difference in the shop.
  2. Will the final dimension of the wood match the SketchUp model?  SketchUp is great at providing dimensions for raw stock.  Suppose you have a door rail that will be mortise & tenoned into the stile.  By all means, add the two tenons to the ends of the rail and use SketchUp to measure the total length of the rail.  But by the time you need to know the dimensions of the door panel, measuring the actual meatspace door is the best way to go.  A little variability could have crept in and suddenly the dimension of the panel in SketchUp doesn't match the door you built.  Until you have a CNC machine just spitting out all you project parts, you have to know when to abandon the perfection of the SketchUp planned dimensions.
  3. Does the design of the piece require a more detailed model?  If I am trying a new type of joint or I want to see how a curve would look, I add more detail until my question is answered.  Otherwise, keep it simple.  For example, when designing a piece with drawers I will often create a simple rectangle to fill the drawer opening instead of modeling a full dovetailed drawer.  Even a drawer-sized box is easy to make and fill the hole.  Until I need details about the drawer there is no need to model it beyond that point.  It's a heck of a lot easier to explore the overall size and shape of the piece this way.
Adding details to a model can be addictive, and frankly a great way to learn how to use SketchUp as a power user.  But take my advice, you have to know when to put the mouse down and back away slowly!

Wednesday, August 25, 2010

Handrail Part 1 - Design and Template

A recent basement renovation has left us without a handrail on the basement stairs. It's amazing how one new space can make others look more dingy and dated. Anyway, the old railing was nothing special, just a 1 1/2" round grab bar. We could probably get along without it indefinitely, but my mother in law checks every time she comes over to see if there's a new railing. I would like to stop hearing that little dissapointed "Oh." from her every visit.

Anyway, we are trying to push our house toward a Craftsman Bunglow style with every project and for the basement project I relied heavily on a great book by Bob Lang. It's called Shop Drawings for Craftsman Interiors and it has great details on Stickley designs for door & window casing, base moldings, and all sorts of built-ins. I looked through it the other day to see how stair handrail was treated, and played with some options in SketchUp.


Of these, I like the one on the far right the best.


Making this in the shop will be a bit of a challenge.  The total length will be about 15 ft, so it's not practical to send the rail through a machine.  I'm looking at handheld router work mostly.  That top curve will be a challenge also because of the large diameter of the curve.  Regular roundover bits are too small and so I'm likely going to have to come up with a jig of some sort.

In the meantime, I printed a template from SketchUp in actual size.  Next step is to take this into the shop and work up a jig.