
Like many others out there in the woodworking community I have devoured all the recent books about workbenches, particularly those by Chris Schwarz and the extended Pop Woodworking Staff. It's hard to have a discussion about benches without relying heavily on their material. I scoured the internet for plans, comparing Roubo with Nicholson, Moxon with Holtzappfel, $175 benches with 21st Century benches, and all the rest. I wanted to take all the good features from all of those and blend them together into the bench of my dreams.
Then I did a little reality check, which I will share with you now. There isn't space in my shop for a bench unless I get rid of some large tools. I'll never be a hand tool only woodworker and after all these years of looking strategically mopey before birthdays and anniversaries I sure can't tell my wife I'm getting rid of anything.
But don't take my word for it - take a look at this panoramic picture of my shop.

Many eagle-eyed viewers will sees something that could be removed to get a ton (or three) more space in the shop. I'll wait while you try to find it. Hint: It has the highest horsepower rating in the shop.
Alright, I should park the Buick elsewhere but life is a compromise. We live in an old house downtown, and the only garage is under the house. The car has to get parked inside, so the first rule of my shop is "everything on wheels". The garage is 19' deep and about 16' wide so at least there is enough space to wheel everything out of the way when the car has to come back in. I've been working on getting everything mobile and I'm about halfway done. I still have plans for a miter saw cart and drill press cart on my to-do list.
As you can see, I also have several steel columns holding up the place. They are perfectly positioned for maximum inconvenience, blocking the long wall where I have a countertop set up. Back to the workbench design, all this is just meant to show that space is an issue for me. I want a full-featured bench but have nowhere to keep it.
I started reading about knockdown workbenches, but this doesn't mean the same to me as it does to most authors. Most knockdown designs are meant to solve the "I might move someday and need to take my bench apart" problem. I literally want to take my bench apart every night.
The last paragraph of Schwarz's newest workbench book inspired me to find a solution, and I hope he won't mind if I quote it here. "What can I remove and still have all the functionality I need? When I cannot remove anything else, it's time to start cutting wood." Vises? Don't need them - they are too heavy to hoist around anyway. Legs? Stretchers? Shelves? Bah, who needs them. After all, a bench is just a 3D clamping surface, right? My design eventually devolved into nothing more than a top sitting on...something. I think it works for me, but maybe others will like the concept too.
Let's see. Here's a shot of the long wall of the shop, once the car is out and the table saw is rolled away.
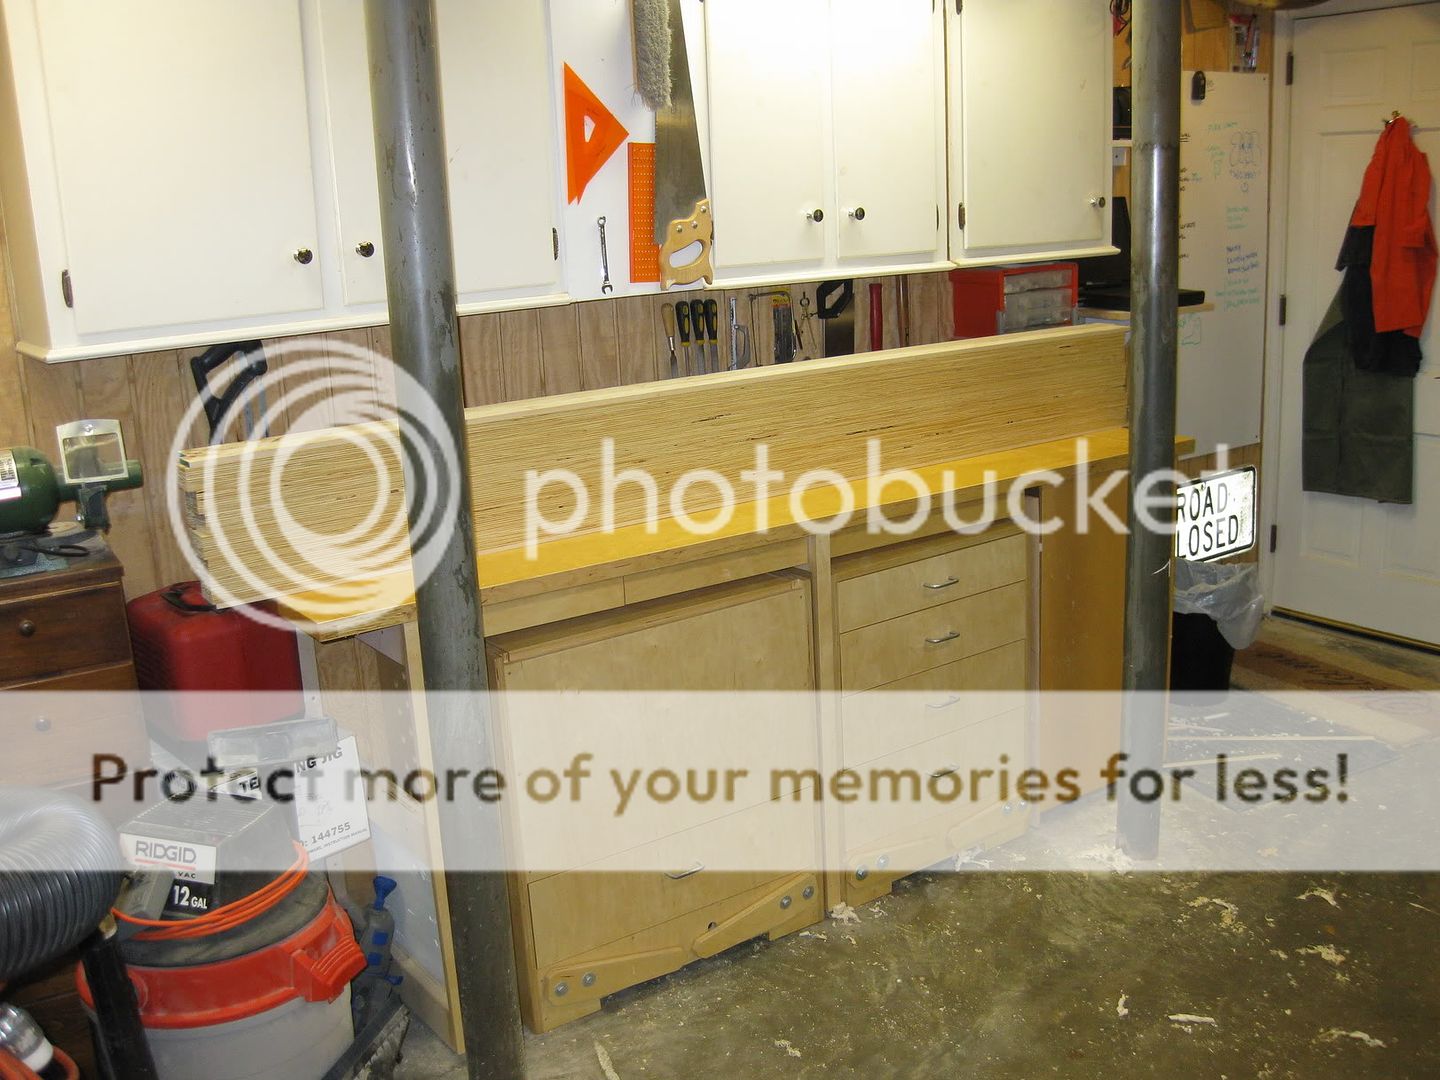
In the picture above, there are two mobile carts under that countertop. They both have retractable wheels and can roll out into the shop. The one on the left is a flip-top stand that holds my planer and the other is simply a stack of drawers.
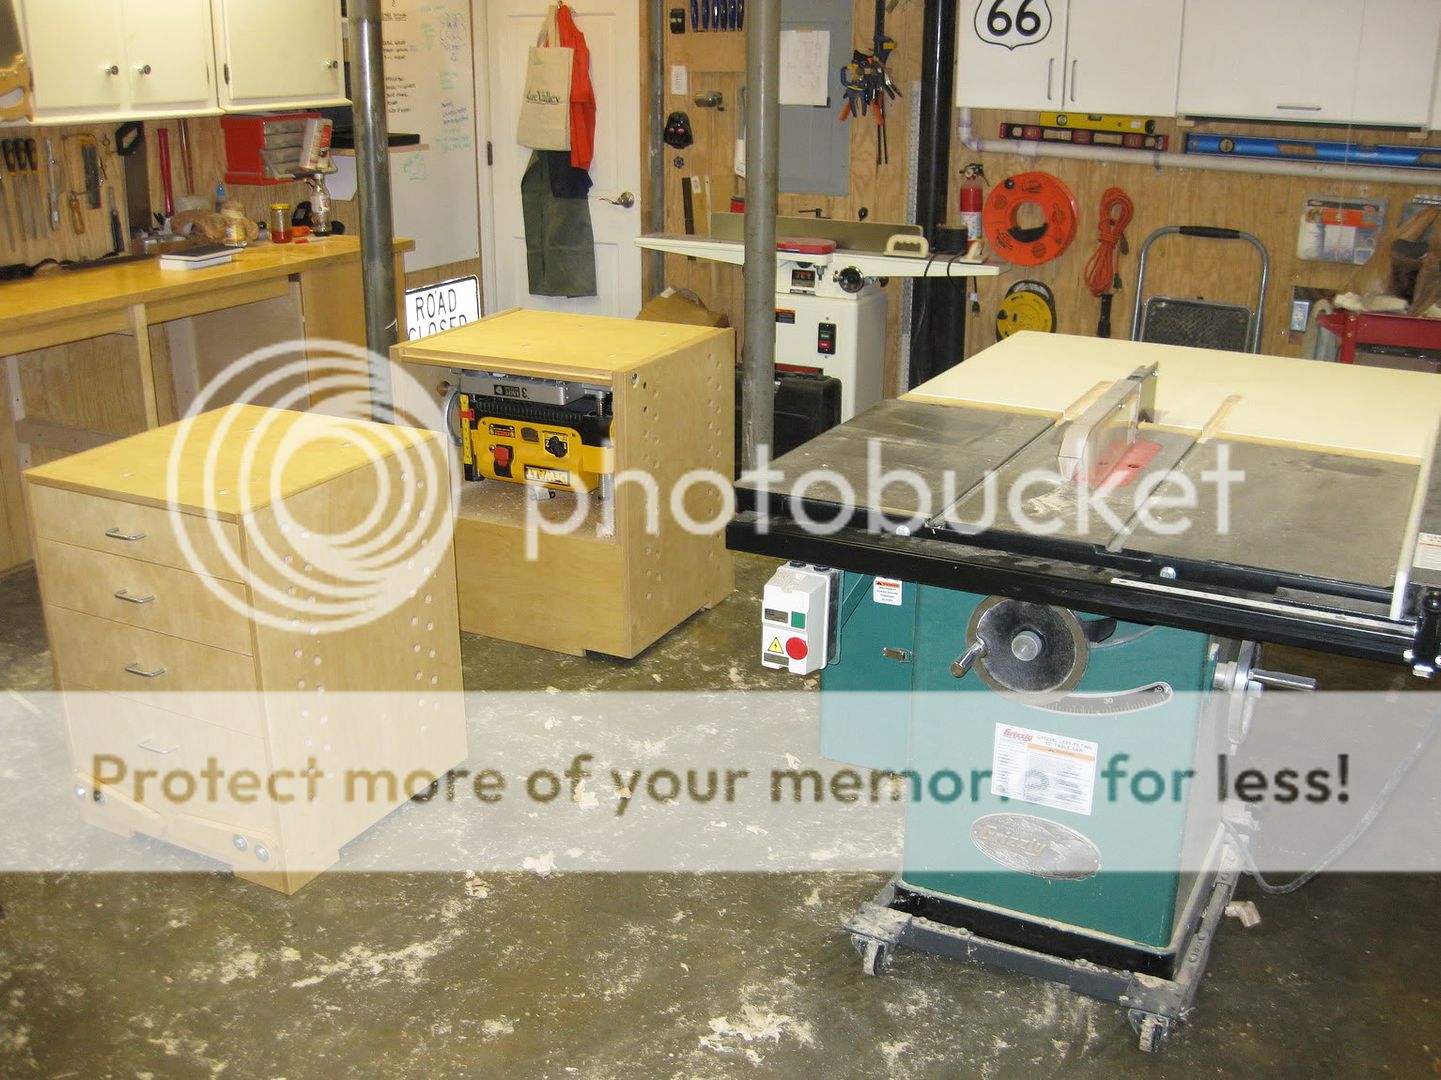
Roll them out, lift the wheels and the two carts make a good base to support the workbench top. The top is made of two separate beams that are 7 feet long and about 10 inches wide. I used LVL for the slabs after seeing the "Gluebo" at Woodworking in America. The extra rigidity of the LVL allowed me to get the top down to about 2 1/2" thick.

When it's time to stop for the evening, I am able to take the two top slabs and stand them in the corner. Then I just roll the cabinets back under the counter and the bench is tucked away for the night. The whole thing takes less than 5 minutes, including moving the table saw back over and driving in the car.
There's a lot more to share about this bench but this post is getting long and I suspect you may be shaking your head. Coming soon, I will go into details about securing the top to the base cabinets, work holding accessories, and vise replacements. Stay tuned for more!
Think I'm a visionary, or just plain nuts? Either way, I'd love hearing what you think about the bench design. See any work holding tasks that may be a problem for me? Shout it out.
8 comments:
Aaron, I love this! I get emails constantly about, not being able to get into hand tool woodworking because I don't have a bench or the space for one. I'm going to be referencing this post for a long time to come to those people. Can't wait to see more about your "knock down" version
Yay, somebody likes it! That makes me all warm inside, Shannon.
Seriously though, I really think this is a very capable bench. The more I have tested it, the more convinced I am. A few common accessories are all I needed to have this bench pass the "kitchen test". At least until I get a bigger shop, this will work just fine for me.
Aaron,
You've shown that necessity is truly the mother of invention!
That set up looks like it will work just fine.
Bravo my friend.
Eric
Aaron,
The bench looks great. I too am excited to learn how you attach the top. Though I'm working in a slightly smaller space (9'11" x 21') I'm taking an opposing tact with my forthcoming bench design. It's the lack of car that is allowing me to do so, but my bench will likely be the most permanent fixture in my shop. As for the LVLs . . . Nice. I'm liking man made materials too.
I like it! The mobile bases are awesome. How about a post explaining those. I see bolted angled bracket widgets on the front, is that how you retract the wheels?
I second what Matt said.
I have been thinking about your mobile bases all day. Trying to figure out how you have them rigged.
I assume that the almost tear dropped pieces on the side are part of the mechanism.
Please post an article on that!!
Wow guys, thanks for all the comments! I am happy to share the design with you all, and I'll have a post on the bases coming up this week.
"I also have several steel columns holding up the place. They are perfectly positioned for maximum inconvenience..."
I think the same guy designed my house too. I have a row of steel columns down the center of the house that are often in the way!
Looks like you came up with a very good solution to adding another work surface to your shop.
My new bench is really an assembly table. I think you will like the flexibility of having two beams. I like the clamping flexibility mine provide.
Thanks for visiting my blog.
Post a Comment