
In a previous post, I said the next step on my handrail project was to make a jig but I'm a big fat liar. Instead I went shopping for lumber and returned to the shop with a couple 16 foot 5/4x4's. I glued these together and used screws in what I thought was a safe spot on the back of the rail where the finger groove would be. Turned out I made a change later and had to fill the holes, but oh well.

Next step was to make the router jig. I will warn you in advance that I must have gone through 5 different versions of the jig, each time trying to battle an unexpected difficulty. In the end I was able to make it work but I now wonder if free-handing it may not have been a possible option. I probably couldn't get it as consistent as the router method though.
First step was to glue the scale pattern I printed to some hardboard and carefully cut out the profile using a jigsaw, file, and sanding blocks.

Next I used the template with a flush trim bit to make a couple sides from 1/2 Baltic birch plywood.

I assembled these with some straight sides into a box with a curved top, being careful to align the two curved parts.
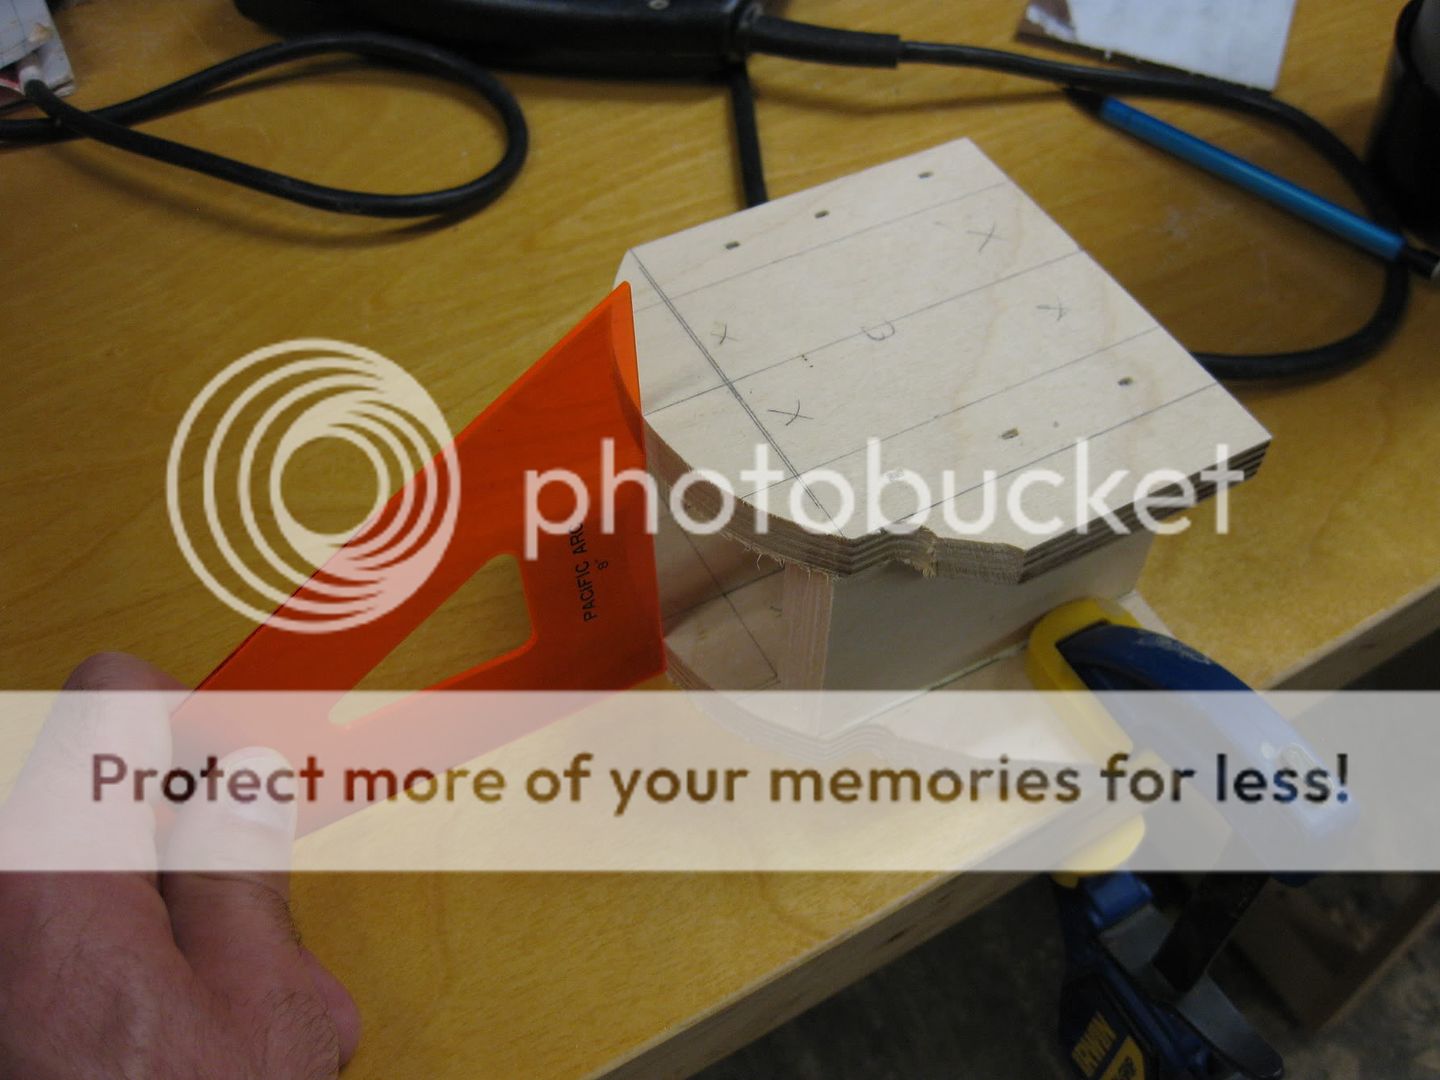
Then using a straight bit with a bottom bearing, I removed material from the curved sides so that the jig could slide up and down the glued up railing blank. I used a chisel to square up the corners. Sharp eyed readers will notice a problem already, but not me!

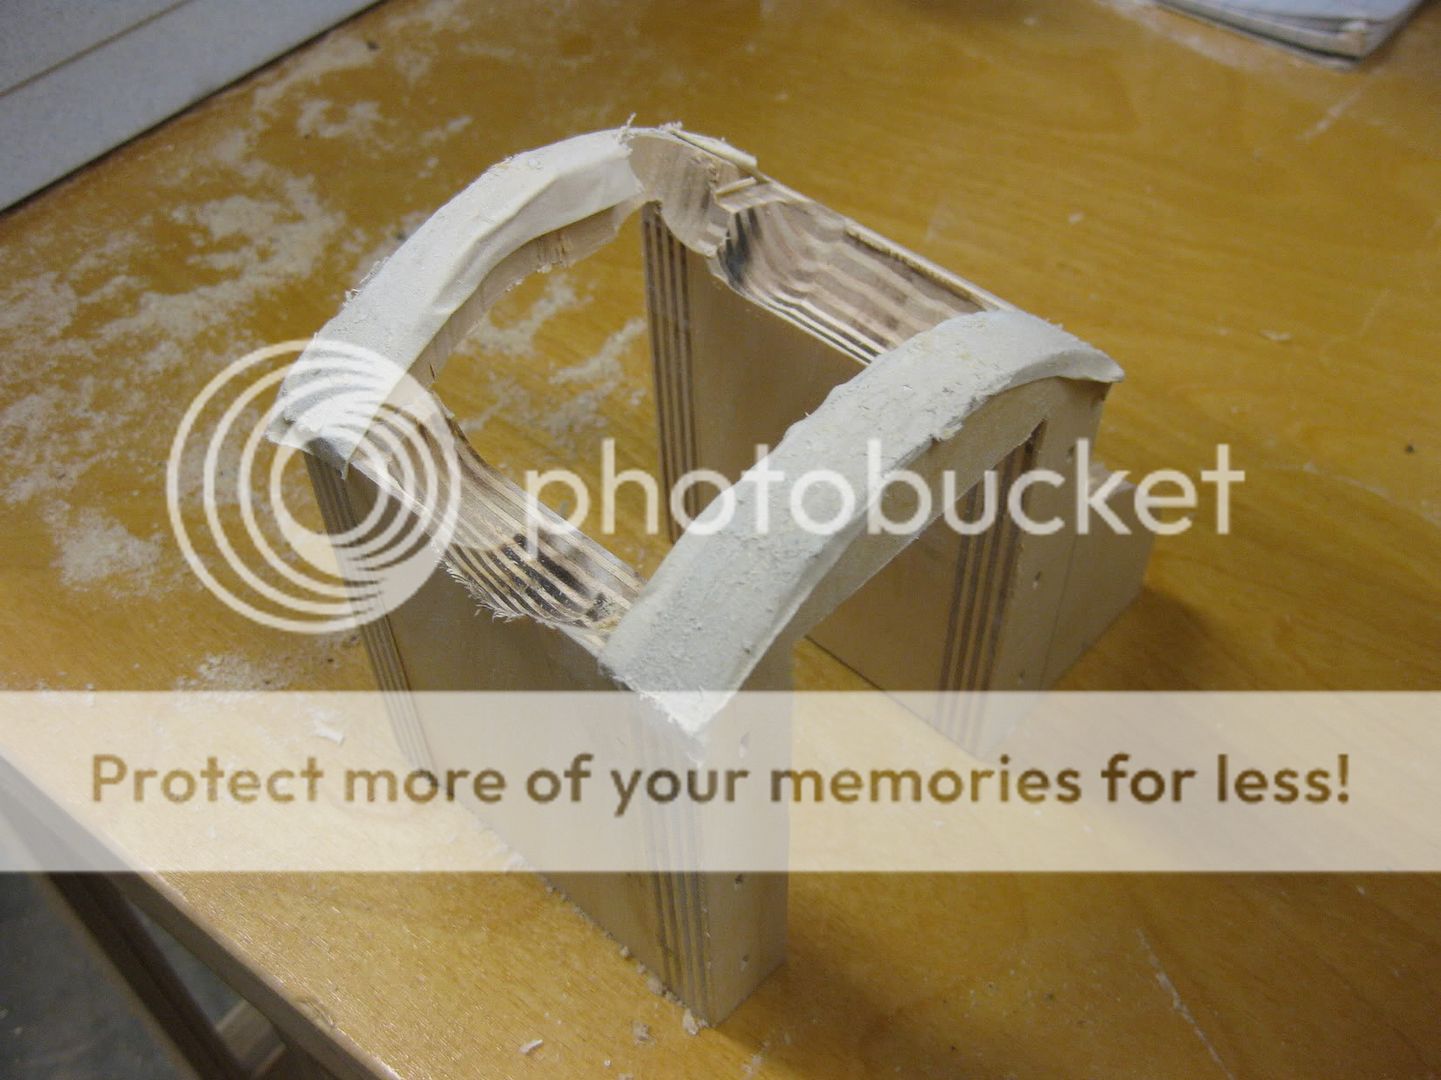
My thinking was to put a fat 3/4" straight bit into the router, and then just follow the curves on the jig with the router freehand. I would go side to side for a few inches, then slide on down and repeat. Yeah, right. The picture below shows my first attempt. There are a few concerns. First of all, the angle of the router really mattered with the straight bit. rock a little too much and the bit really dug deep into the rail, leaving a round gouge. Second, take a look at the router in the picture above. See those holes that I ignored? They make it impossible to follow the 1/2 thick template - the holes kept bottoming out on the jig. Third, I had no way of seeing when to stop so I've already cut into the jig. Some of this is necessary to get the edge or the rail, but I had a lot more to go and wanted to make sure the jig made it.

Back to the drawing board! First I put a piece of polycarbonate on the base with some double stick tape to counteract the holes. Second, I switched to a "bowl and tray" router bit so the edges were curved and hopefully rocking the router slightly wouldn't dig into the rail. I actually tried again with just that setup, and it was still really hard to rotate the router exactly perpendicular to the curve. So I added the little concave curved ramps that had the opposite curve as the jig. Don't even ask how long it took me to make those. Finally, the two strips on the very sides of the poly base are there to stop me from going too far side to side and eating into the curved sides of the jig.

That worked pretty well, but I was still getting pretty lousy results going back and forth across the rail. I had visions of a perfectly curved surface, but each pass just wasn't precise enough to leave a smooth surface. It looked like I was making corn on the cob.
Finally I realized that I should be sliding the router along the rail, not across it. It takes me a while, but I get there! I put some double sided tape on the jig - which had seen better days by this time.
Then I just stuck the router on the jig, made a long pass on the rail, rotated a bit and repeated until I had hogged away most of the waste.

I was left with a rail with small ridges along the length, but these cleaned up pretty well with a palm sander.

After that, I made a pass along the bottom with a beading bit, and along the back with the bowl & tray bit again to carve out a recess for fingers to grip the handrail. Here is a shot of the railing on the stairs. It's just primed at this point, since I am out of trim paint.

Maybe now my mother in law will give me a break next time she comes over! She's been waiting for this for months!
2 comments:
I love this handrail. I've been looking online for something similar and cannot find it anywhere. My husband and I recently bought a home and the last thing on his mind is a handrail. Is there any information you can give me on how to purchase exactly what you made. I love that there aren't brackets and I want a white one as well. Any help would be greatly appreciated!
Sorry, but I'm not aware of anywhere you can buy this online. Maybe you could find a custom woodworker in your area and hire them to make one.
Post a Comment